Creating a Snow Effect and a Pop Out Effect
Step 1
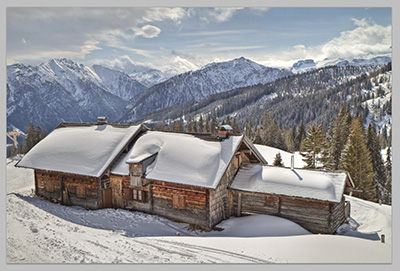
We'll start off by searching for any image of a snow scenery. Then, open it in Photoshop.
Step 2
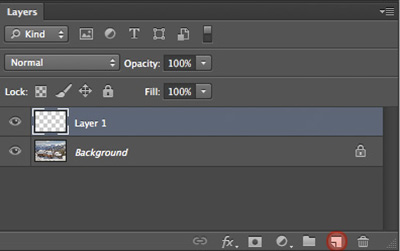
Create a new layer in the Layers window by clicking on the icon, as shown.
Step 3
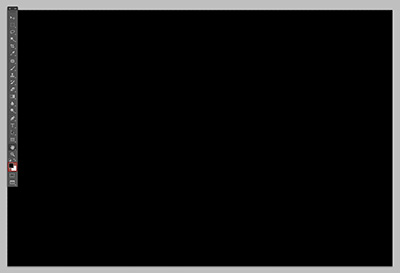
Press D to set the foreground and background color to a default setting. Then, press and hold Alt/Option + Delete to fill it with black.
Step 4
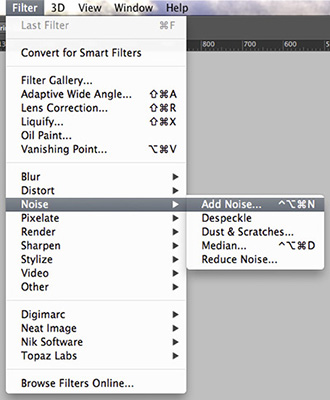
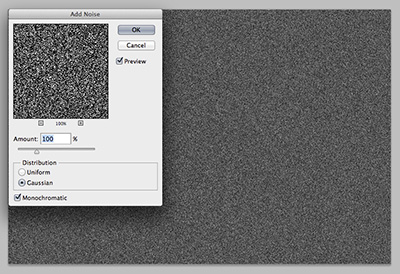
Apply the Noise effect by going to Filter > Noise > Add Noise.
Step 5
Set the Noise amount to 100% and select the Gaussian option under Distribution. Once you're done, check the Monochromatic box below.
Step 6
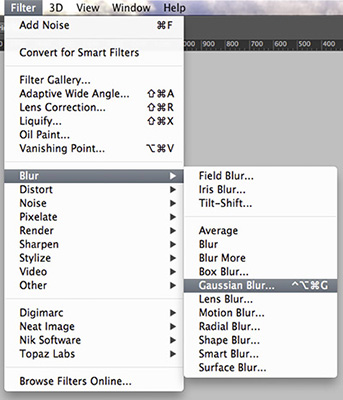
After that, go to Filter > Blur > Gaussian Blur.
Step 7
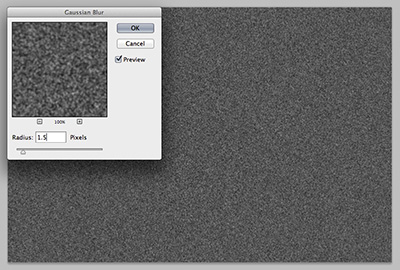
Set the Gaussian Blur radius to 1.5 pixels.
Step 8
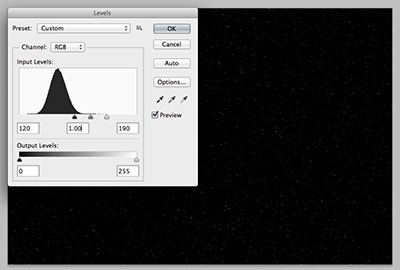
Press and hold Ctrl/Command + L to adjust the Luminance level as this will decrease the amount of Noise. You can also apply this setting according to your personal preference so that the end result will turn out the way you want it to.
Step 9
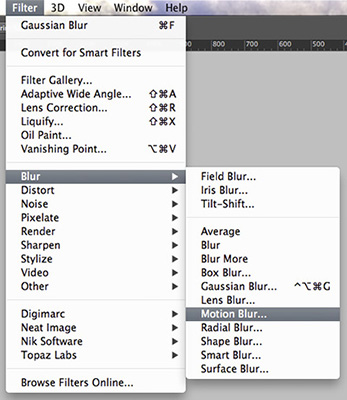
Go to Filter > Blur > Motion Blur to create a certain movement for the snow.
Step 10
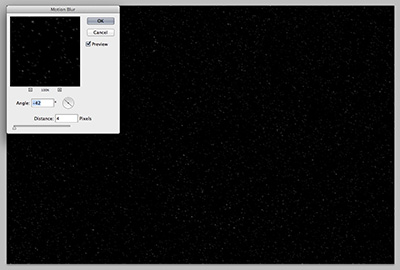
We will then apply the following settings - Angle: - 42%, Distance: 4 pixels.
Step 11
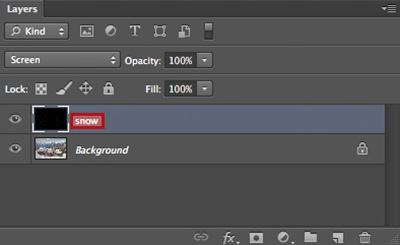
Change the layer name to "snow" for an easier arrangement in the steps to come.
Step 12
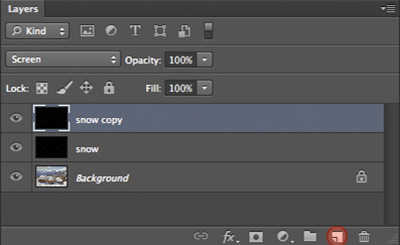
Press and hold Ctrl/Command + J or hold and drag the "snow" layer to the icon at the bottom, as shown, to duplicate another layer. We're duplicating this layer so that it can enhance the whole snow effect, giving it a sharper look.
Step 13
Select the "snow copy", press and hold Ctrl/Command + J to duplicate another layer and rename it to "snow 2".
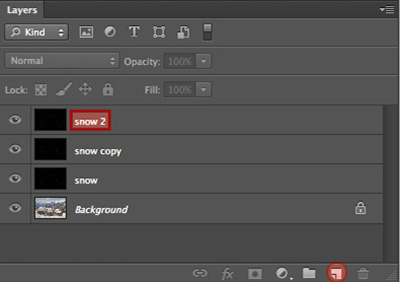
Step 14
To adjust the direction of the snow in the "snow 2" layer, go to Edit > Free Transform or press and hold Ctrl/Command + T.

Step 15
Rotate the image by dragging and turning it at the corner points.
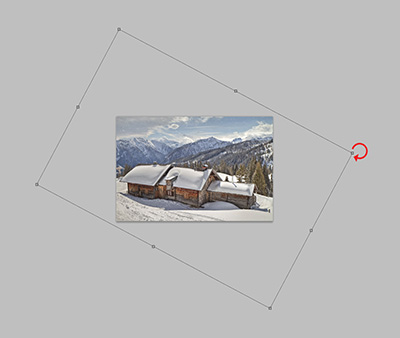
Step 16
Select the "snow 2" layer, press and hold Ctrl/Command + J or drag the layer to the icon at the bottom to duplicate another layer. Then, rename it to "snow 3".
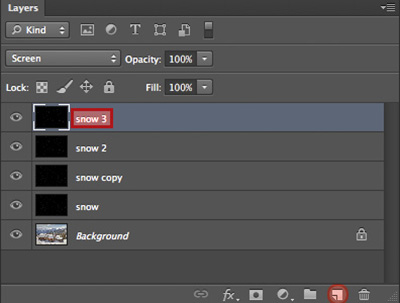
Step 17
Move your cursor to the top right corner and scale it according to your desired size. The purpose of this step is to increase the size of the snow as it's able to create a depth, due to the different sizes of snow.
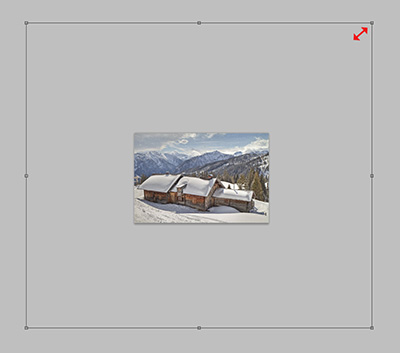
Step 18
Press and hold Ctrl/Command + J again to duplicate another "snow 3" layer. Rename this layer to "snow 4".
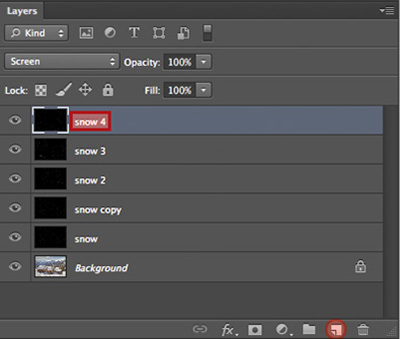
Step 19
Rotate the image again in order to make the direction of the snow even more realistic.
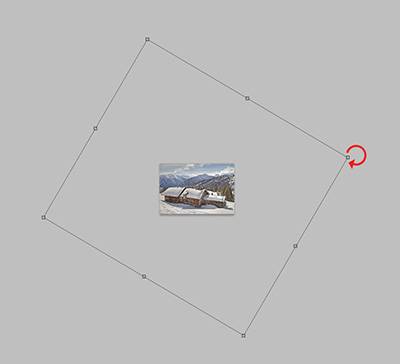
Step 20
Duplicate 2 more layers by pressing and holding Ctrl/Command + J as it will make the "snow 4" layer stand out more. Now, the snow effect layers are complete. Remember to keep these snow layers and save this file as another copy for future use. Make sure it's in PSD format.
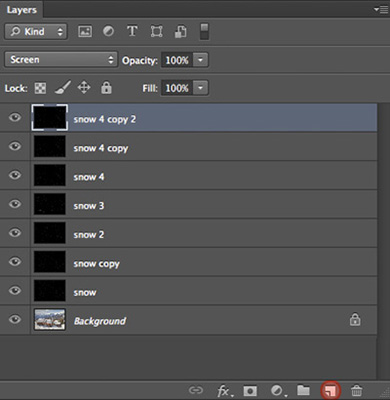
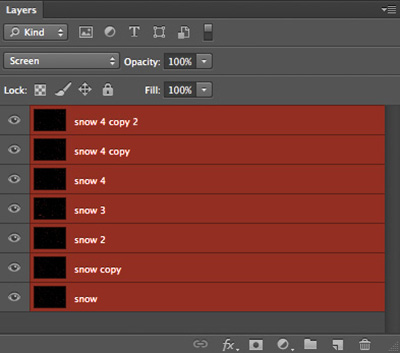
Step 21
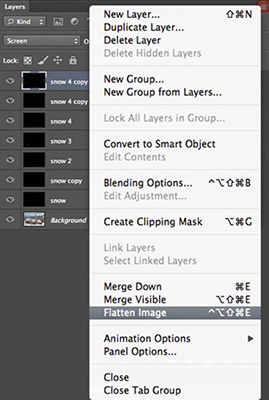
Once you've saved the snow layers in PSD format, go back to the previous file. Click on the icon at the top right of the Layers windows and click Flatten Image to combine all the layers as one.
Step 22
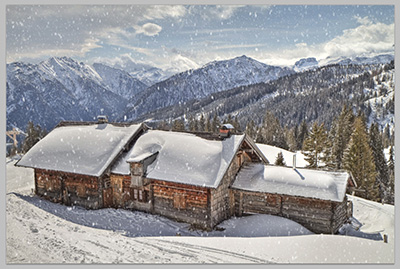
Here's the result. Now, you can create a realistic looking snow effect without cropping it from another image!
Step 23
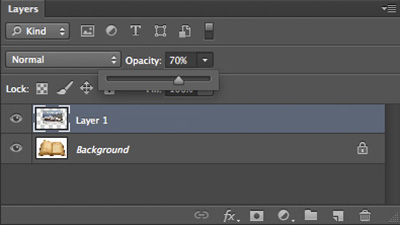
If you think the end result looks a little too simple, we can always apply an additional pop out effect to make it look more interesting. To do so, find any image you like, preferably one that shows an opened book. Drag the snow scenery image and place it on the book image.
Step 24
Press and hold Ctrl/Command + T or Go to Edit > Free Transform.

Step 25
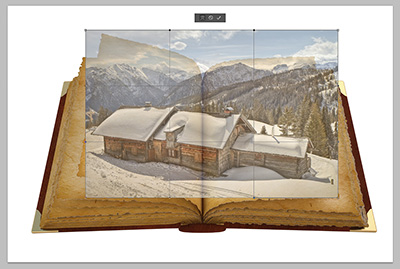
Click on the Wrap Modes icon, located at the toolbar above.
Step 26
Click on all four corners to adjust the transform selection according to the book image.
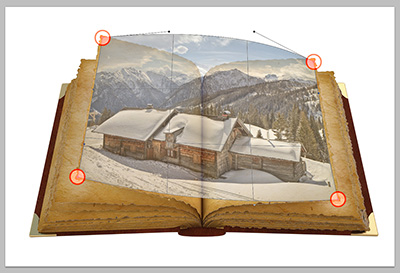
Step 27
Move all four anchor points slightly upwards to make it look like it's popping out.
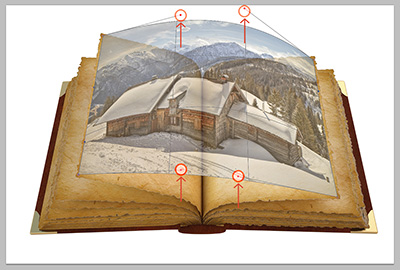
Step 28
The pop out effect of the snow scenery image should look something like this.
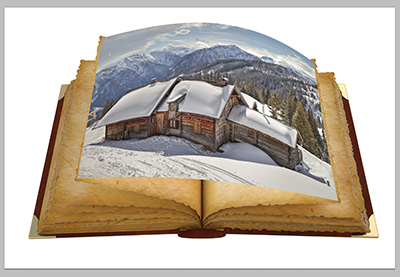
Step 29
Click on the layer mask icon below to create a mask for this snow scenery layer.
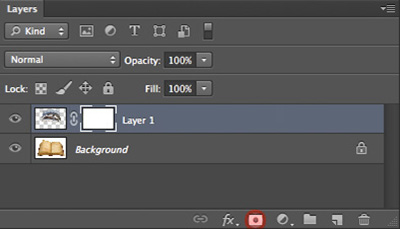
Step 30
Draw a path along the edges of the book by using the Pen tool (press P). Save this path by clicking the icon at the top right corner, in the Path window.
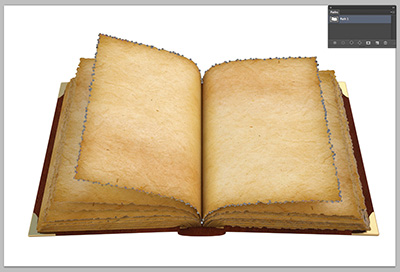
Step 31
Press and hold Ctrl/Command + click on the path icon in the Path window. Mask the unwanted areas, as shown.
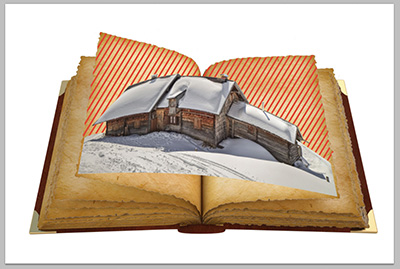
Step 32
Next, pull the anchor points downwards to make it look like it's following the edges of the pages.
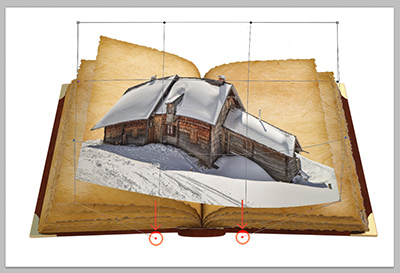
Step 33
Reload the previous path selection and remove the unwanted parts.
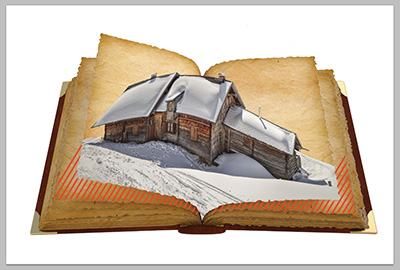
Step 34
Paste the original snow scenery image again and move it under "Layer 1".
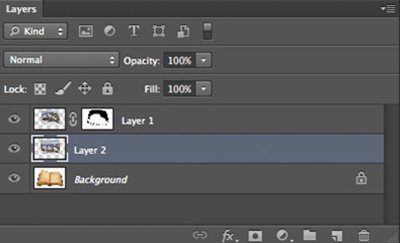
Step 35
The image will be like this, as shown.
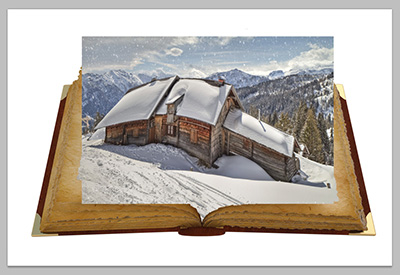
Step 36
Change "Layer 2" and apply a 70% Opacity.
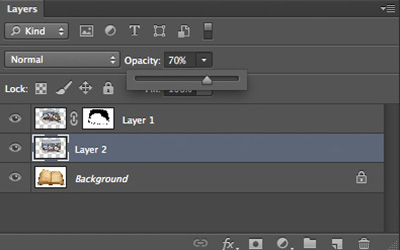
Step 37
The image will be slightly transparent, making it easier to proceed with the next step.
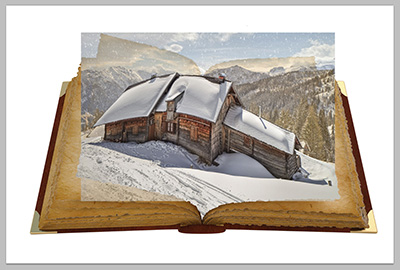
Step 38
Press and hold Ctrl/Command + T and click on the Wrap Modes. We'll move the four corner points to follow the shade of the pages.
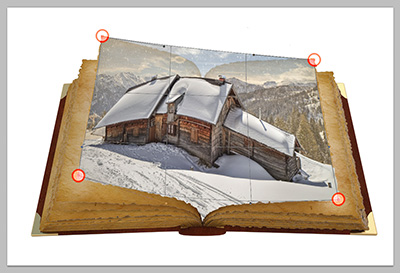
Step 39
Click on the eye icon of "Layer 1" to temporarily make it invisible in the Layer window. You may select the upper portion because we're going to create a depth between the snow hut and the mountain view, located at the background.
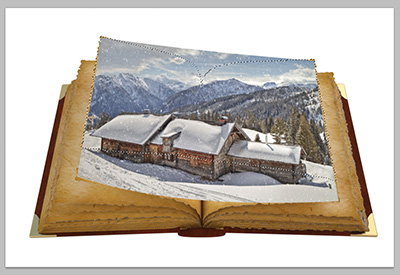
Step 40
Leave the wanted areas by masking it. Then, touch up the edge of the pages by using the Clone Stamp Tool (press S).
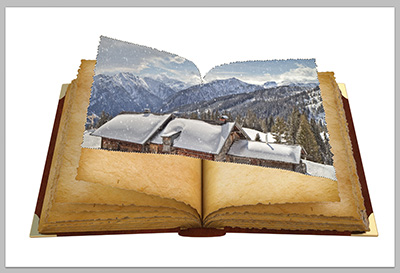
Step 41
Click the eye icon of "Layer 1" again to make it visible. You will notice some unwanted parts, circled in red.
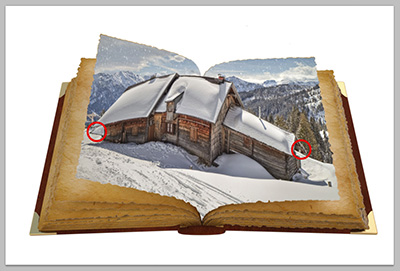
Step 42
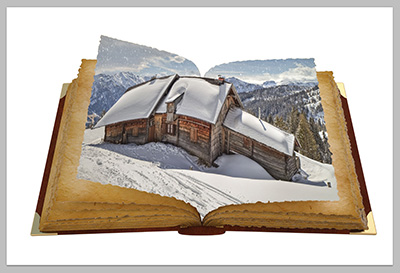
Use the Clone Stamp Tool (S) to remove the unwanted parts so that the pop out effect will look more outstanding.
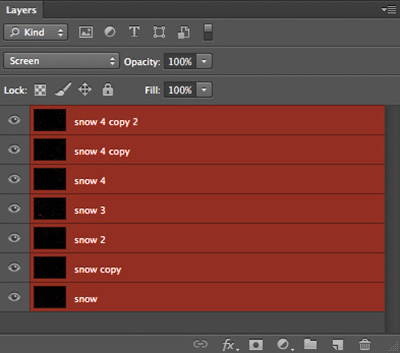
Step 43
Remember how we asked you to keep the snow layer in PSD format? Well, now you'll find it useful. Open the file, press and hold Shift + Click to select all snow layers.
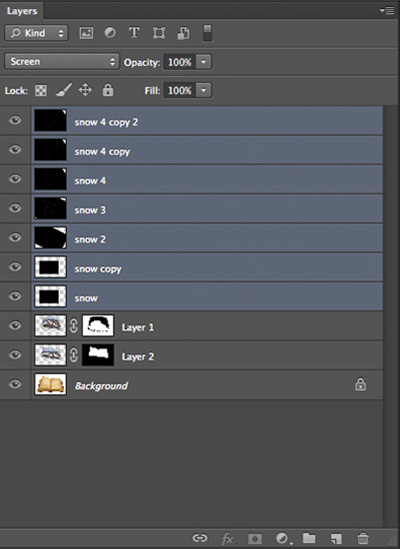
Step 44
Drag all the snow layers onto the book image and make sure it's on top of "Layer 1".
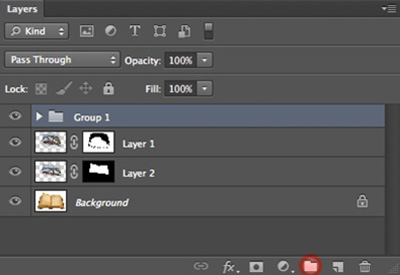
Step 45
Drag the snow layers again to the Group icon, as shown, and combine the layers in one group.
Step 46
Click on the Mask icon placed in the "Group 1" layer.
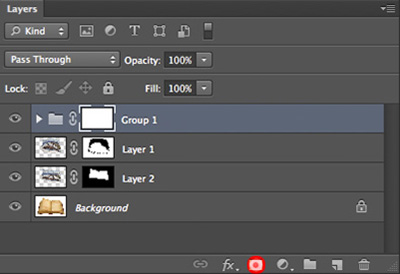
Step 47
At this point, the path selection will be loading.
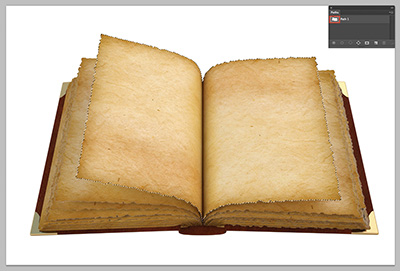
Step 48
Click on the Mask icon again to let the snow effect appear on the pages of the book.
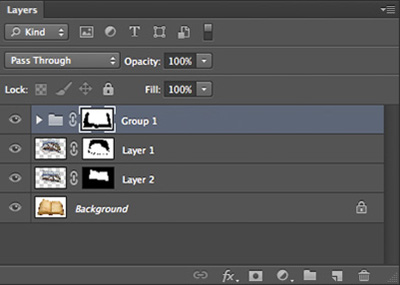
Step 49
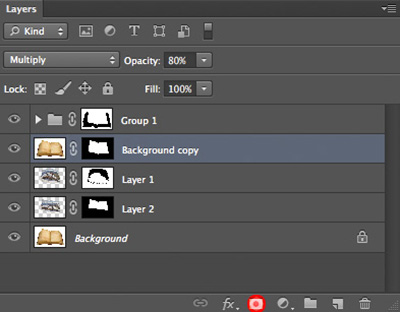
Duplicate another "Background" layer by pressing and holding Ctrl/Command + J. Then, place it under the "Group 1" layer.
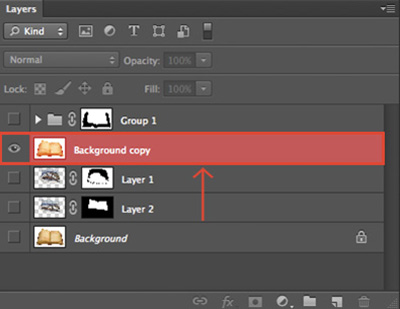
Step 50
Use Clone Stamp Tool (S) to remove the lines in between the pages.
Step 51
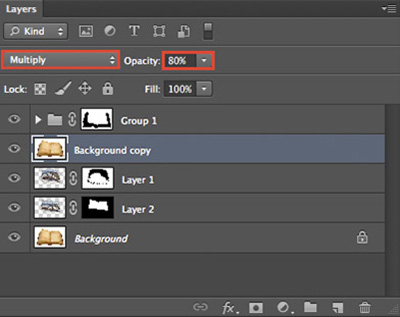
Change this layer to Multiply mode and set the Opacity to 80%.
Step 52
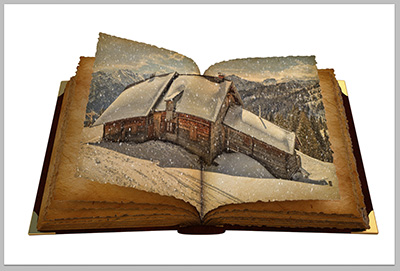
The result will look something like this. Although the overall image may appear slightly dark, not to worry because we'll solve it in the next step.
Step 53
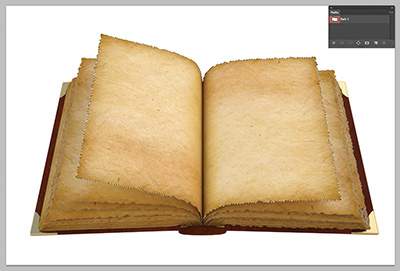
In this step, we'll use the path selection again. Just press and hold Ctrl/Command + click on the path icon to make the selection.
Step 54
Click on the Mask icon so that the effect will appear on the focus pages only.
Step 55
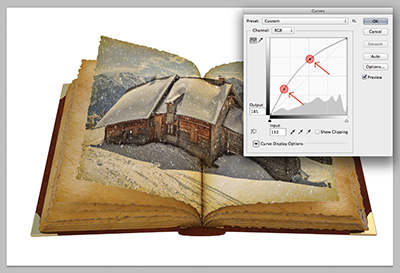
Press and hold Ctrl/Command + M to change the curves setting of the image. Create two points, as shown, and move both points slightly upwards to brighten up the entire image.
Step 56
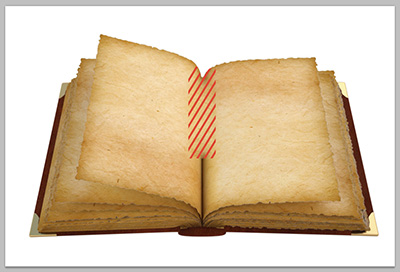
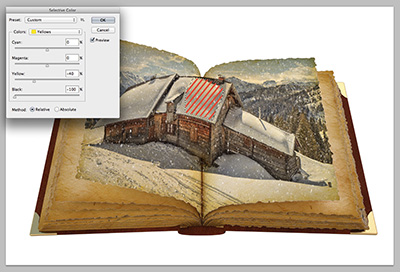
As you can see, there are some obvious yellowish color located at the red striped area. To reduce the yellowish color, go to Image > Adjustments > Selective Color. Then, select the Yellow color option and apply the following settings - Yellow: - 40 and Black: - 100.
Step 57
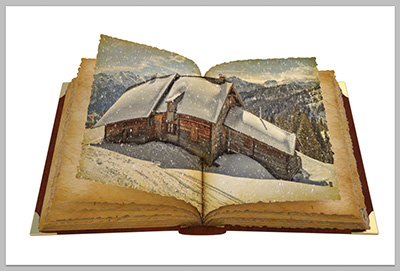
Now that we're done with the previous step, the pop out effect is almost complete!
Step 58
Lastly, you can add in more scenery images on other pages of the book to further enhance it.
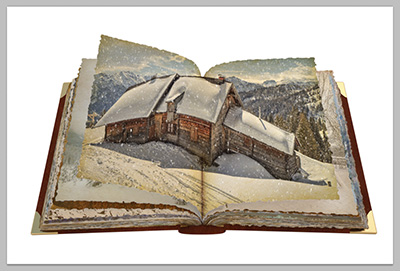
Step 59
The snow and pop out effect is finally done! Feel free to montage additional images to give the final result an extra boost.
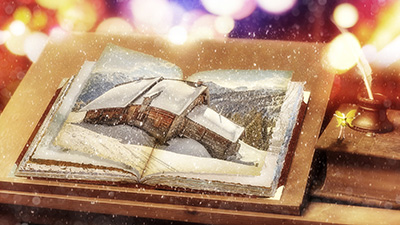
Isn't this tutorial just absolutely mind blowing?? Now that you've got the chance to sharpen your Photoshop skills, go ahead and share (or show it off) to your design lovin' buddies! We hope you enjoyed this tutorial as much as we enjoyed sharing it with you.
See you again next time!
Copyright © . All Rights Reserved