


The vast majority of the time, the vast majority of us use Photoshop's Color Picker in the default configuration. Perhaps we use Custom Colors to select a spot color, but when using the Color Picker itself, we ignore the eight optional modes. (What? You didn't know that the Color Picker has different modes?)
By default, Photoshop's Color Picker opens in Hue mode. The color field, the square area to the left, shows variations in saturation from left to right and variations in brightness from top to bottom. The hue is selected in the color slider, running vertically to the right of the color field. However, you can change the operation of the color field and the color slider by selecting a different mode button.
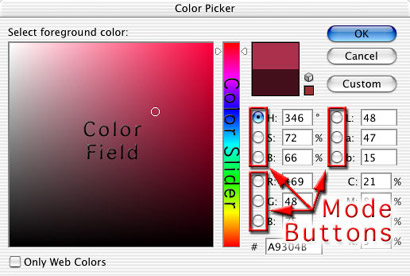
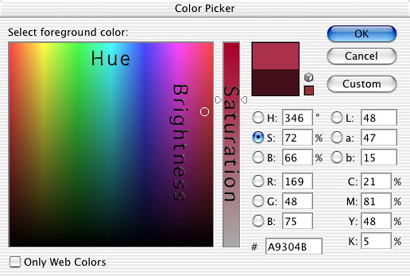
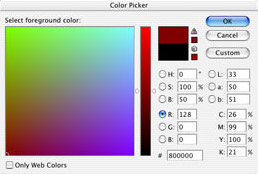
When the button to the left of S is selected, saturation is displayed in the color slider and the color field is used to determine hue (left-right) and brightness (top-bottom). Using the Saturation mode makes it easy to change the current foreground color's saturation with the color slider.
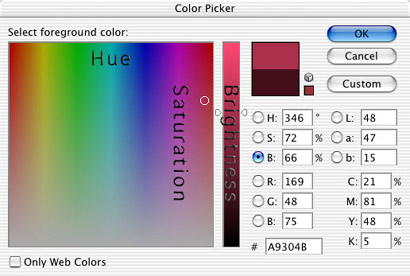
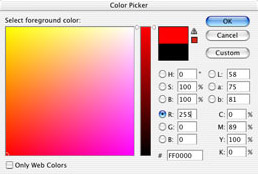
Click on the button to the left of B to switch to Brightness mode. The color slider is used to select brightness, while the color field determines hue (left-right) and saturation (top-bottom). Brightness mode is an excellent choice when creating a gradient from two tints of the same color.
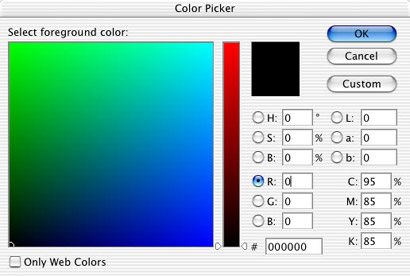
You can also use red, green, or blue as the basis for selection in the Color Picker. In these modes, the selected color appears in the color slider, while the other two component colors are determined in the color field.
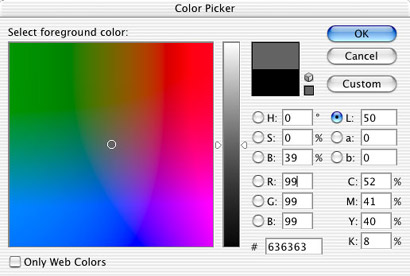
Using the Red mode as an example, you can best see the relationship between the color slider and the color field when the selected color is set to zero (the bottom of the color slider). Black is located in the lower-left of the color field, where all three component colors are zero. White is in the upper-right of the color field (when the color slider is also dragged to the top).
When the color slider is positioned higher, the component color value is higher than zero. The relationship among the colors in the color field is less clear.
You can use the R, G, and B modes of the Color Picker to maintain one or more component color values when defining a new foreground color. To retain one color value, use that mode, ignore the color slider, and make changes in the color field. To maintain two color values, use the mode of the component color that needs to be changed and adjust the color slider only.
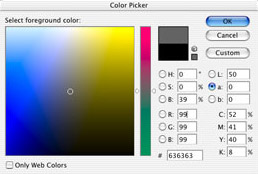
In the upper-right of the Color Picker are buttons that enable you to use the Lab values as modes. In L (luminance) mode, the color slider determines the luminance value and the hue is selected in the color field. L mode is best used to change the luminance of an existing foreground color.
The Color Picker's a and b modes use the color slider to adjust that component, determining the other color value and the luminance in the color field. [The Lab color model defines color according to luminance (L), a red-green component (a), and a blue-yellow component (b).] You may find no use for the a and b modes of the Color Picker.
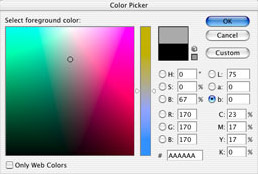
Note that you there are no buttons to the left of the CMYK fields.
 Pete
Bauer is the Help Desk Director for NAPP, as well
as a Contributing Writer for Photoshop User and Mac Design
magazines. His books include "Special Edition Using
Adobe Photoshop 7" (with Jeff Foster), "Special
Edition Using Adobe Illustrator 10," "Sams Teach
Yourself Adobe Illustrator 10 in 24 Hours" (with Mordy
Golding), and "Special Edition Using Adobe Illustrator
9." Pete writes documentation for a variety of computer
graphics related products, as well as testing software
for a number of companies. As a computer graphics efficiency
consultant, Pete specializes in customized training programs.
He is based in Columbus, Ohio, and can be contacted via
Pete
Bauer is the Help Desk Director for NAPP, as well
as a Contributing Writer for Photoshop User and Mac Design
magazines. His books include "Special Edition Using
Adobe Photoshop 7" (with Jeff Foster), "Special
Edition Using Adobe Illustrator 10," "Sams Teach
Yourself Adobe Illustrator 10 in 24 Hours" (with Mordy
Golding), and "Special Edition Using Adobe Illustrator
9." Pete writes documentation for a variety of computer
graphics related products, as well as testing software
for a number of companies. As a computer graphics efficiency
consultant, Pete specializes in customized training programs.
He is based in Columbus, Ohio, and can be contacted via