

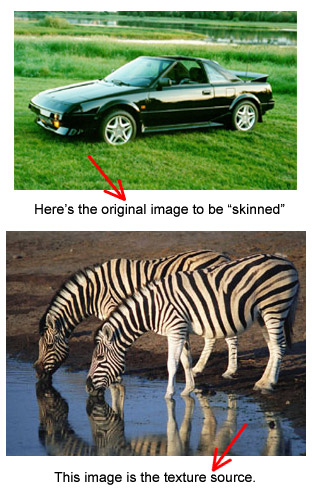
The point of this tutorial is to teach you how to create a fantastic image where none existed before (yes, we're going to use magic). We'll take a pattern from one image and apply it to another image--in this case, we'll give an old car a new color--zebra! Photoshop is the program of choice for this wizardry.
To follow along, you'll need Photoshop or some form of decent paint program. You'll also need a basic knowledge of Photoshop tools (stamp, selector, transform, etc...) Finally, you'll need the two original files to follow along exactly, but I recommend using different images for fun and originality's sake.
Originals:
OK, let's get started.
First, open the texture source image in Photoshop.
The most important starting tip is to use high quality images. If you have to scale up the photo to make it the size you want (unless you start with a high DPI) you need to get better source images.
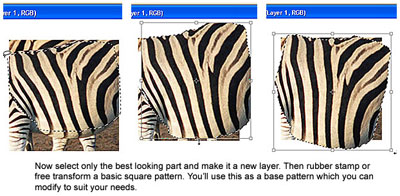
Now that you've got your texture image open, figure out which part will make the best pattern for your skin. It should be relatively consistent in size of detail and values. You can add more shading and modify the scale, rotations, perspective later if you want. Save this selection to a file. Call it texture.psd or something a little less creative if that's confusing.

Great! So now you've got a selection, but we don't really want that dirt or those legs showing up, at least in this example.
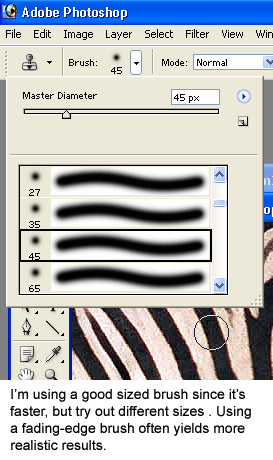
Using the stamp tool (better) or by cutting and pasting (less better), create a "flat" texture. Edit it until you're happy. Try using a solid-edged brush rather than a fading-edge brush to create defined lines, then blend in "choppy" spots with the fading-edger. Use a small brush with the stamp tool to clean up edges to your liking.
Zoom in! The zoom tool and the stamp tool are long lost uncles.
Now you can apply an Unsharp Mask if needed, or a Levels/Colors adjustment (the latter was done here to make the yellow fur look whiter). Don't overdo, though, unless you're going for an effect of some sort.
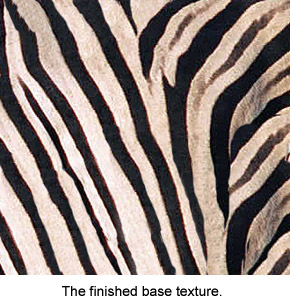
Notice that I've got stripes going in mainly one direction, but on the right there I've got some almost horizontal stripes. If you leave a bit of variety in your texture you'll be able to pull from it like a palette later.
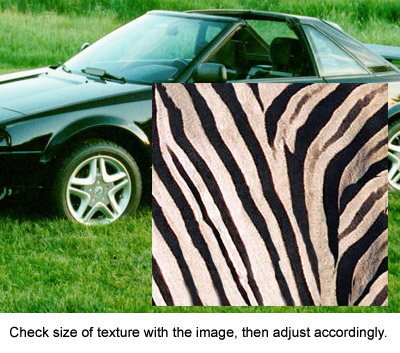
Now that we've got this spiffy texture, we're going to apply it to our image.
Open the image to be skinned and make a copy of the main layer. This will be the one we play with, and we'll always have the original as a backup and a reference.
Next, drag the texture image layer over the image to be edited to check the size of the pattern on the car.
If you have to scale up, I'd suggest creating more pattern using the stamp tool so you don't get a pixilated texture.
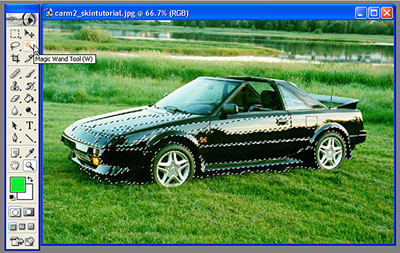
The next step is important if you want to create a realistic look. Use the selection tools (I used the Polygon Lasso tool and the Magic Wand tool) to select the part of the car that you want skinned. Every place that you select will be editable, and everything else won't. This way you can go crazy with the brush and still have clean lines. Leave out small features like door handles and lights if you don't want the car to look "flat". Try different tolerances on the magic wand tool to make the job easier for you. Save your selection periodically under Select > Save Selection.
Now it's time to apply the texture. For those of you that are unfamiliar with how the stamp tool works, it just copies pixels from an image using a start point and a brush. So if you ALT-click on a stripe, then click down again somewhere else you'll copy the same stripe you set as your start point to the new image. I usually align it with the layer, but you can try it un-aligned if you'd like. An aligned layer just means that every time you click, the stamp tool will pull off a spot on the original image relative to where you last clicked, so point A on your original will always be point A on your new image. Un-aligned means that every time you re-click the stamp tool it pulls from the original start point. Play with the settings to see what I mean.
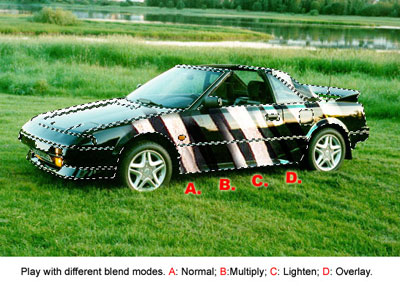
It's easiest for me to have the pattern in a separate file next to the original image so that I can see them both at once. This lets me know where the stamp tool is pulling from. If you haven't already, ALT-click the texture to make a starting point, then switch to the main image. At the top of the screen you'll see an option that says "MODE: Normal". (In PS 7.0 at least. Older versions might be different.) Try different blending modes and opacities until you find something you like. I'm going to use the Overlay blending mode at 100% opacity.
Stamp along until you're getting to someplace you like, and be sure to save often.
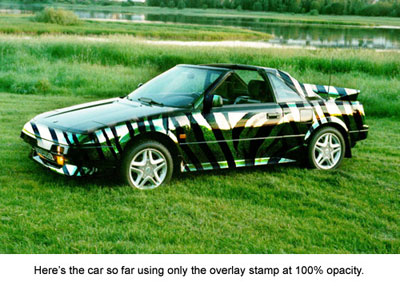
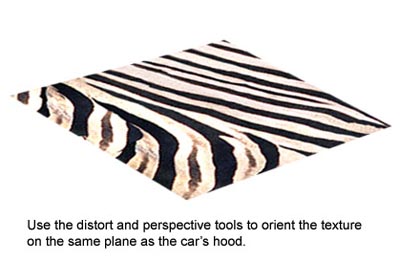
We've got the side of the car done now, and the original texture worked well. Part of the reason is because the zebra's side where we got the texture was on more or less the same plane as the car's side. The hood of the car, however, isn't on a vertical axis. Use the distort, perspective, and rotate tools under Edit > Transform to align a copy of the original texture with the plane of the car hood. If you're having trouble, try dragging the layer to the car image, then adjusting it there. When you're done, bring it back to the texture file.
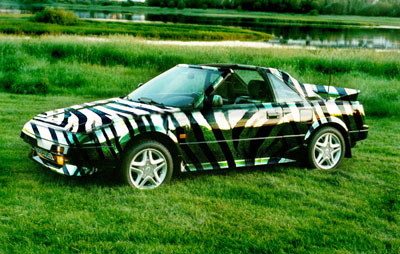
Apply this texture the same way you did with the original. Edit the photo until you're happy with it and there you go! You just skinned a car with a zebra.
I hope you found this tutorial useful. I'd like to hear comments and especially see some of your skins which will no doubt put this one to shame.