
Alright boys and girls, today we're going to make a scary skin texture engulf a person's face. Some of the techniques here are similar to the ones in the car/zebra skinning tutorial, here.
Off we go...
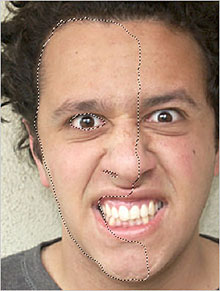
Step 1: Get or take a photo of a friend that won't get too weirded out by you transforming them into a freakish monster, and load it into Photoshop or your favorite paint program. My friend agreed and I got this winner shot of him here:

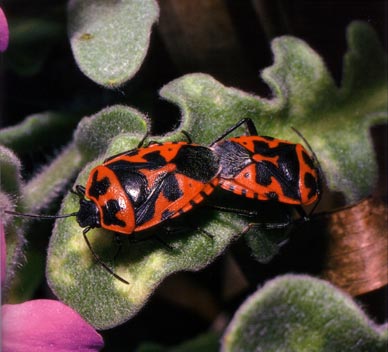
Step 2: Before we start messing with this photo, though, we'll need a texture to play with. I got my texture from a bug photo I found in a book. Yes the bugs are having sex.
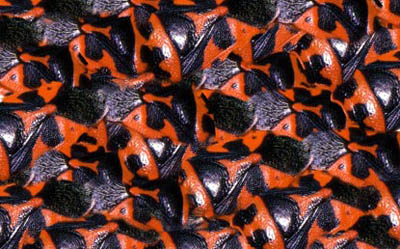
Step 3: Using the Lasso Tool ("L"), select the shell of the beetles. This will be your texture. Remember, holding ALT will allow you to remove part of your selection, and holding Ctrl will allow you to add to your selection.
Step 4: Create a new document about half the size of your person photo. Now, copy and paste the bug texture into this new canvas. With this new layer selected and the "Move Tool" ("V") active, hold Alt and drag the bug layer you just pasted. Continue to do this until you get an interesting pattern. Try rotating and reversing some layers by selecting Ctrl-T, and dragging the selection box with the mouse. You should end up with something like this:
Step 5: Great! We're ready to start texturing the face. Using the Lasso Tool again, select the parts of the face that you want textured. In my case, I selected everything on one half of the face except the eye and the nostril. Once you've made your selection, go to Select > Feather and give a feather of 2px, or more if you're editing in a DPI higher than 72. Now go to Select > Save Selection, and save it as "face", in case you need to get to it later.
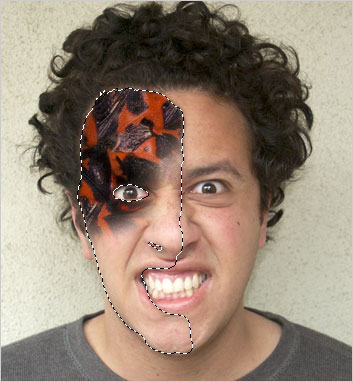
Step 6: Create a new layer and set its blend mode to "Multiply". This will allow some of the face layer below to "show through" with highlights and contours. If the "Face" selection isn't still active, go to Select > Load Selection and bring it back up.
Step 7: Make sure both the texture file and the face file are open. On the texture file, use the Clone Stamp Tool and select an area by Alt-Clicking somewhere. Now, when you left-click on the face selection, it will copy the pixels from the texture. It's helpful if the "Aligned" box is unchecked on the clone tool's options.

The Clone Stamp Tool
Step 8: After you've selected an area of texture with the clone stamp, switch back to the face file and start "painting" the texture into the selection, as shown below.
Step 9: Once you have filled in the whole face area, play around with the stamp tool and Alt-click bright areas of the texture to clone into highlight areas of the face. For example, pick up the shine on the beetle's back and apply it to the shine on the person's cheek. Eventually you should get something that looks like this:
Obviously I went beyond the face onto the neck, and added the chin shadows using the "Burn" tool to separate the face from the neck.
Step 10: In a new layer set to "Multiply", load the face selection again if it's not up. Hit Shift+Ctrl+I to invert the selection. Now, the eye should be selected along with everything on the outside of the face. Using the paint brush and a dark green, paint around the eye. Pick a very dark green and draw in a reptilian pupil if you want.
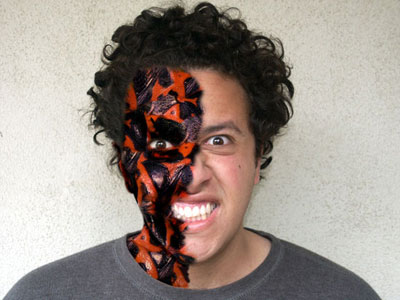
The final result:

Hope you enjoyed this one.