1. I want this mouse to move a little bit around. So, what do I do? I create a motion tween. But not any kind of motion tween. A path tween. Using path tween I can easily control the route of the object I want to move.
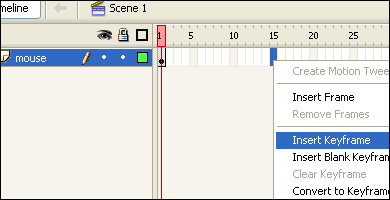
2. The first thing I want to do is just change the frame rate to 30fps. This is done in the properties tab, and gives us a much more fluid animation. Then, in the movie clip layer, right click at frame 15 and select "Insert Keyframe". This will be the frame where the tween stops.
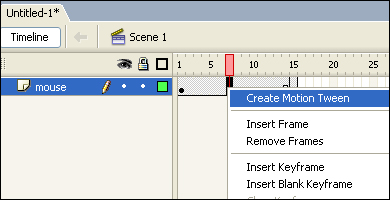
3. Then right click in between the two keyframes and select "Create Motion Tween". This will create the actual tween.
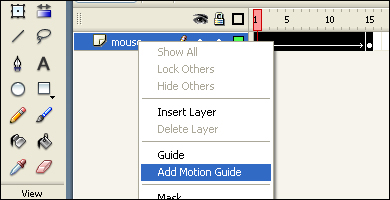
4. Now we have to add the guide that the mouse will follow. To do so, right click the layer name and select "Add Motion Guide".
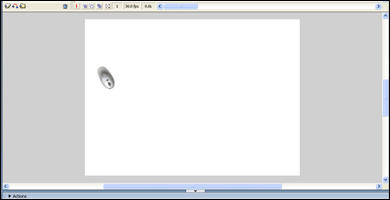
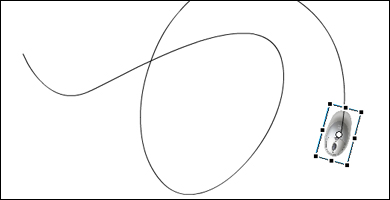
5. Use the pen tool to draw the actual path. Make sure that the object is aligned to the path, like you see on the picture.

6. Now make sure frame 15 is active, and move the mouse all the way to the end of the path. Again use the free transform tool to align the mouse as shown on the picture.
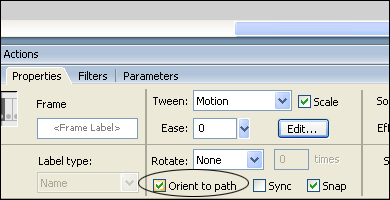
7. If you have done everything right, the mouse should follow the path. But it seems quite unnatural, since the mouse doesn't orient to the path. So, the last thing we need to do, is to select the motion tween by clicking between frame 1 and 15 in the "mouse" layer. Then, in the "Properties" tab, check the "Orient to path" option. And there you go! Ctrl-ENTER to test your mouse animation.