


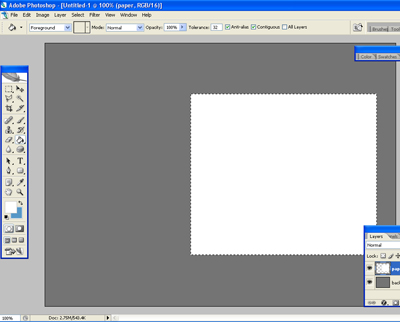
1. Create a New Image 800 x 600 pixels
2. Click View > Actual Pixels (Alt+Ctrl+0) this will allow you to see your work space
3. Change the Background Color to #747474
4. Create a new layer ( Layer>New>layer) or Shift+Ctrl+N name it paper1
5. Click on
![]() and set the dimension to what I have below. With the Style fixed it will make setting the exact dimension easy.
and set the dimension to what I have below. With the Style fixed it will make setting the exact dimension easy.
![]()
6. Now click
![]() and change the color to # FFFFFF. Fill the rectangle with the color. It should look something like this
and change the color to # FFFFFF. Fill the rectangle with the color. It should look something like this
Press Ctrl+D to deselect
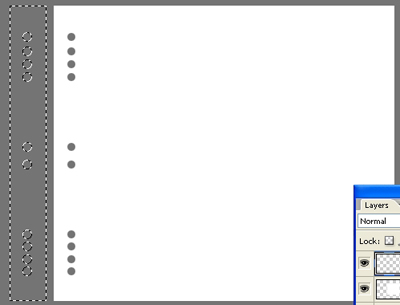
7. We need to create the text book holes. Click on the Rectangular marquee Tool and select the elliptical marquee tool
![]() . Use the setting that I have below.
. Use the setting that I have below.
![]()
8. Now with the elliptical marquee tool selected click on the selection
![]() to add to selection, now you will be able to add more that one selection. After this you need to create a circle using the tool. Make sure your still on the paper layer. Place the circle holes on the left hand side and create the holes.
to add to selection, now you will be able to add more that one selection. After this you need to create a circle using the tool. Make sure your still on the paper layer. Place the circle holes on the left hand side and create the holes.
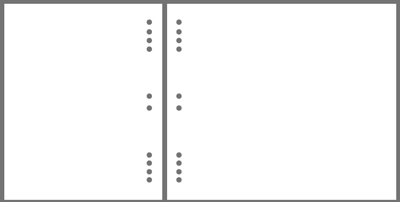
9. Now we need to add another paper, Create a new layer, (Layer>New>layer) or Shift+Ctrl+N name it paper2. Click back to the first layer u created. now hold Ctrl and click on the layer it should now be selected. Click on the Rectangular Marquee Tool
![]() . And click on Subtract from selection. Create a rectangle and cut the selection so u can duplicate the holes
. And click on Subtract from selection. Create a rectangle and cut the selection so u can duplicate the holes
10. Click over to the new layer and fill the selection with #FFFFFF. Still on layer paper2 use the rectangular marquee tool
![]() to create a rectangle to make the rest of the paper by adding a selection to the holes u just created
to create a rectangle to make the rest of the paper by adding a selection to the holes u just created
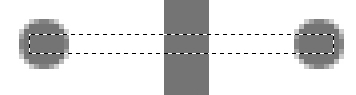
11. Now to create the book rings, create a new layer and name it coil. Use the
![]() Rectangular Marquee tool to create a small rectangle to connect the holes.
Rectangular Marquee tool to create a small rectangle to connect the holes.
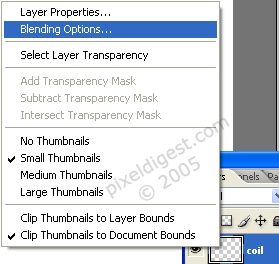
Fill the coil will this color #FFFFFF. Right click on the Coil layer and click Blending Options
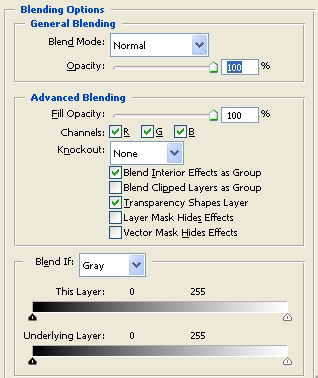
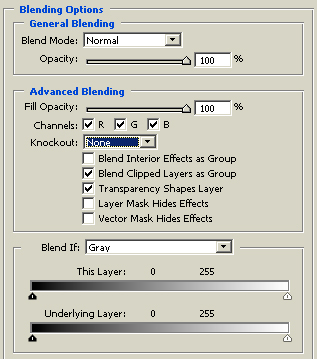
12. Here is the settings.
Blending Options:
Drop Shadow:
Counter: Gaussian
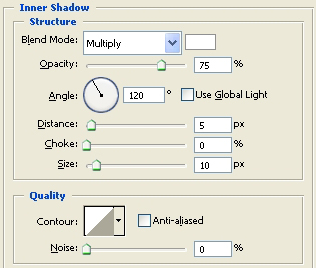
Inner Shadow:
Counter: Linear
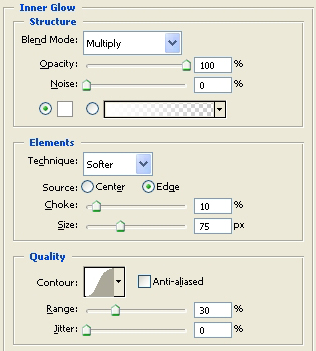
Inner Glow:
Counter: Gaussian
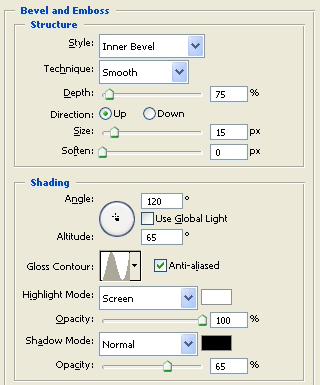
Bevel and Emboss:
Counter: wow Chrome
Download: chrome
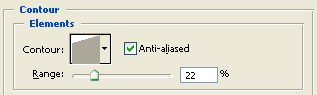
Contour:
Counter: wow Sharp Lighting
Download: sharp
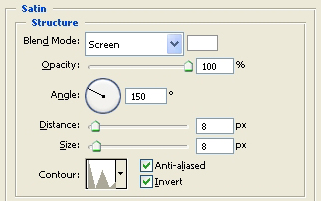
Satin:
Counter: custom
Download: custom
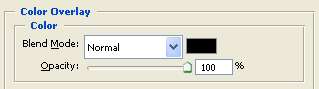
Color Overlay:
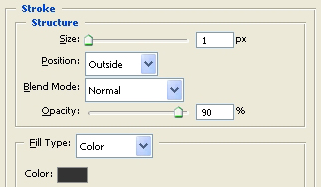
Stroke:
When you are finished you can click new style or just click ok.
13. Now u have to duplicate the coil layer. Right click on the layer can click Duplicate. Use the key board arrows to move the newly duplicated layer into the hole.

Do this until u fill all the holes.
14. That's it for the "hard" stuff. If you want to create a paper to add to you book. Go back to the layer name paper, hold Ctrl and click on the layer. with the layer still selected, create a new layer. Use the Rectangular marquee Tool and cut about couple inches off the edge of the selection so it looks like the paper is in the book and u can fill
![]() it with #5798c7. you can use what ever color you like.
it with #5798c7. you can use what ever color you like.
15. That's it your finished, Hope it came out to what you wanted.