

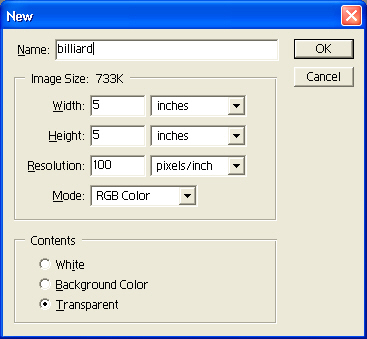
1. Create a new image, 5 inches x 5 inches, RGB, 100 DPI with the background set to transparent.
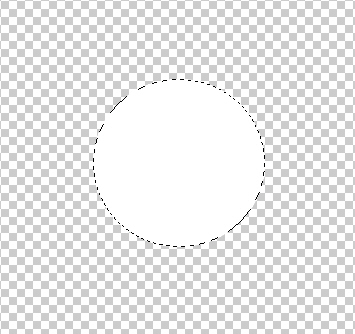
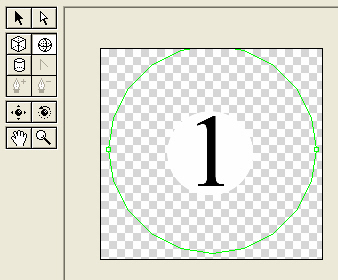
2. Create a new layer. With the Elliptical Marquee Tool (or as it is commonly know up here -'that roundish dotted thingy') and make a circular selection in the center of the new layer. Make it so that it takes up about a quarter of the center of the entire image. Fill the selection with white.

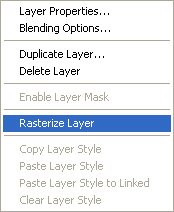
3. Hit 'D' to reset the default colors. Select the Type Tool and type a number. This will show up in its own layer. Right click the type layer, Rasterize it and then hit Command/CTRL+E to merge it with the white circle.

![]()

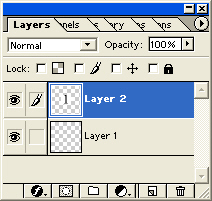
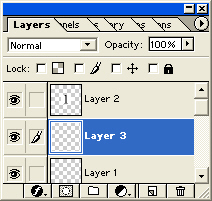
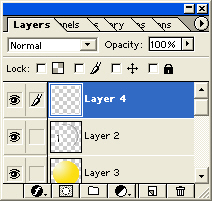
4. Create a new layer beneath the numbered layer we created with our merge.
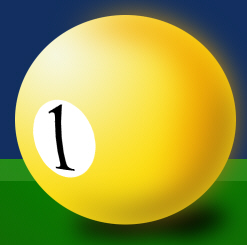
5. Let's set up a a couple colors for a gradient before we go any further. Since I'm using the ever popular One ball (which is yellow), I'm picking a faint white/yellow for my foreground and a truer yellow for the background. Selecting the gradient tool, click the radial gradient button on the options bar. We'll come back to the gradient in a minute.

![]()
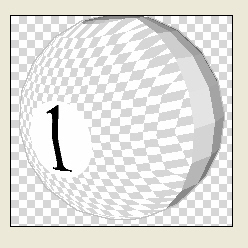
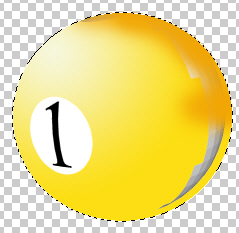
6. Select the number layer again. Go to Filter>Render>3D Transform. Click the Sphere Tool and draw a circle that takes up most of the image. Then select the trackball Tool and move the number around with your mouse… it should begin to look as though it is on the face of a transparent sphere. Click ok to go back to your image.

7. Go back to the layer beneath the number and fill it, from top left to bottom right, with the gradient.
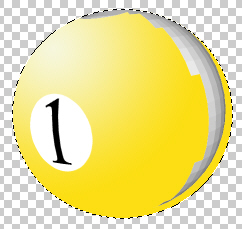
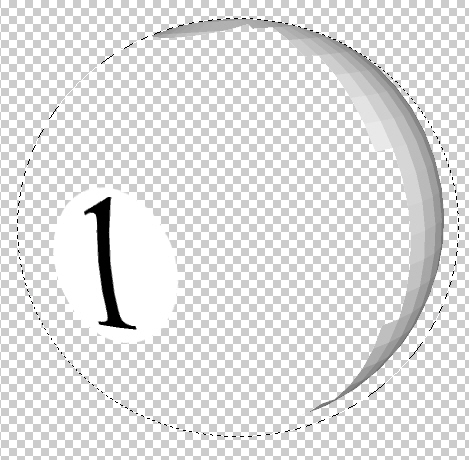
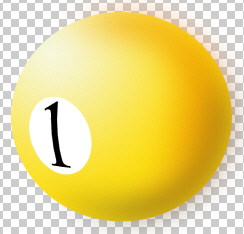
8. Change your foreground color to a darker orange. Select a large airbrush and, in a new layer, begin painting over the nasty smear that appeared on the numbered layer when we transformed it. Change to a darker color and continue painting along the bottom edge, so that the ball appears darker on the side opposite the bright reflective side. You may want to choose the Erase Tool and clean up the smear on the number layer as well. Apply a blur to the paint brush layer so that the paint blends together, and you should find yourself with a decent looking pool ball!

![]()
 Al Ward, a certified Photoshop Addict and Webmaster of Action FX Photoshop Resources (