
In this tutorial, I will teach you how to make the Glass Text above.
Step1: Setting up work space.
Create a new image using the dimension 800 x 600. Set the background color to white, or you can import a texture like I did above. Create a new layer, Layer > New > Layer... (Shift+Ctrl+N).
Step2: Adding Text.
Click on the Type Tool
![]() and write something in your work area. I typed "Glass Text" using the Impact font. Your work area should look something like the image below.
and write something in your work area. I typed "Glass Text" using the Impact font. Your work area should look something like the image below.

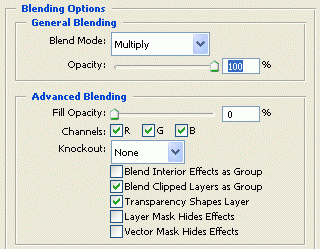
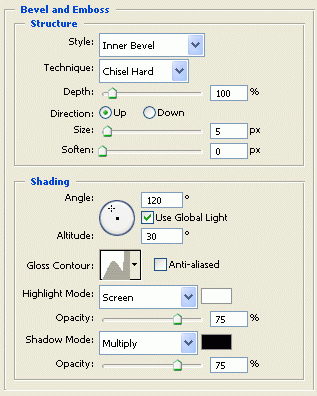
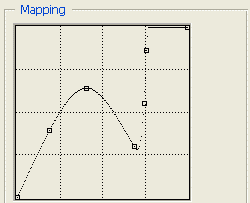
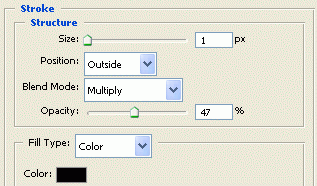
Right click on the Text layer and click Blending Options and add the settings below.
Blending Options
Bevel and Emboss
Bevel and Emboss (Gloss Contour)
Stroke
Now click ok, to apply the settings.
Finished:
That's it, hope it came out to what you expected.