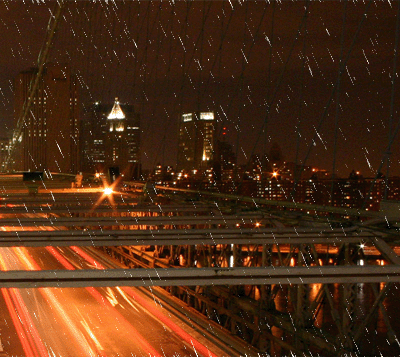
This tutorial can turn any photo into a realistic rainy day and I'm going to show you how to do this with the image below.

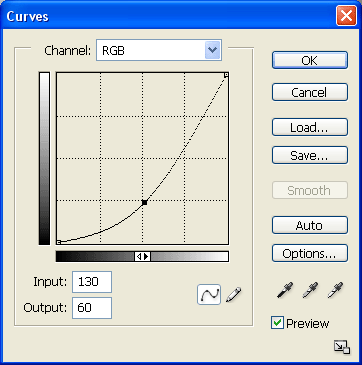
First off duplicate the image layer and now go to Image > Image Adjustments > Curves... to give the image a darker rainy day appearance. Then copy the values exactly in the image below.
Plus I'm not doing to do this step because my image I'm using is already very dark.
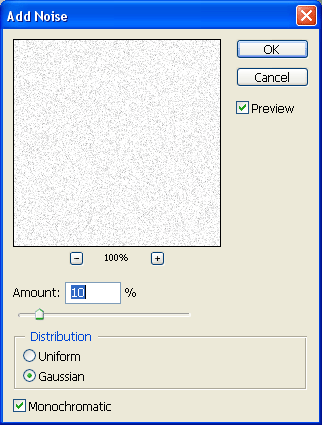
Next step is to create the rain but first we will need to Create a new layer and have it with a white background and then go into Filter > Noise > Add Noise... and then put the exact setting I have shown.
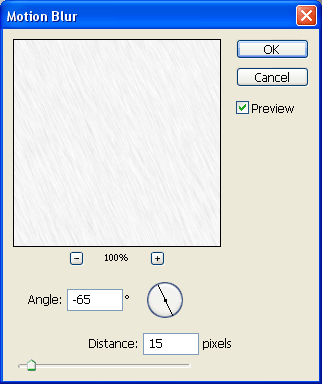
Now head over to Filter > Blur > Motion Blur... and set the setting up like I have here:
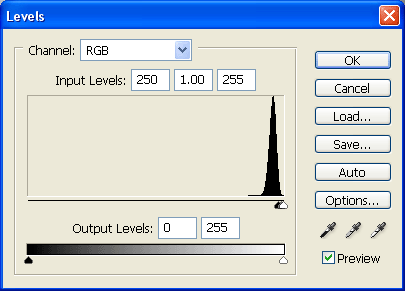
Then you need to go to Image > Image Adjustments > Levels.. and put the settings I have below.
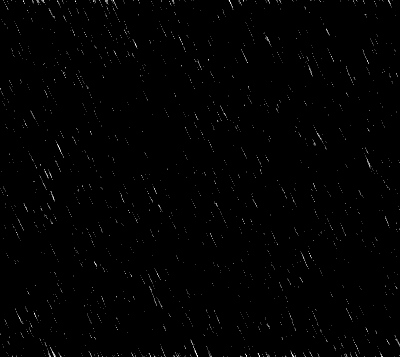
This will then make the rain out of the motion blur and it will look something like I have here so far.
Now for the final step! Go to the top of your layers pallet and change the mode of the layer with the rain to "Screen" and that’s your finished and you should now have a rainy day.