Step1:
Create a new image, File>New or (Ctrl+N). Set the Width(800) Height(600) and change the background color to white #FFFFFF.
Step2:
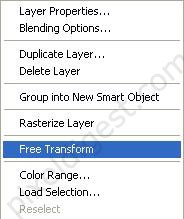
Type something in your work area I typed REFLECT using the IMPACT font. Press Ctrl+J to duplicate your layer. Click on the Chop Tool
![]() and right click on the REFLECT font you just duplicated and click Free Transform as shown below.
and right click on the REFLECT font you just duplicated and click Free Transform as shown below.
Step3:
Change the Height (H) of your text to -100 this will flip your text around as shown below.
![]()

Step4:
Right click on the text layer you just flipped and click Blending Options and enter the setting for the Gradient Overlay.
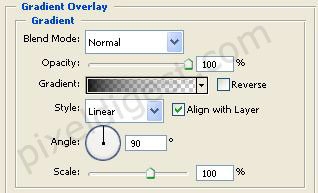

Gradient Setting
When you finished with the setting you should have something like I have below.

Step5:
Still on the same layer change the Opacity to 20% as shown below.
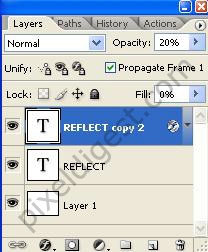
Now you should have something like I have below.

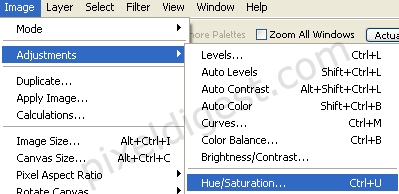
Hold Ctrl and click on your REFLECT layers to select it and press Ctrl+E to merge the layers. Now you should have two layers your background and one Reflect layer. Now click Image>Adjustments>Hue/Saturation or Ctrl+U as shown below, the Hue/Saturation window will pop up. If you click Colorize in the Hue/Saturation window and play around with the Levels you can change the color to what ever you like.
Step6:
That's it, here is my finished work.