Start a new document mine is 150px by 200px with background set to white.
Ok make a new layer by going to layer>new layer. Select the rectangular marquee tool and set it to fixed size of 148px by 25px.
![]()
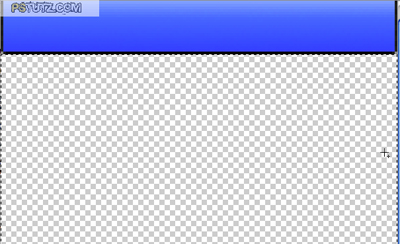
Next click on the top of the layer and it will make a selection the width of the image.
Now set the top colour to 5B90FC and background colour to 1662FD.
Next select the gradient fill tool by clicking and holding on the bucket tool. Draw a line from the top to the bottom of the selection.
Now in the layer selection window click on the little f and bring up the layer options.
Select stroke and enter my settings.
Ok next you are going to have to get your rectangular marquee tool back out and make sure it’s a fixed size of 148px by 12px, now click at the top of the blue bar make sure that the selection is inside the black lines.
Now again make a new layer by going to layer>new layer. Change the top colour to white and again select the gradient fill tool now at the top of the screen click on the gradient fill type and this window should come up.

Select the white to transparent fill.
Make sure the opacity is set to say 52 and draw from the top of the selection to the bottom holding the shift key to make your selection straight if needs be.
Notice this gives it a nice shine effect.
That’s if for the top bar.
Now you are going to make a container for the rest of the box. This could easily be a content box or a navigation box.
Myself I am going to make a content box.
Ok first off make a new layer by going to layer>new layer.
Zoom in to 400% by pressing crt and + and then get your rectangular marquee tool out and draw a box around the transparent space you have under the black stroke of the blue box.
Now fill that area with white FFFFFF .

To make the border go to select>modify>border and set it to 1px.
Click ok.
Now set the colour to black 000000 and select the bucket fill tool and click in the 1px border around the edge.
Zoom back out and you should have this by pressing crt and -
This gives you a very basic but nice content box.
If you want to add some finishing touches I added some text and an arrow that I just turned round and added a slight bevel and emboss to give it an indented effect.
Ok to add the arrow it’s quite simple you click and hold the shapes tool and down the bottom of the list you will see custom shapes click on that and on the top bar with be a drop down box of all the shapes you can have.
Select the arrow I am showing above. And draw whatever size you see fit on your header bar. Making sure you have white as you chosen colour.
Ok next hold crt and T down to select free transform and turn the arrow around till you are happy with the angle.
Now you are going to need to make the arrow look like its sitting inside the blue bar. Go to bevel and emboss found by clicking and holding on the arrow layer.
Click ok and this is what you should have.
Ok you can do the same for the text as well to make this sink into the blue bar.
Repeat the last step but do it for the text instead.
And you will end up with my finished product.

I hope this helped some of you and that you all learned something from this.
Thank you for reading my tutorial.