1. Create a new image 800x110 with white background.
2. Fill the background with dark red color #4b0d0d

3. Create a new layer, rename this layer as "header", make a rectangle selection and fill it with any color.
I used #ac1415

4. Right click the header layer and choose Blending Options, use these settings:
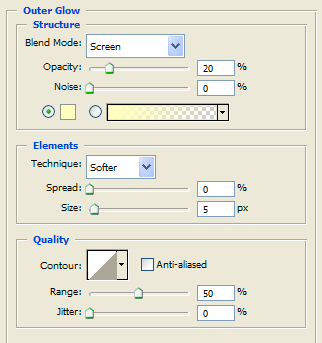
Outer glow:
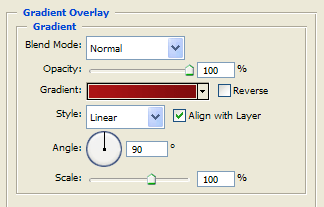
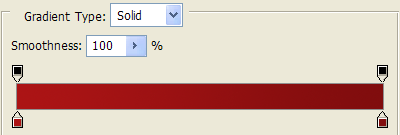
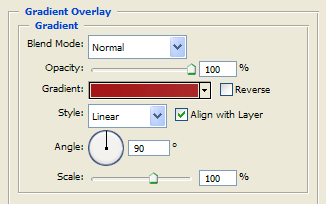
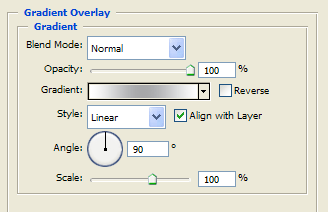
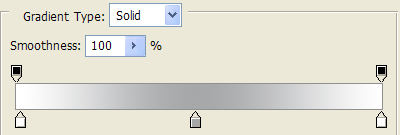
Gradient overlay: use these colors # ac1415 -> # 800d0d
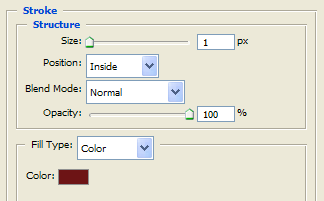
Stroke with this color #6d1415:
The result is:

5. Create a new layer, rename this layer as "light".
6. Select the Rectangular Marquee Tool and draw a rectangle inside the "header" layer and fill the selection with any color, similar to this:

8. Right click the "light" layer and choose Blending Options, use these settings:
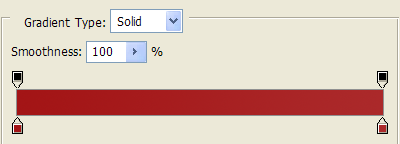
Gradient overlay: use these colors # a31416-> # ab292a
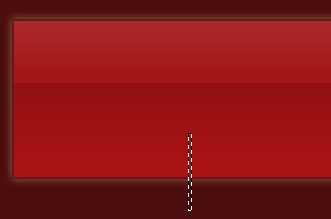
The result is:

9. Select the "header" layer and select the Rectangular Marquee Tool and make a selection 2 pixels wide:
10. Press DEL to delete that part of the header and get a hole.
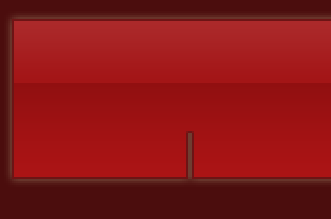
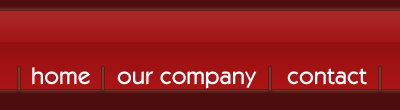
11. Make more holes that will be used to separate the menu elements. Add the menu elements with simple white text. I have used KaratMedium font 24 px.
The result is:
12. Add a title with white text. I have used RedFive font 30 px:

13. Right click the title layer and choose Blending Options, use these settings:
Drop Shadow:

Gradient overlay: use these colors # ffffff-> # a7a8aa->#ffffff
The result is:

14. Finally add a picture or logo.
Also I have added a yellow color font for the rollover #ffd909
The final result is: