


Step 1.
Create a new document that is 500x500 in size, and fill the background with a dark grey color I'm using: #313131
Step 2.
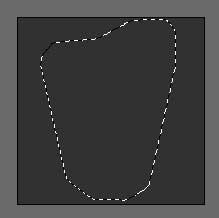
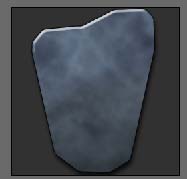
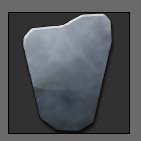
Get out the polygon lasso tool, create a new layer and make a selection on the canvas similar to this:
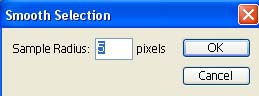
Go to: Select->Smooth with a setting of 5 pixels:
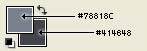
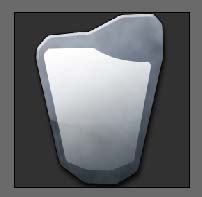
Set your foreground color to: #78818C and your background color to: #414648
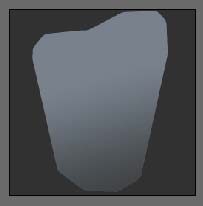
And fill the selection with a gradient from top to bottom like so:
Press Ctrl + D on your keyboard to deselect the selection.
Step 3.
Double click this layer, and apply the following blending options:
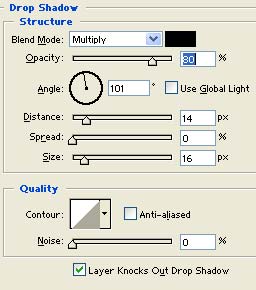
Drop Shadow:
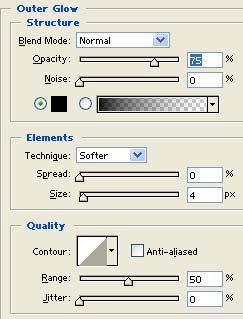
Outer Glow:

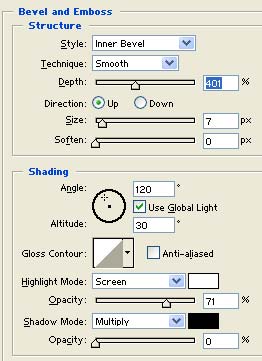
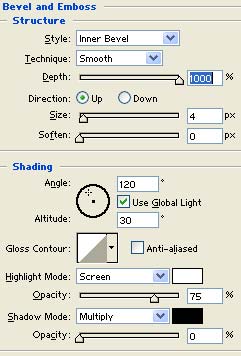
Bevel & Emboss
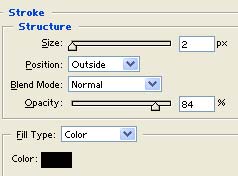
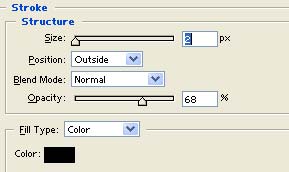
Stroke:
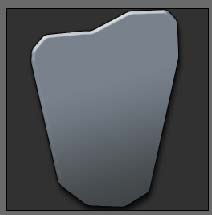
Result:
Step 4.
Next create a new layer, and go to Filter->Render->Clouds
Now go to: Filter->Render->Difference Clouds
Press Ctrl + F on your keyboard to repeat the filter one more time.
Press Ctrl + G on your keyboard to group this layer with the previous layer.
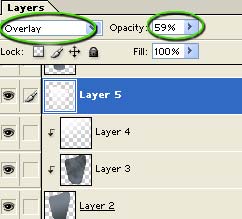
Finally change the blending mode of this layer to "overlay". Here's how your layers pallet should look now:

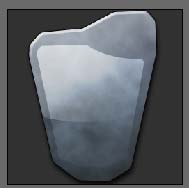
Result:
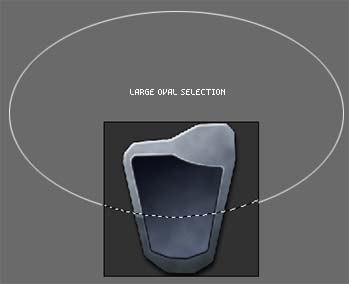
Step 5.
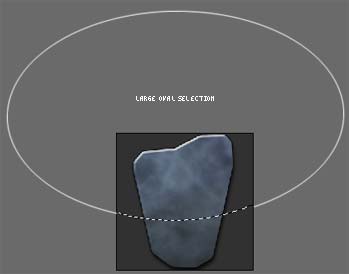
Next create a new layer, get out the elliptical marquee tool, and make a large oval selection over the top portion of the interface-base like so:
Next set your foreground color to white (#FFFFFF) get out the gradient tool, and fill this selection with a gradient like so:
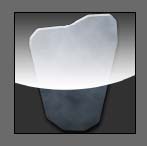
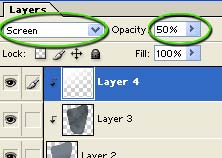
Change the blending mode of this layer to "screen" and drop the opacity down to 50 percent:
Next group it with the previous layer, by pressing Ctrl + G on the keyboard. Here's how your pallet should look:
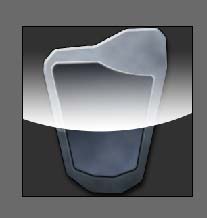
Result:
Step 6.
Create a new layer, get out the polygon lasso tool again and create a selection inside of the interface-base, notice I used the elliptical marquee tool to deselect a portion in the top right corner of the screen I did this by holding the Alt key with the elliptical marquee tool:

Go to Select->Modify->Smooth with a setting of 5 pixels:
Fill this selection with a white to transparent gradient just like in the previous step:
Do not deselect!!
Change the blending mode of this layer to "overlay" and drop the opacity down to 59 percent:
Do not deselect!!
Result:
Do not deselect!!
Step 7.
Create a new layer, name this layer "screen base".
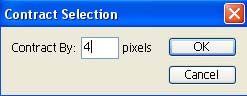
Go to Select->Modify->Contract with a setting of 4 pixels:
Set your foreground color to: #10131F and your background color to: #78818C
![]()
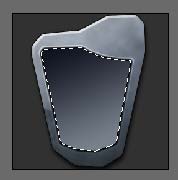
Get out the gradient tool, and fill this selection with a gradient similar to this:
Press Ctrl + D on your keyboard to deselect the area.
Step 8.
Create a new layer, go to Filter->Render->Clouds
Go to Filter->Render->Difference Clouds
Press Ctrl + F on your keyboard one or two times to repeat the filter.
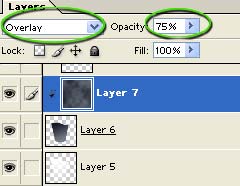
Change the blending mode of this layer to 'overlay' and drop the opacity down to 75 percent
Press Ctrl + G on you keyboard to group this layer with the previous.
Here is how your layer pallet should look after this:
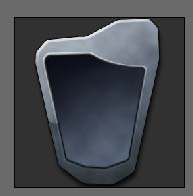
Result:
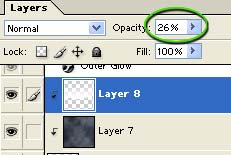
Step 9.
Create a new layer. Get out the elliptical marquee tool and make a selection similar to this:
Set your foreground color to white (#FFFFFF), get out the gradient fill tool, and fill this selection with a gradient like so:
Drop the opacity of this layer down to 26 percent, and press Ctrl + G on your keyboard to group it with the previous layer:
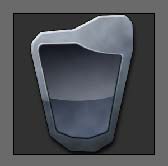
Result:
Step 10.
Create a new layer. Next hold down the Ctrl key on your keyboard and click the layer named "screen base" (it should be three layers down) to make a selection on the canvas with it's contents:
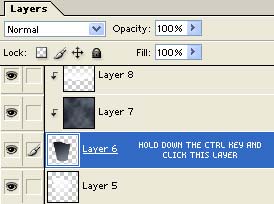
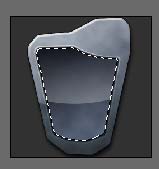
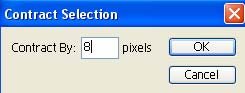
Go to Select->Modify->Contract with a setting of 8 pixels:
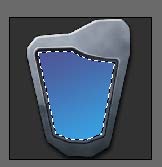
Set your foreground color to: #4D5898 and your background color to: #389EDF
![]()
Using the gradient fill tool, fill the selection with a a similar gradient:
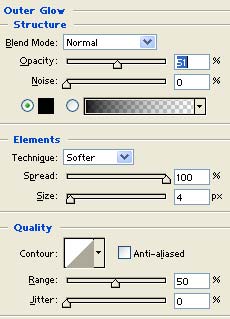
Press Ctrl + D on your keyboard to deselect the area, double click this layer and apply the following blending options:
Inner Shadow:
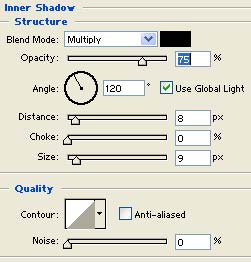
Outer Glow:
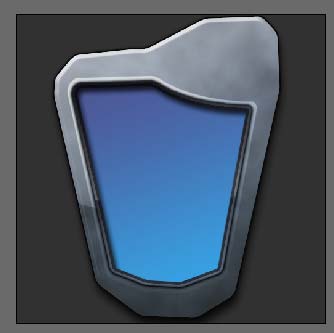
Result:
Step 11.
Create a new layer, get out the elliptical marquee tool and make a selection similar to this:
Fill this selection with a white to transparent gradient as we have done in previous steps.
Change the blending mode of this layer to "overlay" and drop the opacity down to 73 percent.
Result:
Step 12.
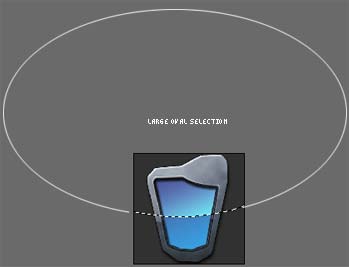
Now we'll add the buttons to the interface. Create a new layer, and get out the elliptical marquee tool and make a selection similar to this:
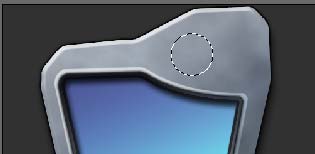
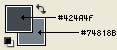
Set your foreground color to: #424A4F and your background color to: #74818B
Get out the gradient fill tool, and fill the selection like so:
Do not deselect!!
Step 13.
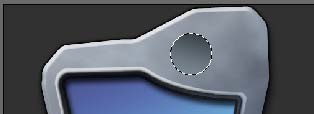
Create a new layer, go to select->modify->Contract with a setting of 4 pixels:

Using the same colors, fill this selection with a gradient, only going the opposite direction:

Double click this layer, and apply the following blending options:
Outer Glow:
Bevel & Emboss
Stroke:
Result:

Step 14.
Create a new layer. Get out the elliptical marquee tool, and make a selection like so:

Set your foreground color to (#FFFFFF) white, and fill this selection with a transparent to white gradient form bottom to top.
Press Ctrl + D on your keyboard to deselect the area.
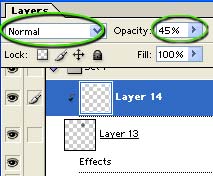
Change the blending mode of this layer to "overlay" and drop the opacity down to 45 percent.
Press Ctrl + G on your keyboard to group this layer with the previous.
Your pallet should look like this now:
Result:

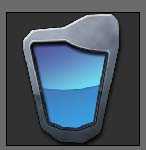
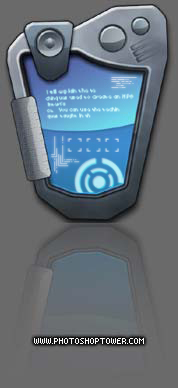
And that completes all the techniques in the tutorial.
Here I've duplicated the steps and created another button. I've also added a small over-snap on the top with a speaker looking circle on it. (this is just another button, with a smaller button inside of it, nothing new). Here's how my piece turned out after playing with it for a few minutes:
Like I said, just continue to use the same techniques to add as many little panels/pieces you'd like.
I hope you enjoyed this tutorial, and that it's inspired you to create some great looking interface layouts for your next application or web site design! Thanks for reading.