Step 1.
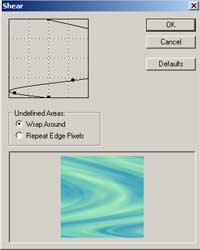
Create a new 400X400 pixels document and set dark blue color for a foreground and light green for a background. Apply Filter > Render > Clouds and then apply Filter > Distort > Shear with the following settings:
Step 2.
Apply Filter > Pixelate > Mosaic with the following settings: Cell Size->10 square.
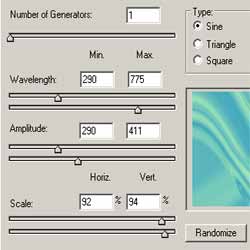
Apply Filter > Distort > Wave and use settings like shown in the pic.2.
Step 3.
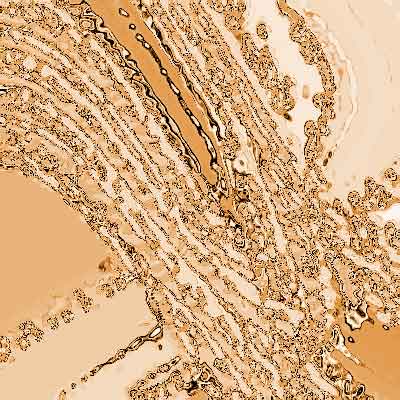
Apply Filter > Artistic > Poster Edges with the following settings: Edge Thickness->3; Edge Intensity->3; Posterization->4.
Apply Filter > Pixelate > Crystallize with the following settings: Cell Size->6.
Apply Filter > Sketch > Chrome with the following settings: Detail->10; Smoothness->0.
Step 4.
Now apply Image > Adjustments > Brightness/Contrast with the following settings: Brightness->+8; Contrast->+55. Then add some colors, apply Image > Adjustments > Hue/Saturation with the following settings: Colorize->ON; Hue->31; Saturation->55; Lightness->0. And that's it.