


Step 1.
Open a new document that is 770 x 500 and fill the background with white
Step 2.
Create a new layer & get out the pencil tool, and set it to 1 pixel in diameter.
![]()
Now using the pencil tool, draw 4 lines all the way across the top of your canvas like so:
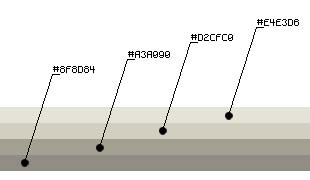
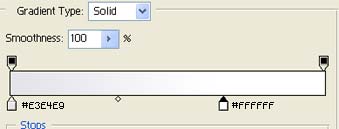
The order of colors I used are:
1 - #E4E3D6 (top)
2 - #D2CFC0
3 - #A3A090
4 - #8F8D84 (bottom)
Step 3.
Create a new layer: Now using the rectangular marquee tool, make a selection on the canvas as I have done here:
and fill this selection with black.
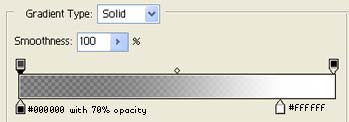
Now double click on the layer, and apply the following blending options:
Gradient Overlay
Stroke

Result:
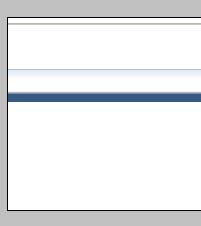
Step 4.
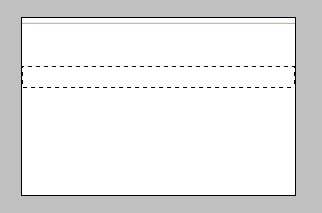
Create a new layer: Again, using the rectangular marquee tool make a selection like this: Notice it is directly bellow the previous box we'd made:

Fill this selection with #: 375A80 and press Ctrl + D to deselect.
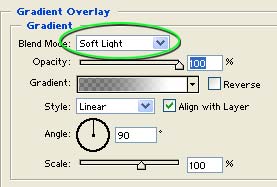
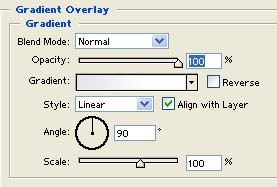
Double click this layer, and apply the following blending options:
Gradient Overlay:
Result:

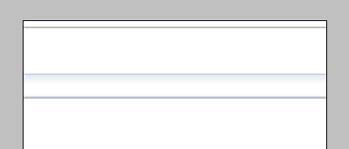
Step 5.
Create a new layer: Get out the rectangular marquee tool, and make a selection directly bellow this box like so:
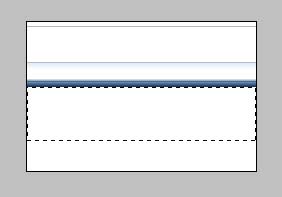
Fill this selection with: #FFFFFF (white) and press Ctrl + D to deselect.
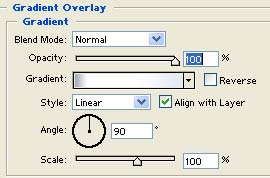
Double click this layer, and apply the following blending options:
Gradient Overlay:
Result:

Step 6.
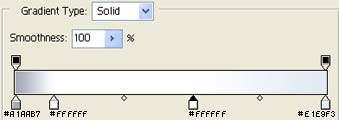
Now set your foreground color to: #C8CED8, get out the pencil tool and set it up like so:
![]()
(2 pixel width)
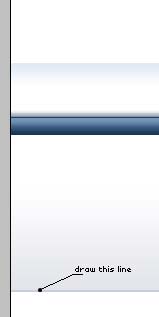
Now draw a 2 pixel line at the bottom of the new box we just made that spans the entire width of the canvas:
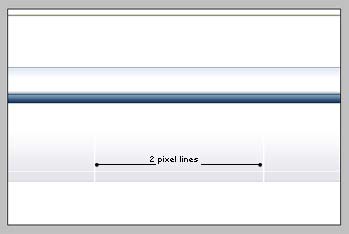
Step 7.
Now set the foreground color to: #FFFFFF (white), and set the pencil tool to 1 pixel instead of 2:
![]()
Now draw a 1 pixel line across the canvas about 1/4 inch above the bottom of this box like so:
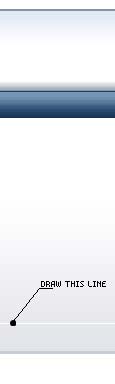
Step 8.
Now change the thickness of the pencil tool to 4 pixels, and draw two vertical lines up this box to separate it as I've done here:
This separates our content areas for the layout.
Step 9.
Create a new layer, using the rectangular marquee tool make a selection like so for the header:
Fill this selection with #FFFFFF, and press Ctrl + D to deselect.
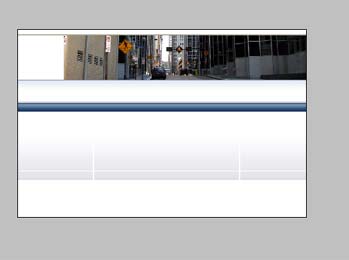
Step 10.
Using the previous box as a guide, place an image into the header area. You can use a Render, or whatever you'd like. I've used a photo of a city street with a massive black tinted glass windows all over it.
Finishing Touches:
At this point you want to continue to refine your header, adding small details. Here I've added a "swooping" overlay and applied a company logo.
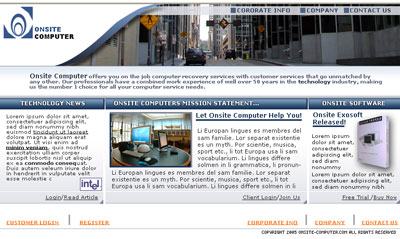
This concludes the tutorial. What you'd want to do here is continue to add small details to the layout to make it your own. Here's what I ended up with after adding text, and a few minor details:
I hope you've enjoyed this tutorial and have learned a few things along the way!