


Step 1.
Download and open the 'blue shatter' image, available here. (or open a render of your own, any render will work for this tutorial)
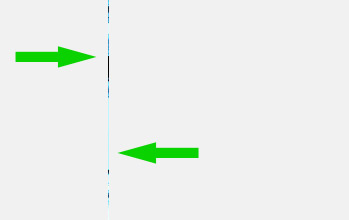
Step 2.
Grab the 1 pixel horizontal marquee tool
![]()
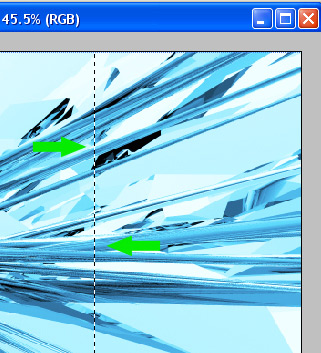
Step 3.
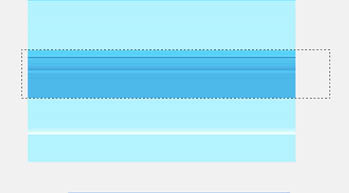
Make a selection on your render anywhere on the photo, I was aiming for a section with a little bit of black
Step 4.
Press Ctrl + C to copy the selection of the render and minimize the window (we'll use the render again later...)
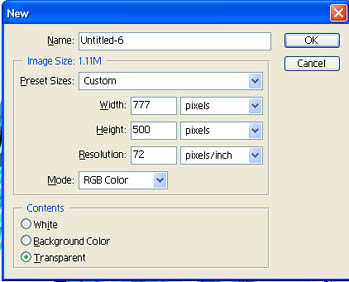
Step 5.
Open a new document. Width 777 height 500 (777x500) and name it "layout"
Step 6.
Fill the background with: #F1F1F1.
Step 7.
Create a new layer, and press Ctrl + V to paste the 1 pixel snippet of our render. place it near the center of the canvas.
 .
.
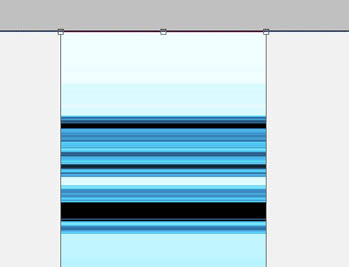
Step 8.
Next press Ctrl + T, or go to: edit->free transform. to open up the free transform tool. Move the cursor over the center of the pasted 1 pixel render until you see a dual arrow pointing both right, and left. Hold down your mouse and drag it to the right, you'll notice that this will "stretch" the 1 pixel snip from the render. This is known as "pixel stretching" (incase you didn't know that already). Stretch it out until you can get a good look at the design such as I have done here and press "enter" on your keyboard to finalize the "stretch".
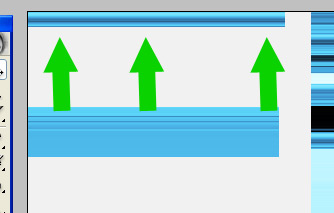
Step 9.
Now press 'V' on your keyboard to get out the Move tool. Highlight a section of the stretched image, and move it up and down to get a good look at the whole thing. What we're looking for are sections that we can use for our pages borders.
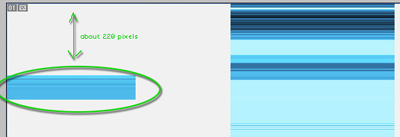
Near the bottom I found a good section for the buttons. Get our the rectangular marquee tool and select this area. (or a similar area)
Pay special attention to make sure that the top and bottom are lined up precise with the section you're going to use.
Once you've gotten the area selected, press Ctrl + C to copy it, create a new layer, and press Ctrl + V to paste the image.
Step 10.
Press V to get our the "move tool" and position the pasted section approximately 220 pixels from the top of the canvas, off to the left, such as I have here.
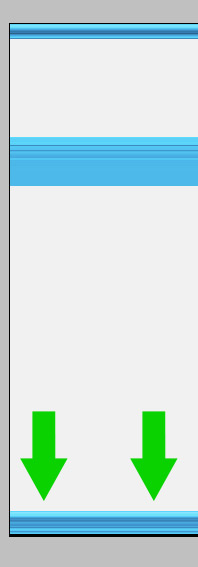
Step 11.
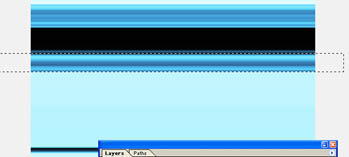
Now get back to the layer with our stretched render image, and move it around until you find a nice section for the top of our page such as I have here.
Step 12.
Once you've got it selected, press Ctrl + C just like before to copy it. create a new layer, and press Ctrl + V to paste it. Next position it at the very top of the canvas such as I have here.
Step 13.
Okay, back to the stretched render one more time. This time we're looking for a piece that will be the footer of our web page. I've found this section here. This section is probably the least important as not many people will even notice it, but just grab a nice little slice and place it near the bottom such as I have here.
Step 14.
Now that we've gotten that our of the way, go ahead and delete the layer with the stretched render on it by right clicking, and selecting "delete layer", or alternatively drag it over to the trashcan.
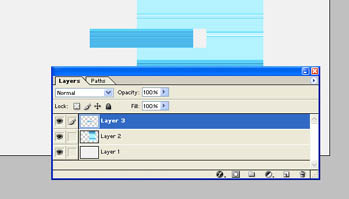
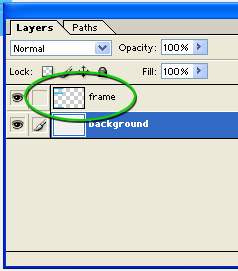
Step 15.
Now you should have 4 total layers. Merge the top three (the three pieces we just pasted) by highlighting the top most layer, and pressing CNTRL + E (merge) two times, and name the new merged layer "frame".
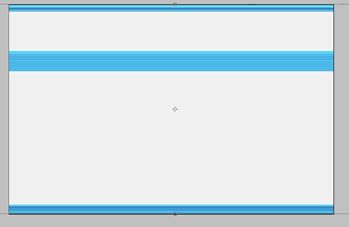
Step 16.
Once all three layers are merged, press Ctrl + T to open up the "free transform tool", and drag the frame so that it covers the entire canvas such as I have here. You might have to pull in both directions just make sure that all three of them span all the way from the left, to the right. and press Enter on your keyboard to finalize the transform.
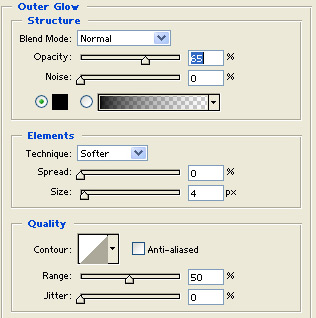
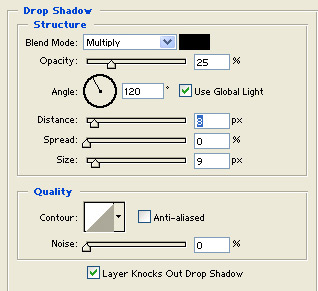
Step 17.
Double click on the "frames" layer and add the following layer styles to add a little depth:
That completes the "frame" of our layout, you are now ready to continue on to Vol. 2 of our full layout tutorial, which is where we'll start working on the header.
Continue on to vol. 2 Header Creation.