
Photoshop channels are a great tool for many purposes.
You can use them for complex selection masks, applying filters with mapped opacity and even as a creation tool.
So let's start discover them!!
Open up Photoshop, and open a new image, the one you prefer.
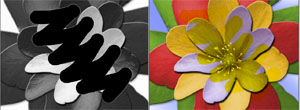
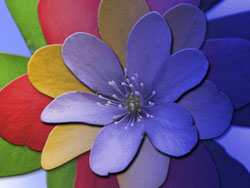
For this tutorial we are going to use the following one:
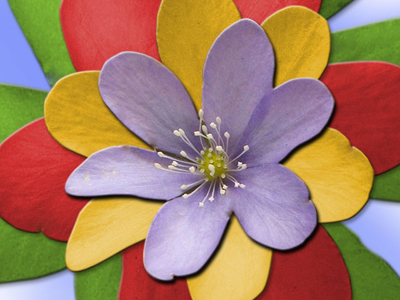
If you wish to use the same image you can download it by clicking here.
The channels tab:
Now, to open up the Channels panel simply click on its tab, just next to the Layer panels. (If you don't see it you can open it up through the Window -> Channels menu).
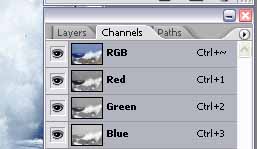
For RGB images (the one used for this tutorial) you'll see 3 main channels, each for one of the basic color of the image (R, G and B) and one containing the complete image.
If it was a CYMK image you'd have seen channels for Cyan, Yellow, Magenta and Black.
Understanding default channels:
By clicking on each of the Red, Green and Blue channels you see different black and white versions of your image. If you want to return back to the original colored picture simply click on the RGB channel (this mixes the information from all of the channels mentioned before to recreate the correct colored picture).
You may wonder why clicking on the Red (for example) channel let you view a greyscale image. This is due to the channel's nature itself.
A channel is simply a 256 values greyscale mask linked to your image.
The default channel Red is just a map of where the pure Red color can be found in your image. The information is coded in 256 greyscale value meaning that if one pixel in the channel is white then that pixel contains full Red color (but may contain also some Green or Blue).
It's probably much easier to visualize it rather than explain it with too many words.
Let's analyze the three images:
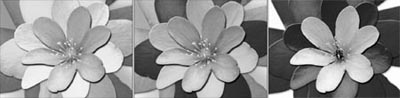
The first is the Red channel. As you can see it's white where the original image was red and yellow (in the RGB color space yellow=red+green).
The second channel is the Green one. Here there's a almost black color in the third petal ring, which is red and thus contains no green color.
The third channels is for Blue color. Almost completely black except for the background and the first ring (which were light blue and lilac).
Note: These are the default channels, if you modify them you'll affect original image. But you can give it a try and see what happens (that's a very useful technique to learn faster!)
Just take a big brush and start painting some white strokes on the blue channel. Back to the original and ... you increased blue values!
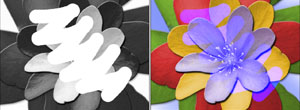
If you paint black strokes on the first ring you subtract blue and the main flower will eventually be orange-yellowish.
(remember to roll back to the original image before going on with the tutorial!)
Creating new channels:
Now that we understood the way color weights are painted onto the image it's time to create new channels and see how to use them.
To create a new channel simply click on the small icon on the bottom right part of the Channel Panel:
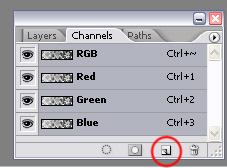
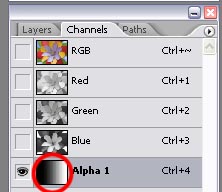
Now you should have a brand new channel names Alpha1, completely black.
When working with standard channels (not the default ones) you must remember that they are simple masks linked to your original image. This means that creating and modifying new channels is NOT going to affect your image any way. Yes, you can safely play around without caring ;)
Create soft selection
A channel contains complex selection information. It works like this:
If you paint with full black brush on a new channel means that you don't want to select that part of the image.
If you paint with full white brush on the channel means that you want to select that part.
Every grey filling in between means that you select that zone only partly, in other words you'll apply further changes in a softer way (with less opacity).
A channel is a greyscale representation for a selection.
So let's try out some of these soft selection!
Select the Gradient Tool and fill your Alpha1 channel with a lovely, smooth gradient from black to white. Then load the selection by Ctrl-clicking on the thumbnail of the channel in the Channel Panel:
You should see now the usual marching ants, but don't get fooled! The selection is as soft as you painted it, the ants just march along the 50% grey perimeter. (which should be more or less centered if you dragged the gradient tool from one side to the other).
Now that the selection is loaded simply click on the RGB channel to see your original image and go back to the Layers tab.
If now we apply some filter we'll see the selection in action:
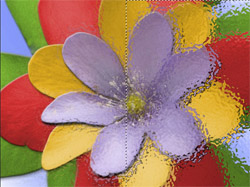
That's a simple Ocean Ripple filter, as you can see where the mask was white the filter applies 100%, then fades to 0% following the gradient we created in the channel.
The same way you can modify image levels, brightness, contrast and so on:
This is a modification in the Image->Adjustments->Hue/Saturation (check the colorize option and select the color you want with the Hue bar)
The one we used is just a very simple selection, made with a single gradient. Many interesting things can be done with some more complex work.
So what can I do with these soft selections?
Now that the misery of Photoshop Channels are revealed, your question could be: how can I use these techniques in my ordinary photo retouching?
Channels are a professional and extremely powerful tool for the creation of complex selection masks.
Whenever you need to select something in your scene and you obtain no decent result with the standard tools (like lasso tool for example) probably Channels are the solution you were longing to see.
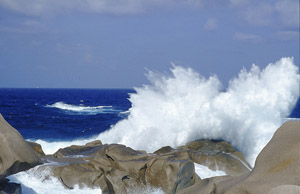
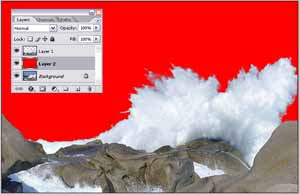
Check out our Difficult Background Removal tutorial to see how to quickly and precisely select a huge wave breaking on the rocks.
(you can use the same technique to select the hair of a person, a furry animal and every time there's no way to select the object by hand)
Click here to start now!