


This Photoshop tutorial teaches you to create your own Painting with Water color effect.The dimensions used in this tutorial is : width 300px, height 300px and resolution 72px. The essential tools required for this technique are Brush, Smudge and Burn Tools. At the end of this tutorial you will be able to create a Modern art water color Painting using this technique.
Create a new document of dimensions 300 x 300 px with white background.
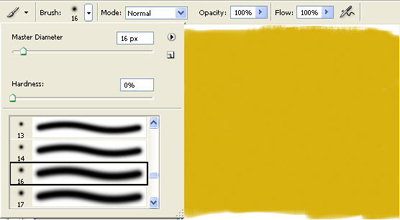
Set the foreground color to #dab00e. Select the Brush tool (B)
![]() . Set the soft brush of diameter 16px and click on create a new layer button
. Set the soft brush of diameter 16px and click on create a new layer button
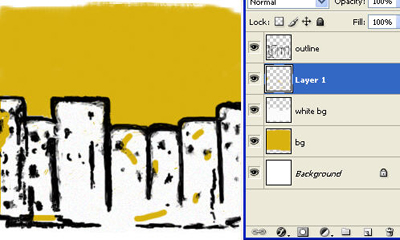
![]() in the layers palette. Paint a new background color as shown in the image. Name the layer as bg.
in the layers palette. Paint a new background color as shown in the image. Name the layer as bg.
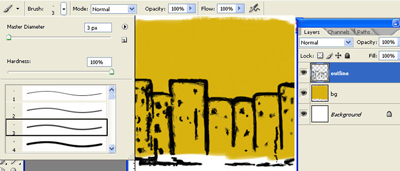
Press D to load the default colors. Click on the new layer button
![]() in the layers palette. Select the brush tool (B)
in the layers palette. Select the brush tool (B)
![]() and then from the Brush tools options select the hard brush of 3px diameter. Create an outline for buildings. Name the layer as outline.
and then from the Brush tools options select the hard brush of 3px diameter. Create an outline for buildings. Name the layer as outline.
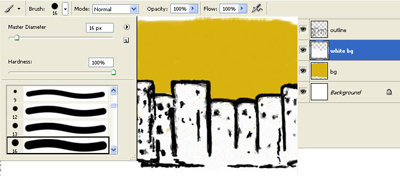
Press X to inverse the colors. Now your foreground color should be white. Click on the new layer button
![]() in the layers palette. Place the new layer below the outline layer. Select the brush tool (B)
in the layers palette. Place the new layer below the outline layer. Select the brush tool (B)
![]() and then from the Brush tools options select the hard brush of 16px diameter. Paint a white color to the building. Name the layer as white bg.
and then from the Brush tools options select the hard brush of 16px diameter. Paint a white color to the building. Name the layer as white bg.
Click on the new layer button
![]() in the layers palette and create a new layer above the white bg layer. Select the brush tool (B)
in the layers palette and create a new layer above the white bg layer. Select the brush tool (B)
![]() and then from the Brush tools options select the hard brush of 6px diameter.
and then from the Brush tools options select the hard brush of 6px diameter.
We will shade the building with 3 different colors. First set the foreground color to #dab00e and make some strokes.
Next set the foreground color to #0c2e5d and make few strokes.
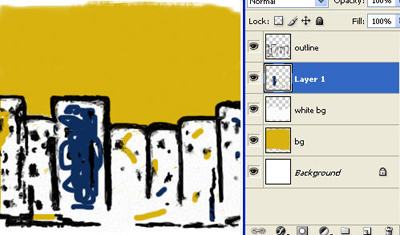
Then set the foreground color to #dbea6f and make few other strokes.

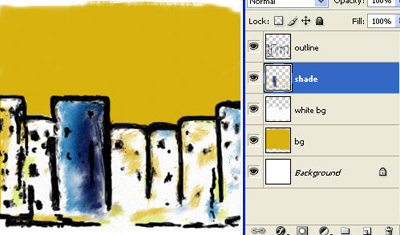
Select the smudge tool
![]() and smoothen the stokes you have created. You can also use the Burn Tool
and smoothen the stokes you have created. You can also use the Burn Tool
![]() darken some of the areas.
darken some of the areas.
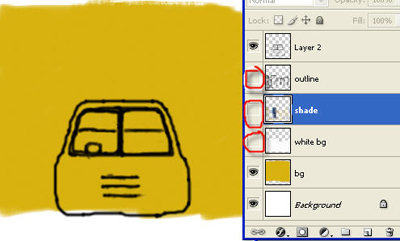
Press D to load the default colors. Click on the new layer button
![]() above the outline layer in the layers palette. Select the brush tool (B)
above the outline layer in the layers palette. Select the brush tool (B)
![]() and then from the Brush tools options select the hard brush of 2px diameter. Create an outline for Car. Name the layer as car-outline. You can hide the Outline, White bg and the shade layers by clicking on the Eye button in the layers palette corresponding to these layers, so that you can get a clear picture of what you draw.
and then from the Brush tools options select the hard brush of 2px diameter. Create an outline for Car. Name the layer as car-outline. You can hide the Outline, White bg and the shade layers by clicking on the Eye button in the layers palette corresponding to these layers, so that you can get a clear picture of what you draw.
Next we will create the tyres for the car. First create a new layer and using the Brush tool (B)
 draw the tyres for the car. Name the layer as tyres and position them below the car-outline layer.

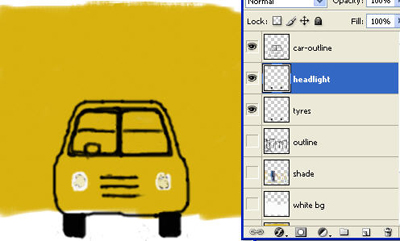
Let's create the headlight for the car. Press X to inverse the colors. Create a new layer and using the brush tool draw circles for the headlight. Name the layer as headlight. Press D and then shade the headlight using the black color.
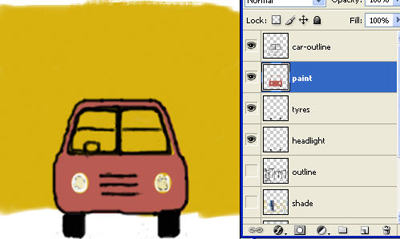
Next set the foreground color to #bd5952 and paint the car. Create a new layer and select the brush tool and paint the car.
Unhide the Outline, shade and the white bg layers.
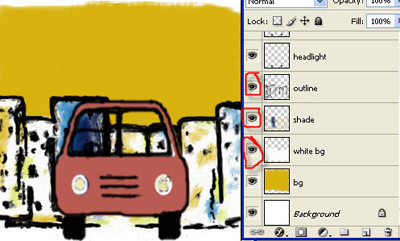
Select the Burn Tool
 darken some of the areas of the paint layer by moving the cursor randomly over the layer.
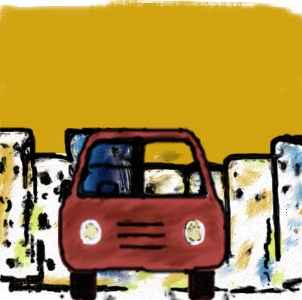
The final image should look like the one below: