Ok this tut is a simple one. It will introduce you to the use of blend modes and filters.... so open up photoshop and get going.
1. Open a new canvas (ctrl+N). For this tut I am going to use width-400(px) and height-400(px) with resolution 72(pixels/inch). Make sure u set the mode to RGB Color. I am setting the contents to 'white'.
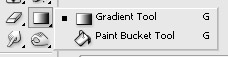
2. Make a new layer (shift+ctrl+N). Get the Paint Bucket Tool(G). Sometimes the gradient tool comes up so simply right click it and select the paint bucket tool.
Make your new layer black.
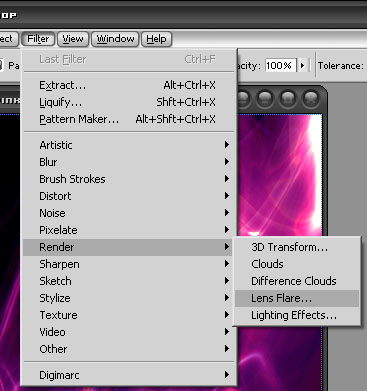
3. Go to Filter>Render>Lens Flare.
Make a flare anywhere on your canvas. Do this 3 more times. Make the flares anywhere on the canvas.(The flares and the black background should be on the same layer(layer 1)). Here's how mine looks-

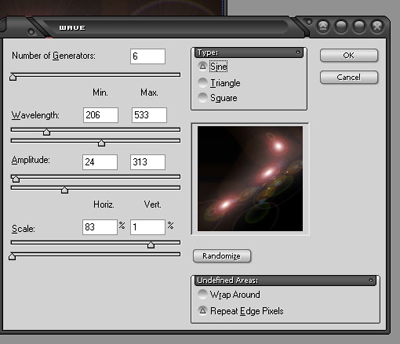
4. Go to Filter>Distort>Wave. Mess around with the settings till you get what something you like.Here are my settings-
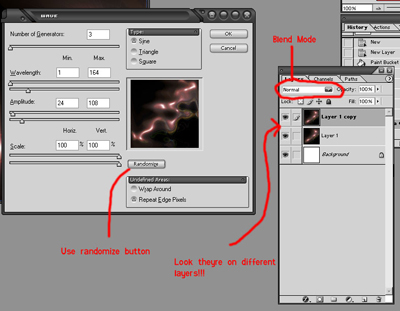
5. Duplicate the layer (ctrl+J). Go to Filter>Distort>Wave. Mess around with the settings again. Use the randomize button to get different results. The more different this wave is from the last wave, the better.
6. Change the blend mode. I put mine to Color dodge but you can put it to whatever mode you think looks best.
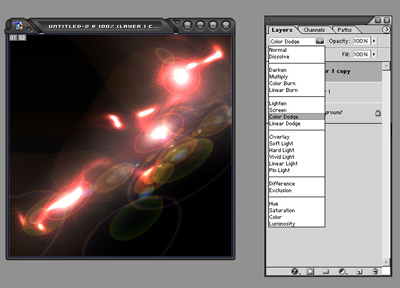
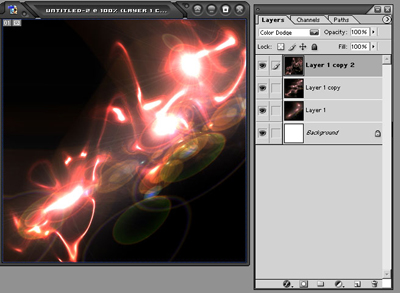
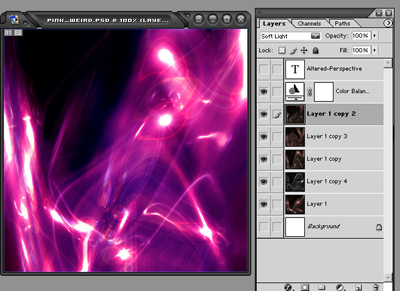
7. Repeat Steps 5 and 6. Here's how mine looks-
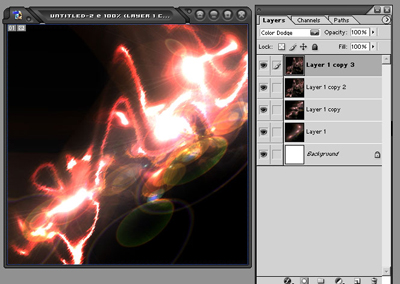
8. You can also Try out different filters. I duplicated one layer and did filter>brush strokes>sprayed strokes. I kept the layers blend mode color dodge. here's how mine looks-
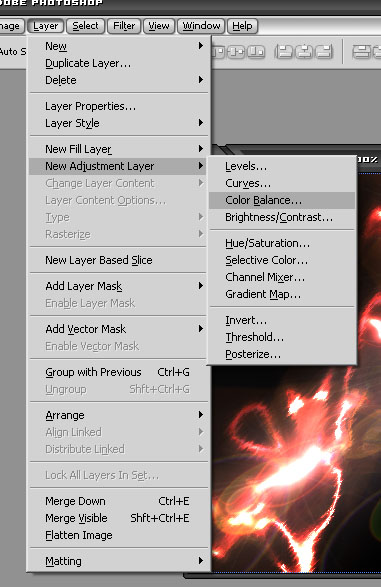
9. To add color go to layer>new adjustment layer>color balance, and mess around with the settings.
10. Now to add text. Select the text tool(T) and click anywhere on the canvas(this should make a new text layer).Type whatever you want. Here's how mine looks-
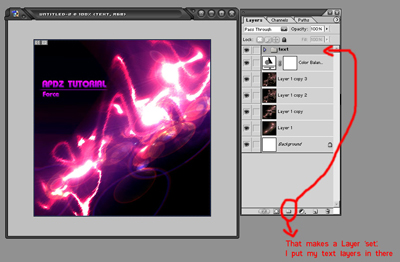
11. Your basically done now. Just make sure you add a border to your piece. A border can be as complicated or as simple as you want. To make a simple border make a new layer(ctrl+J), Press ctrl+A (should select the outside edges of the canvas). Go to edit>stroke.Set the size to one pixel and the Location to 'inside'.
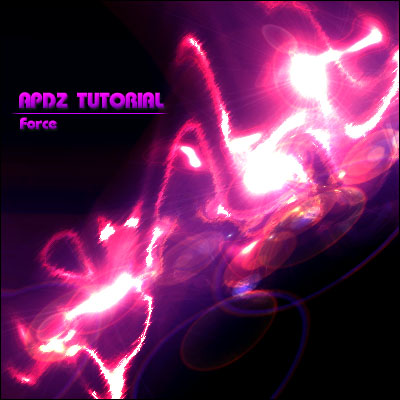
Here's my finished result-
Here's what I did earlier using the same method-
Quick Summary
Duplicate Layer- ctrl+J
New canvas- ctrl+N
New layer- ctrl+shift+N
Paint bucket- G
Text tool- T
Select all- ctrl+A
Adding color layer- layer>new adjustment layer>color balance
Adding color to layer- ctrl U
Adding color to layer- ctrl+B