Create a new document in photoshop around size 400 x 400 Pixels.
use the Paint Bucket tool to fill the entire canvas black.

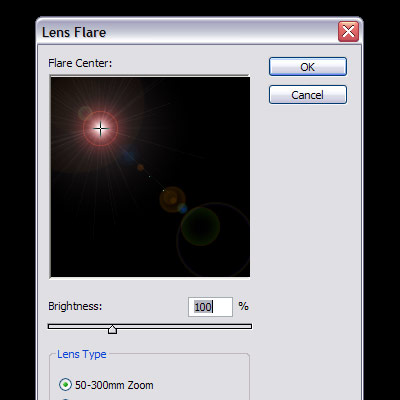
Now, go to Filter > Render > Lens Flare, and create a 50-300mm Zoom Flare, anywhere on the page
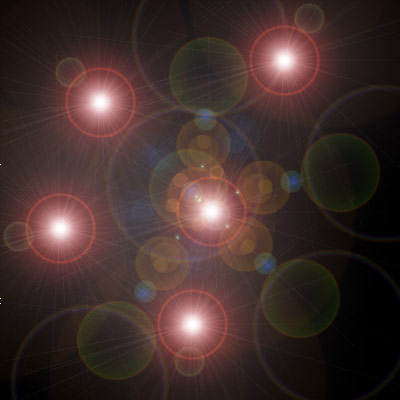
Repeat Step 3 several times so that you have 4 or 5 flares across the screen.
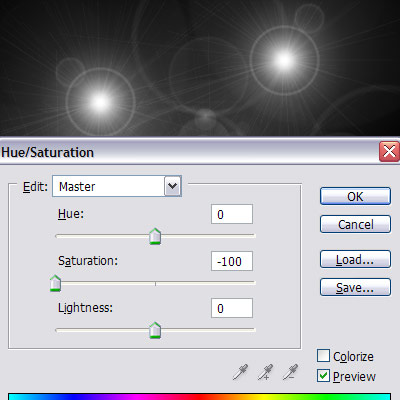
Now press Ctrl + U to bring up the Hue/Saturation box, and set the Saturation to -100.
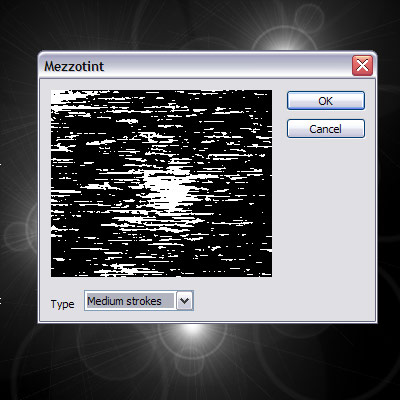
Next we go to Filter >Pixelate> Mezzotint and use the setting of medium strokes.
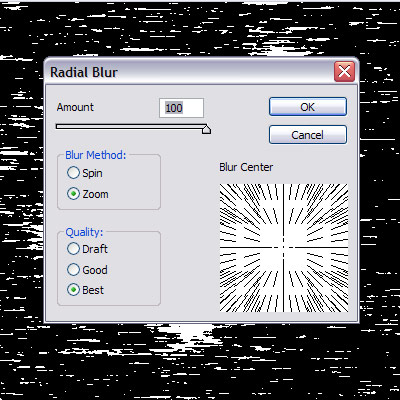
Next go to Filter > Blur > Radial Blur and use the settings in the picture below.
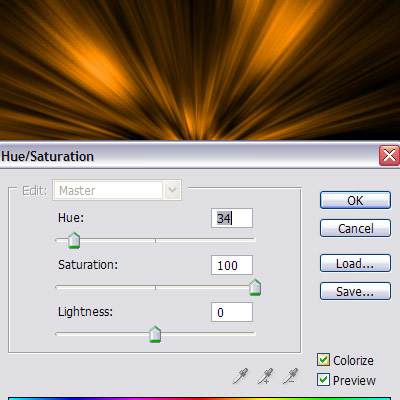
Press Ctrl + F This will repeat the last step again and blur the image even more. Now press Ctrl + U to bring up the Hue/Saturation box, and use these settings in the picture below.
Now select the 1st layer, and drag it into the new layer button.

Next set the Blending Mode of this new layer, to Lighten.

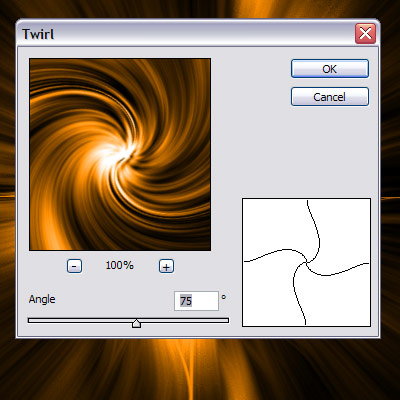
Now go to Filter > Distort > Twirl and use a setting Of 75.
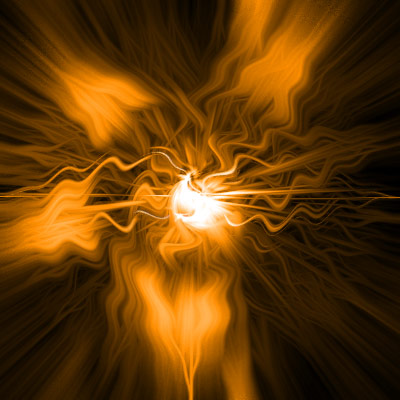
This is what I got for a result, but you can alter step 12 to your liking. In fact, you don't have to use the twirl effect, you can you almost any filter found in Filter > Distort >, the Wave filter, and ZigZag filter, both produce great images as well.

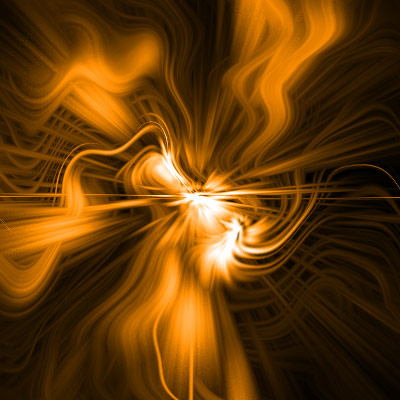
Final product is below.