

This tutorial will teach you how to make a signature with using grunge and smudge effects.

I will teach you how to make a signature similar to that above. Throughout this tutorial, I will be using that signature as an example.
What you will need for this tutorial:
- a nice cut render, I prefer to use a good looking female, preferable the head.
- and the brush I used.
You can download both of these here
Step 1
Ok now lets get started with making the signature background:
Go to: File > New and then Use the following settings:
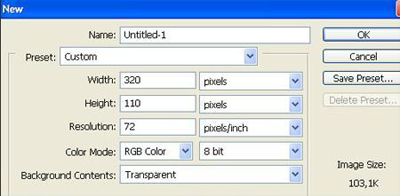
Step 2
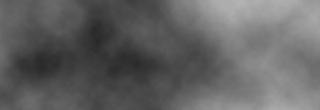
Then make your background color black and foreground color white by pressing D.
Now go to Filter > Render > Clouds until it looks somewhat similar to this: (don't worry, it doesn't have to look exactly like it).
Step 3
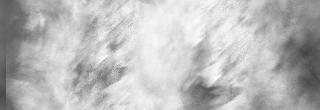
Make a new layer on top of it with Ctrl+N.
Now take out your rust and grunge brush and make a nice white spot in the center of your signature where your render will be. You can change the layer settings later if its to white. My sig now looks like this:
Step 4
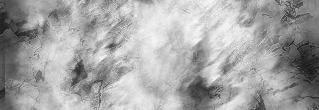
Now take the grunge brushes I provided and on a new layer brush a bit on the left and right side of your signature with a black color.
Step 5
Now open up your render in photoshop in a new document, and then select it with ctrl+a, and copy and paste it on a new layer in your sig.
Now go to Layer > Duplicate layer, and you will have 2 layers with a render on it.
Hide your first layer by pressing on the little eye in front of it.
Your sig will now look like this:

Step 6
Now we can begin with the smudging
With the second, visible render layer selected press R to bring up the smudge tool.
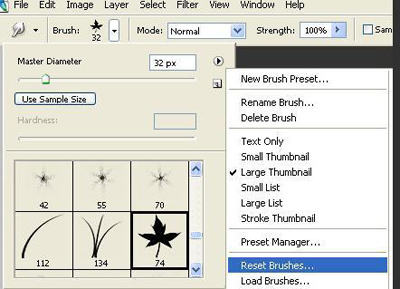
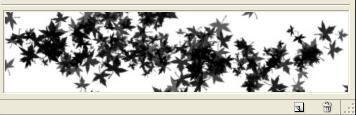
Then select the leaf kinda brush I also selected and set the Master Diameter to 32.
[if you cant find the brush, reset your brushes (highlighted below), it wont delete anything, it will just list the default brushes]
Step 7
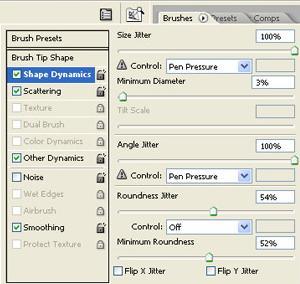
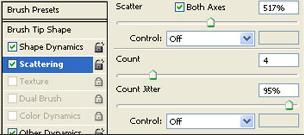
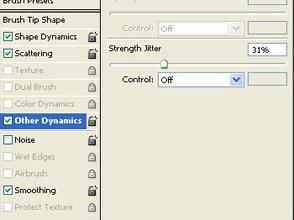
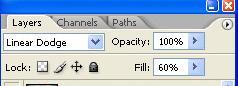
Now we are going to set all the settings for the smudge tool, you don't really need to follow my settings if you know what you are doing, and you can play a bit with them for different results. With the second render layer and the smudge tool selected go to the brushes menu on your top right and use these settings:
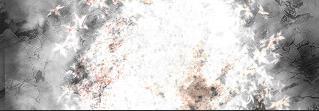
If you did it correct it will now look something like this:
Step 8
Now you can begin to smudge the second layer by clicking on it and then drag it a bit. Click again and drag again etc.
Now your sig will look like this:
Step 9
Pretty ugly eh? that's why why we do this:
And voila, looking much better now :)
Step 10
Now make your first render visible again and the sig should look something like this:

Step 11
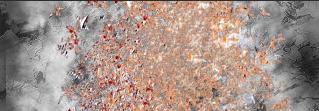
Now we are going to place some simple colors on the background, it can be done in a lot of ways, but this time I just choose the easy way and I put a color balance above the very first layer (with the clouds on it). Play a bit with the color settings until you think it looks nice.
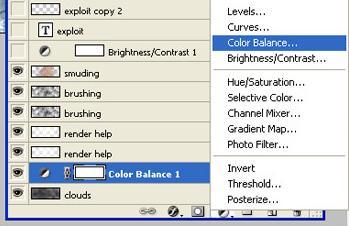
This is how mine turned out:

Step 12
Now all we need to do is add some text and put a nice border around it.
First the border:
Make a new layer on top of every other layer, now press Ctrl+A, and it will select your whole sig. Then go to Edit > Stroke and add a one pixel border around your sig, it looks best when you use a color that is in your sig.
Now on to the text, I didn't want to make the text to big, because we want people to look at the brushing and smudging, and not at the text. Make a new layer under your border layer and type your name. I used these settings:
Some general tips for the text:
- use a color that is in your sig,
- use a font that is easy to read
- and always use the AA settings.
Now I used Edit > Transform > Rotate it until you get something like this, and put the text in a corner:
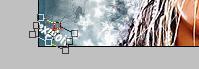
As you can see I also added a little butterfly on the dot on the i, just to give the text that extra touch;
This is how I did it:
- right click on your text layer and choose Rasterize Type
- now zoom in and with the Eraser tool (E) delete the dot on the i
- make a new layer
- then I added the butterfly like brush (i think it comes with ps) and placed it on the right spot
Completed
If you followed everything here, your sig should look something like this and you are finished :)