


In this tutorial I will show a basic outline of a nice orb-like logo template with a sleek metal border that is both easy to create and easy to build upon to personalize as your own.
Step 1.
Create a new white canvas (or whatever background you want, it doesn't matter) at whatever size you'd like your "orb" to be,preferably a square canvas. I made mine about 500 x 500 px.
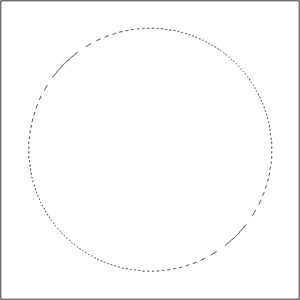
Step 2.
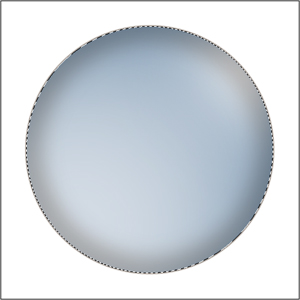
Create a new layer and on it using the elliptical marquee tool,make a perfect circle (hold down shift while dragging) that takes up avast majority of your canvas.
Step 3.
Right click in the circle (with your elliptical marquee tool still on) and go to "Fill...". Fill the circle with 50% grey with default settings.
Step 4.
Go to the circle's blending options (right click on the layer, "Blending Options...") and put in these settings:
Color Overlay:
Blend Mode: Normal
Color: I used #009cff (blue), but you can choose your own color
Opacity: I used 37% to match my color
Stroke:
Size: 2 px
Position: Outside
Blend Mode: Normal
Opacity: I played with mine to match my color, and put it to 33%
Fill Type: Color
Color: #000000 (black)
Step 5.
Now we add some light. Get out your paintbrush tool and change the brush to a large soft brush (the one that blurs out), making it a bit smaller than the orb itself. While on your orb layer, go to Select> Load Selection, and load the outline of the circle (it should be on Channel: Layer 1 (or whatever you named it) Transparency, New Selection. With that selection make a new layer above your orb (CTRL +Shift + N) and change your foreground color to white (#FFFFFF). Go to Select > Modify > Contract and contract a few pixels. It depends on the size of your orb, but 5 pixels should be fine for anything around 500 x 500 px. Now, with your brush and the settings I said earlier and of the new layer, click twice near the bottom left of your orb, as the picture below shows.
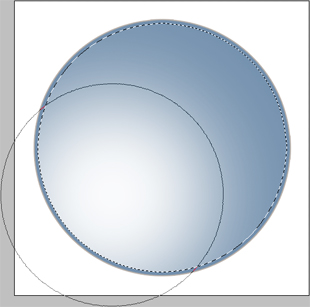
Step 6.
You can now deselect the contracted circle (CTRL + D) and go back to the orb layer and load the selection of it again like we did instep 5. This time do not contract the selection and go back to your new layer with the light glare. Go Filter > Distort > Spherize... and use these settings:
Amount: 100%
Mode: Normal
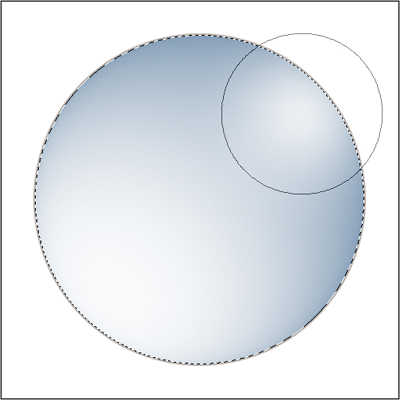
Step 7.
With the same selection from step 6 Spherize the layer again but this time have the Amount at 30%.
Step 8.
With that same selection from step 6 and step 7 make a new layer and get your brush tool out, changing the size of the soft brush to about half of what your large one was. Now, using this brush and the selection, click in the top right corner of your orb (on the new layer)like shown below, but this time, only click once.
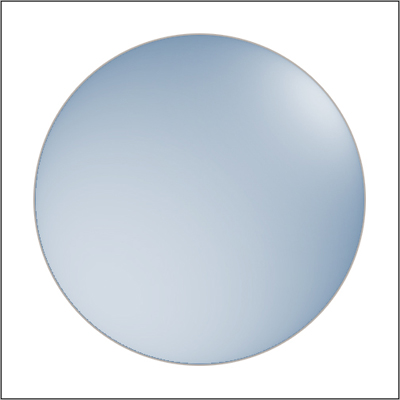
Step 9. With the same selection from step 6, step 7, and step 8, and on the same layer you just did the new white glare on, go to Filter >Distort > Spherize... and set the Amount to 100%.
Step 10. Lower the layer opacity of the large light glare to 70% and the small one to 90%, so it resembles something like the picture below.
Step 11. Now lets add some more depth. Load the selection of the orb if you've deselected and make a new layer that is above all three you've made so far. Right click in the selection with any marquee tool and goto "Stroke..." using these settings:
Width: For my size I used 10 px.
Color: #000000 (black)
location: Inside
Mode: Normal
Opacity: 100%
Step 12.
With the same selection on the layer with the black ring go to Filter > Blur > Gaussian Blur... and, for my size, I used about 20pixels to get this:
Step 13.
Change the layer's (the one with the black ring) opacity to 70% and change it to Overlay.
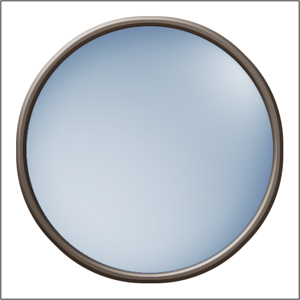
Step 14. Make a new layer and move it underneath your orb layer. Load up the orb selection like we've done before and go to Select >Expand... and, at my size, I put it to about 17 pixels (this is how big you would like your metal ring around the orb to be). Right click on the selection with a marquee tool and go to Fill... and fill it with 50%grey. Load up that orb selection again and cut out the center of the metal circle (CTRL + X).
Step 15.
Lets add some Blending Options to the metal ring. Again, right click on the layer and click on Blending Options... and change these settings:
Bevel and Emboss:
Style: Inner Bevel
Technique: Smooth
Depth: 1000%
Direction: Up
Size: It depends on your ring size, but for mine I put it to 6 px
Angle: 45 degrees
Altitude: 30 degrees
Highlight Mode: Screen, #FFFFFF (white) at 75% opacity
Shadow Mode: Multiply, #323131 (dark grey) at 75% opacity
Color Overlay:
Blend Mode: Normal, #000000 (black) at 28% opacity, to make the ring darker (this step can be skipped if you like it's darkness already)
Gradient Overlay:
Blend Mode: Normal at 30% opacity
Gradient: Black to Transparent to make one edge of the ring darker
Style: Linear, Aligned with Layer
Angle: 45 degrees
Scale: 100%
Final Touches
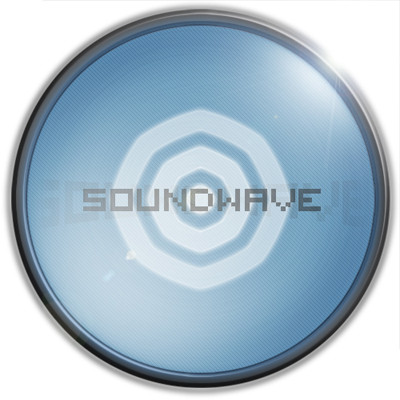
For my personalization I added in a nice blue glow from the orb (loaded the orb selection, made a stroke about 4 px big, and Gaussian Blurred it and put it under the orb and above the metal ring).I put in a simple shadow for the ring to give it some more realism, and I added in my screen name (using Visitor's Font (Visitor TT2)) and added in a shadow of it in the background, warping it using the text bar along the top of the screen and putting the layer opacity fairly low. After that I made a cool little target-type logo in the center by contracting the orb selection and making 3 rings with a nice blue outer glow. I then added in a diagonal line pattern across the orb and also alight circle pattern around it to give it some texture, and threw in an ice lens flare in the top right corner.
Here's my result:
You can do whatever you'd like with your orb; it's up to you to come up with some creative ideas to make it your own.