

Through this Photoshop tutorial you will learn to create Modern painting using Photoshop Tools.The dimensions used in this tutorial is : width 300px, height 300px and resolution 72px. This tutorial demonstrates the use of Pen, Rectangular Marquee and Brush Tools. At the end of this tutorial you will be able to create your own paintings using simple techniques in Photoshop.
Create a new document of dimensions 300 x 300 px with background color as #fbf7f6.
Click on the new layer button in the layer palette
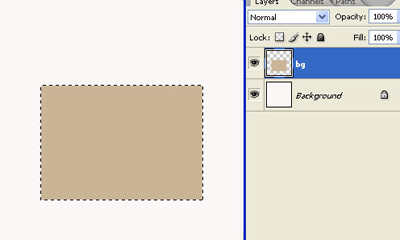
![]() to create a new layer. Set the foreground color to #cbb496. Select the Rectangular Marquee Tool (M)
to create a new layer. Set the foreground color to #cbb496. Select the Rectangular Marquee Tool (M)
 and draw a rectangle. Press Alt + Backspace to fill the layer and then press Ctrl + D. Name the layer as bg.
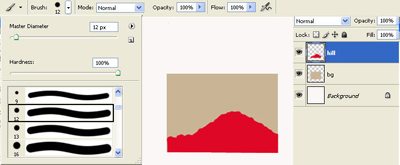
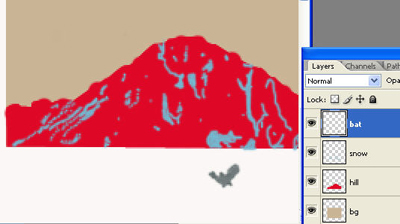
Next change the foreground color to #e70326 and then create a new layer by clicking here
![]() in the layers palette. Select the Brush tool
in the layers palette. Select the Brush tool
![]() and in the tools options select a hard brush of 12px diameter. Make a hill using the brush an name the layer as hill.
and in the tools options select a hard brush of 12px diameter. Make a hill using the brush an name the layer as hill.
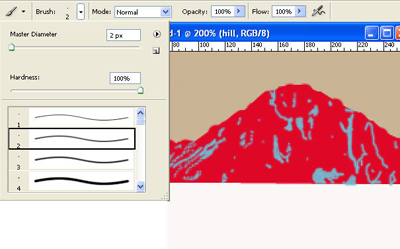
We will next create some snow covering over the hills. First create a new layer, then change the foreground color to #71b9cf and select a Brush tool
![]() . From the tools option select the hard brush of 3px and create strokes as shown in the image. Name the layer as snow.
. From the tools option select the hard brush of 3px and create strokes as shown in the image. Name the layer as snow.
Next we will create few shapes for our painting. First change the foreground color to #6e7c7d. Select the Brush tool
![]() and create the shape of a bat as shown in the image below.
and create the shape of a bat as shown in the image below.
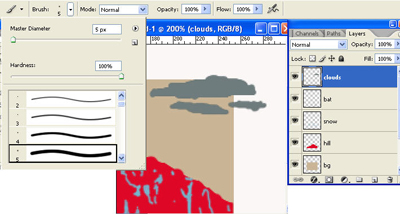
Press Shift + Ctrl + N to create a new layer name your layer as clouds and click ok. Select a Brush tool
![]() . From the tools option select the hard brush of 5px and create clouds as shown in the image. Name the layer as clouds.
. From the tools option select the hard brush of 5px and create clouds as shown in the image. Name the layer as clouds.
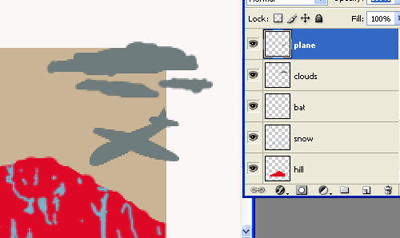
Create a new layer. Select a Brush tool
![]() . From the tools option select the hard brush of 3px and create shape of the Plane as shown in the image. Name the layer as plane.
. From the tools option select the hard brush of 3px and create shape of the Plane as shown in the image. Name the layer as plane.
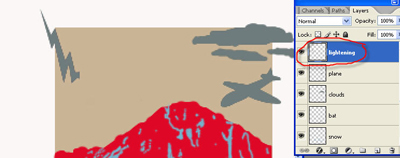
Next select the Pen Tool (P)
![]() and create the shape of lightening. Name the layer as Lightening.
and create the shape of lightening. Name the layer as Lightening.
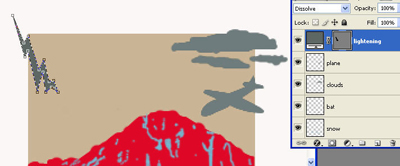
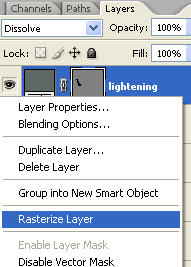
Right click on the Lightening layer in the layers palette and select Rasterize layer.
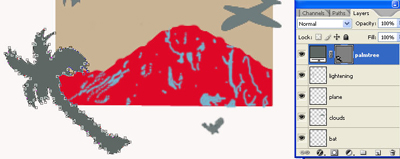
Again select the Pen Tool (P)
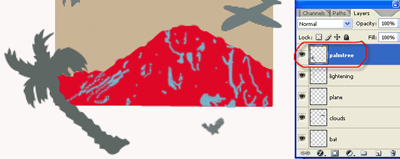
![]() and create the shape of Palm Tree. Name the layer as Palmtree.
and create the shape of Palm Tree. Name the layer as Palmtree.
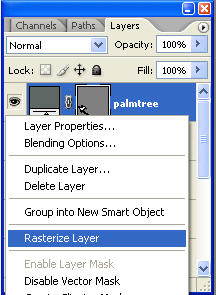
Right click on the Palmtree layer in the layers palette and select Rasterize layer.
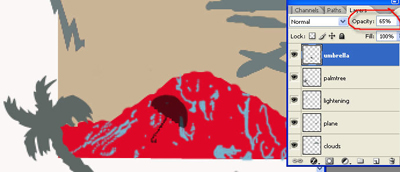
Change the foreground color to #000000. Press Shift + Ctrl + N to create a new layer name your layer as Umbrella and click ok. Select a Brush tool
![]() and create shape of an umbrella as shown in the image. While working on the handle for the umbrella change the diameter of the brush to 1px.
and create shape of an umbrella as shown in the image. While working on the handle for the umbrella change the diameter of the brush to 1px.

Reduce the opacity of the Umbrella layer to 65%.
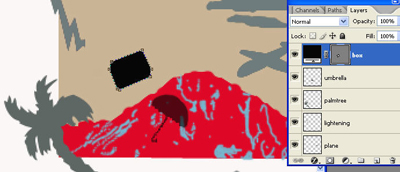
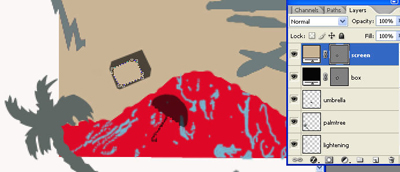
Next we will create a Television Box. Select the Pen Tool (P)
![]() and create the shape of 3d Box. Name the layer as box.
and create the shape of 3d Box. Name the layer as box.
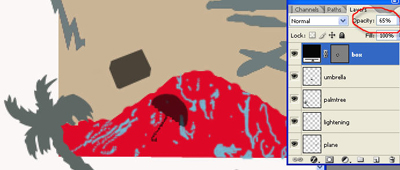
Reduce the opacity of the Box layer to 65%.
Change the foreground color to # cbb496. Select the Pen Tool (P)
![]() and create the shape as shown in the image. This will be the screen for our Television Box, so name this layer as screen.
and create the shape as shown in the image. This will be the screen for our Television Box, so name this layer as screen.
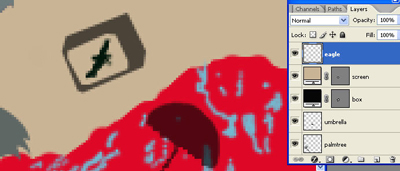
Next we will create an Image inside the Television box. Click on the new layer button in the layer palette
![]() to create a new layer. Select a Brush tool
to create a new layer. Select a Brush tool
![]() and create shape of an Eagle as shown in the image. Set the brush size to be 1 - 2 px.
and create shape of an Eagle as shown in the image. Set the brush size to be 1 - 2 px.
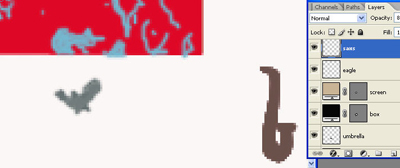
Set the foreground color to #482720. Create a new layer, select the Brush tool
![]() and create shape as shown in the image. Name the layer as saxs.
and create shape as shown in the image. Name the layer as saxs.
Change the foreground color to #000000. Select the Pen Tool (P)
![]() and create the palm branch as shown in the image. Place this layer below the Palmtree layer. Name the layer as shade.
and create the palm branch as shown in the image. Place this layer below the Palmtree layer. Name the layer as shade.
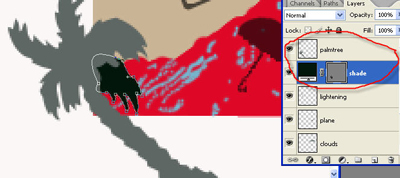
Reduce the opacity of the shade layer to 25%.

Set the fore ground color to #525a4d. Press Ctrl and click on the clouds layer in the layers palette.
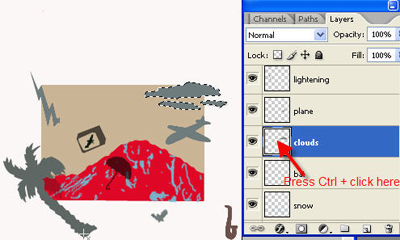
Select the Rectangular Marquee Tool (M)
![]() and from the tools option select the 'Intersect with Selection' button.
and from the tools option select the 'Intersect with Selection' button.
![]()
Left click the mouse button and drag the cursor over the bg layer as shown in the image.
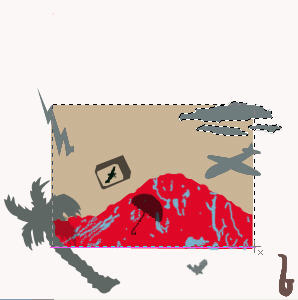
Release the mouse button and you should have a selection like the one below.

Press Alt + Backspace the fill the selected area and then Press Ctrl + D.
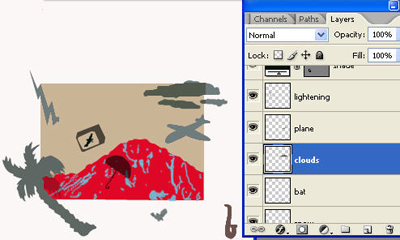
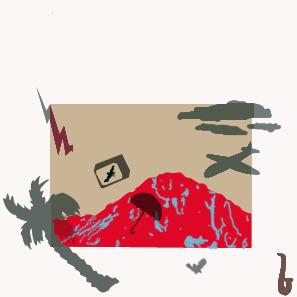
Repeat the step 5 with the Plane and the Palmtree layers. Then change the foreground color to #7e2a3a and repeat the process with the lightening layer. Your image should resemble the one below:
Next we will add the painting effect to our image. Create a new layer. Press D and then Ctrl + Backspace to fill the new layer with white color. Set the blending mode for the layer as Overlay and reduce the opacity to 50% and fill to 40%. Name the layer as Painting effect.

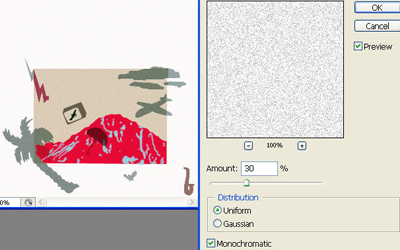
Goto Filter > Noise > Add Noise. Set the amount to 30%, distribution uniform and check the Monochromatic option.
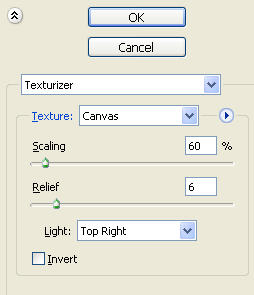
Then goto Filter > Texture > Texturizer. Set the texture as canvas, scaling 60%, relief 6 and light top right.

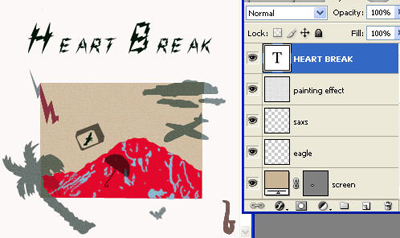
Finally we will give name to our modern art painting. I have used the zap font of size 40pt and the text color #01170b. You can use any font of your choice and type your text 'Heart Break'.
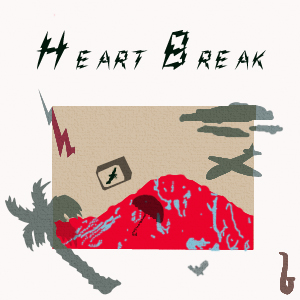
Your final image should look like the one below: