


In this tutorial, you will learn to create a nice looking water drop icon. Final output of the water drop icon can be seen below :

Start by create this circle with ellipse tool :

Add these layer styles in it :
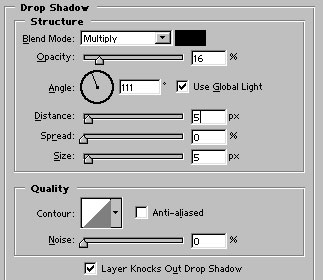
Image, after apply above layer styles :

Create another circle with ellipse tool. This time change the foreground color to #28738A.

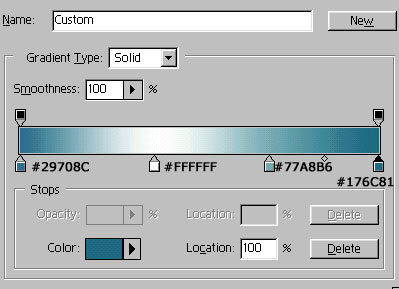
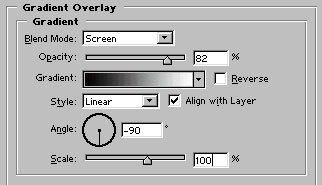
Apply gradient overlay as shown:

Create a new layer. Draw a circle with elliptical marquee tool. Fill the selection with white to black using linear gradient -

Change the blending mode to screen :

Use high feathered eraser and erase most of the middle part as shown :

Press control+j to duplicate the layer and rotate it to -180 degree. After that draw this water drop shape with autoshapes. Use #649AC0 color as foreground color while drawing the shape :

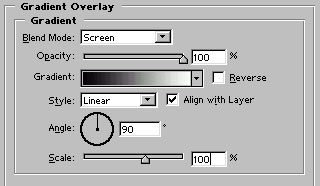
Add these layer styles in it :


Finally, draw two white color shapes with ellipse tool. Our water drop icon is ready :)