Gradient tool
![]() is very useful in Photoshop. It is used to fill more than one color into the selection. This tutorial guides you to create, save and using the gradients.
is very useful in Photoshop. It is used to fill more than one color into the selection. This tutorial guides you to create, save and using the gradients.
Click on gradient tool
![]() or press G from the keyboard. Your option bar will now display the gradient options.
or press G from the keyboard. Your option bar will now display the gradient options.
![]()
Now click on
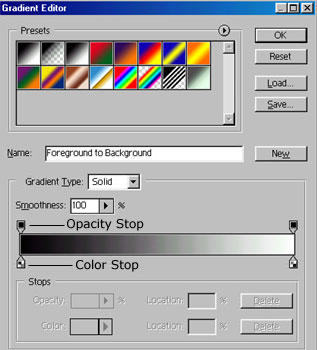
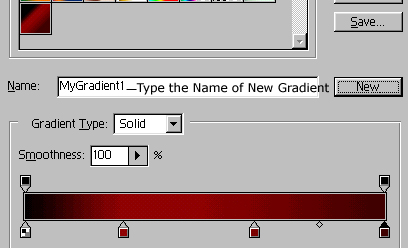
![]() to create or edit the gradient. When you click on it, you will find this dialog box, which is gradient editor.
to create or edit the gradient. When you click on it, you will find this dialog box, which is gradient editor.
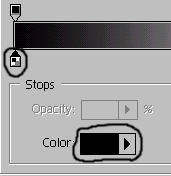
To create a new gradient, click on the color stop. When you click on it you will notice that the color option is active now. Click on the second circle displayed on the image to open color palette. Choose your first desired color.
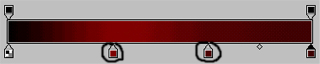
If you want to add more colors, than also click on palette to create more color spots and more colors.
If you want to save your gradient for future use, type the name of the new gradient and click on new. You now have your new gradient.
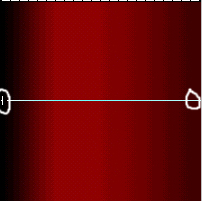
Below are the few examples of using the new "MyGradient1" gradient. Selection filled by Linear gradient
![]() . White circles show the starting and end points.
. White circles show the starting and end points.
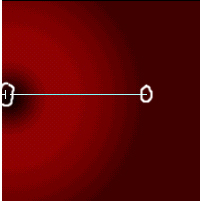
Selection filled by Radial gradient
![]()
Selection filled by Angular Gradient
![]()

Selection filled by Reflected Gradient
![]()
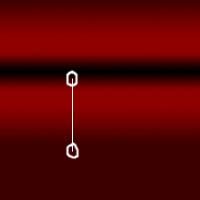
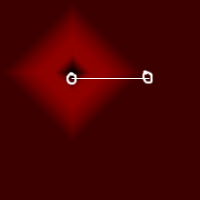
Selection filled by Diamond Gradient
![]()