1. First of all to open a new Document. Go to Menu select File > new and then a new document will appear. In the new Document type the name of the document width = 300 pixel , height = 300 pixel and resolution = 96 pixel/inch.

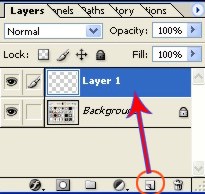
2. Now create a new Layer1 to create a new layer click on the icon that is shown with the red circle in the Layer window or press Shift+Ctrl+N.
3. Now from the Tool bar select Custom Shape Tool first click on the small red circle and then select the Ellipse shape which is shown with the big red circle.

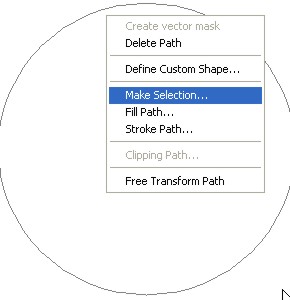
4. Now here with the Ellipse Tool create a new Ellipse and then select Pen Tool > Right click > Make selection > select Feather 0px click ok.
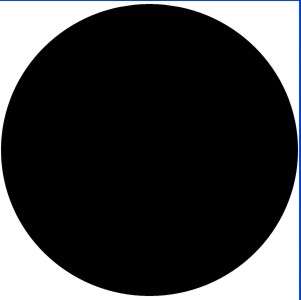
5. Press Alt+Backspace to fill the color then Deselect with Ctrl+D.
6. Press Ctrl+J to make a copy of Layer1.
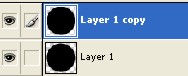
7. Now here select Gradient Tool click on the red circle for Edit to Gradient.
![]()
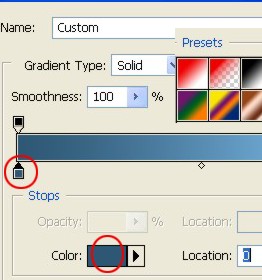
8. Now choose color # F184AB , #87BCD9 from the Gradient Editor.
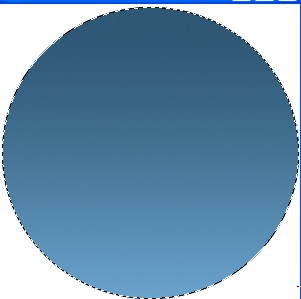
9. Now here click on the copied Layer1 while pressing Ctrl and then fill the color with the Gradient Tool Deselect.
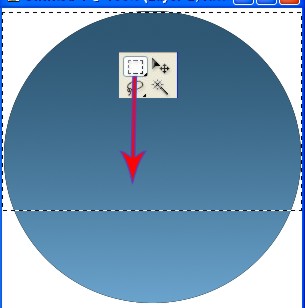
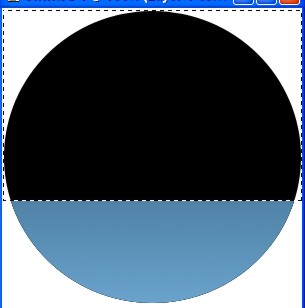
10. Now create a rectangle with the Rectangular Marquee Tool as shown below.
11. Now press Delete in your keyboard and then Deselect.
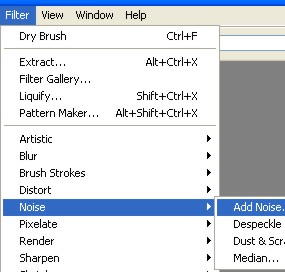
12. Now select Filter Menu > select Noise > select Add Noise.
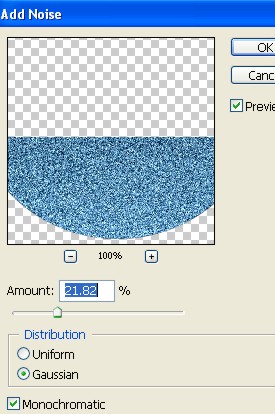
13. Now in Add Noise select Amount - 21.82% / Gaussian / Monochromatic click ok.
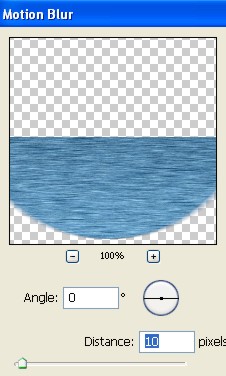
14. Again select Filter > Blur > select Motion Blur. In Motion Blur select Angle -0 / Distance- 10px click ok.
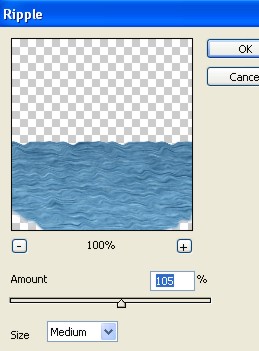
15. Now again select Filter > select Distort . In the Distort select Ripple with the size- medium and amount - 105 % and click ok.
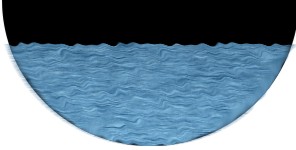
16. Now the Image will look like this as shown below.
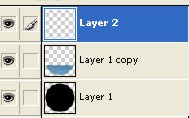
17. In the Layer window select Layer2.
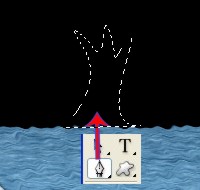
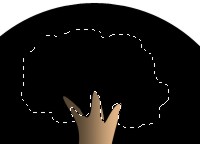
18. Here with the Pen Tool create a shape which look like a tree Trunck and then Right click for make selection.
19. Now here with the Gradient Tool fill the color code # 584733 , #BE9871
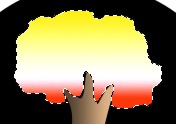
20. Now with the help of Lasso Tool create a new shape and then create a new Layer.
21. Now here with the Gradient Tool fill the color code #FEF640, #FFFAE4 , #FC4C22 and then Deselect.
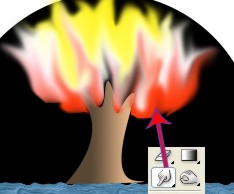
22. Now use Blur Tool with the brush size-13 / strength-60.
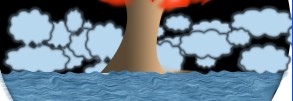
23. Now here with the Custom Shape Tool create new cloud shape and then Make selection after that create a new Layer.
24. Now fill the color #B7D7EEand then select Rectangular Marquee Tool > Right click > select Stroke with the width-2px and black color click ok.
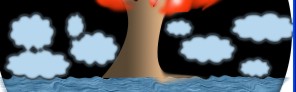
25. Now here select Move Tool and put your pointer on the cloud shape and drag the shapes while pressing Alt by this way you are making copy of cloud.
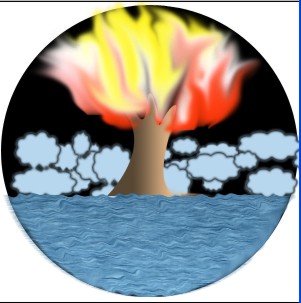
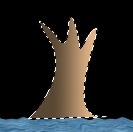
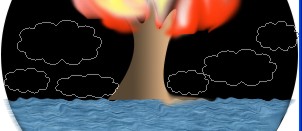
26. Final Image.