To begin this tutorial choose 5b0256 to be the Foreground and 1d012a as the Background. Now go to the main menu and select "Filters" then "Render" and lastly "Clouds".

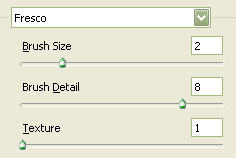
Duplicate the cloud layer and change the Blending Mode to "Color Dodge" and turn the Fill down to 23%. Then go to the main menu again and select "Filter" then "Artistic" and finally "Fresco" and use the below settings.
You should now have the following:

Now grab the "Text Tool" and select "Verdana" and set at 68 pixels with fad4fb as the color and type "glow".

Now right click on the text layer and select, "Blending Options...". Now click on "Drop Shadow".
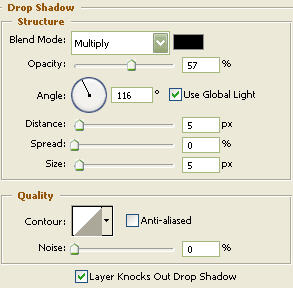
Do not click "OK" yet. Still more to do.
Now click on "Inner Shadow".
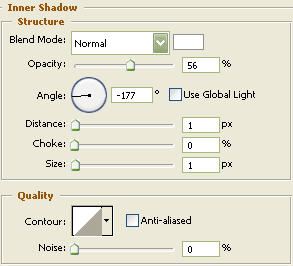
Do not click "OK" yet. Still more to do.
Now click on "Outer Glow".
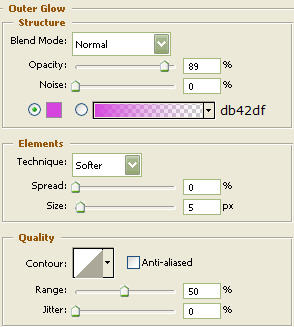
Do not click "OK" yet. Still more to do.
Click "Color Overlay".
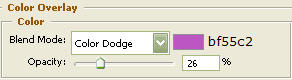
Do not click "OK" yet. Still more to do.
Click "Gradient Overlay".


You may click OK.
You should now have the following:

Using the "Pen Tool" draw the below shape with white as your color.

Now "Ctrl" click the text layer "glow" to create a selection around it. Then, go to the main menu and click on "Select" then "Modify" and then "Contract". Contract by 1 and click "OK". Then go to the main menu once again and click on "Select" and lastly "Inverse". Now rasterize the new shape layer that you drew with the "Pen Tool", then go to "Edit" and lastly "Cut".

The Results!!!
Turn the opacity down on the glare layer and your done. I hope you enjoyed this tutorial.

Done with blue...