


Start by creating a new layer that would have 1024x768 px and 72 dpi. The Rectangle Tool (U) will be helpful in creating the background of the picture to be next.
The layer's parameters:
Blending Options>Gradient Overlay
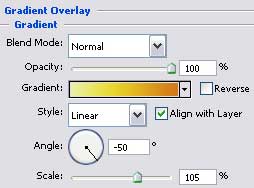
Gradient's parameters:

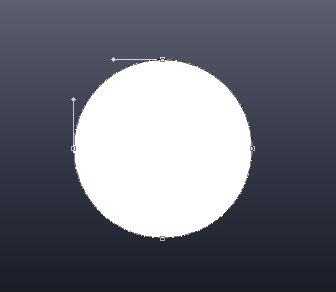
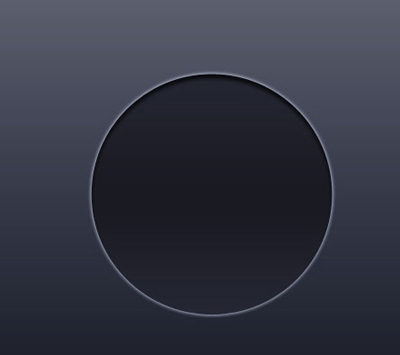
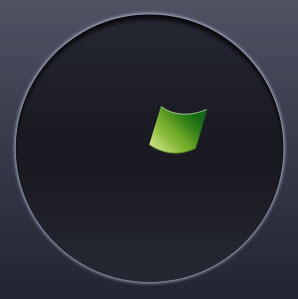
Take the Ellipse Tool (U) now and begin representing the first layer for the logotype to draw next.
The layer's parameters:
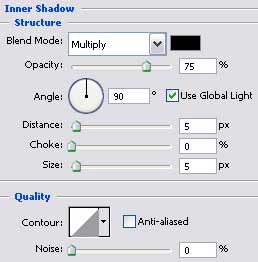
Blending Options>Inner Shadow
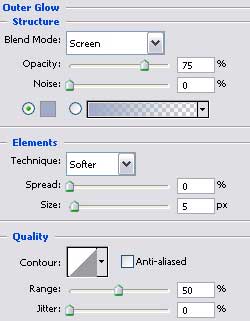
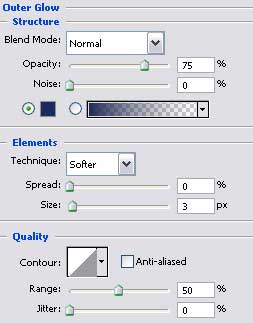
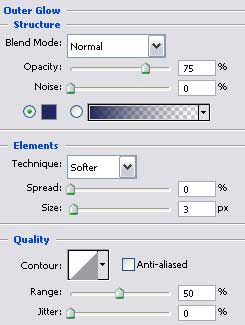
Blending Options>Outer Glow
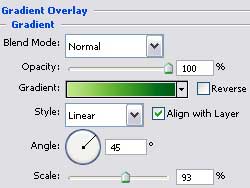
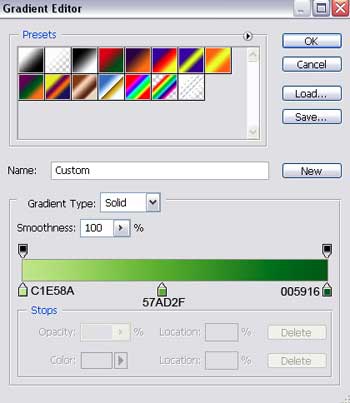
Blending Options>Gradient Overlay
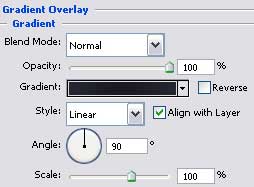
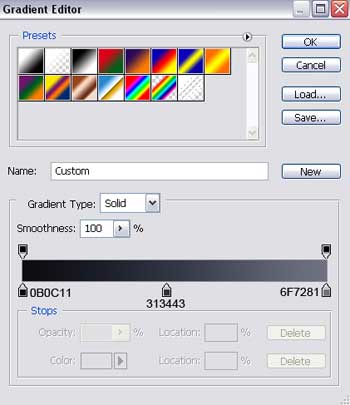
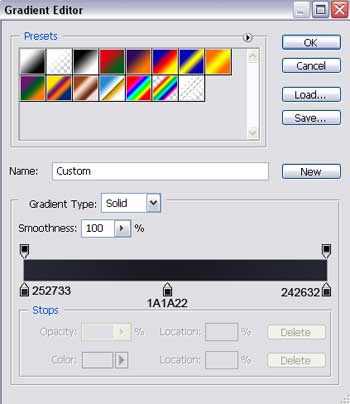
Gradient's parameters:
Select the Pen Tool (P) to create a certain part of the famous Windows logotype.
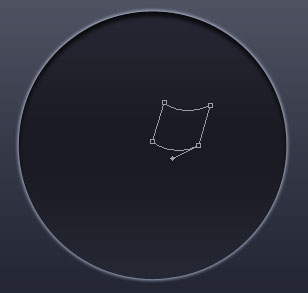
Fill 0% on the layers.
Blending Options-Outer Glow
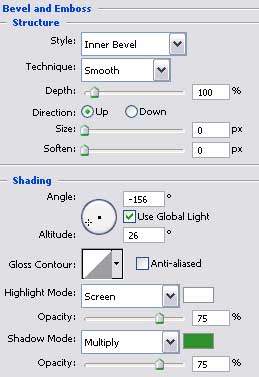
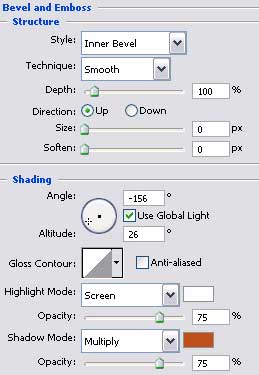
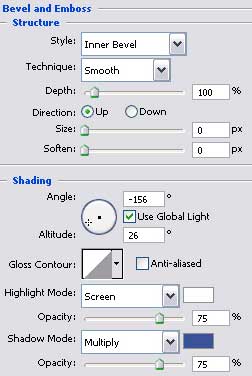
Blending Options-Bevel and Emboss
Blending Options-Gradient Overlay
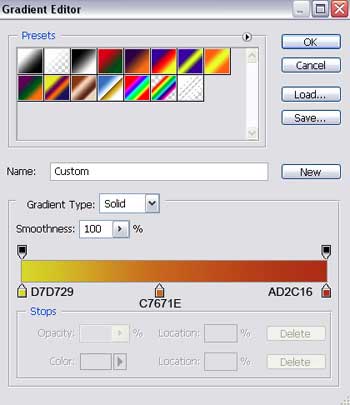
Gradient's parameters:
Make three copies of the new made layer and choose the Free Transform option to turn the layers over if necessary and to place them the way it is indicated below, changing the parameters also.
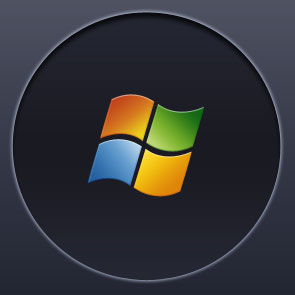
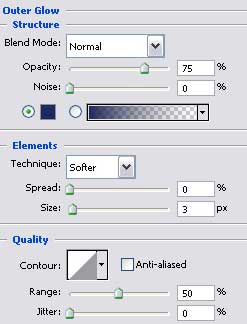
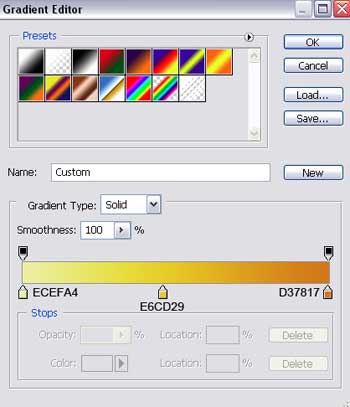
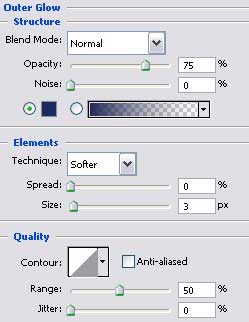
The parameters for the orange layer:
Blending Options-Outer Glow
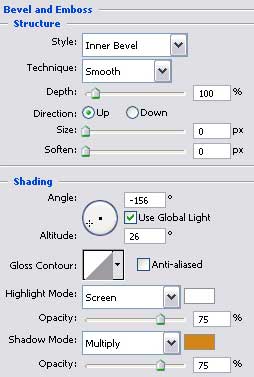
Blending Options-Bevel and Emboss
Blending Options-Gradient Overlay
Gradient's parameters:
The parameters of the red layer:
Blending Options-Outer Glow
Blending Options-Bevel and Emboss
Blending Options-Gradient Overlay
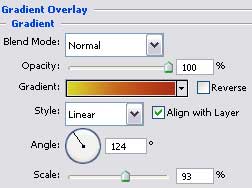
Gradient's parameters:
The parameters of the blue layer:
Blending Options-Outer Glow
Blending Options-Bevel and Emboss
Blending Options-Gradient Overlay
