Create a new file (File>New) with 1024x768 px and 72 dpi and select the Rectangle Tool (U) to represent the picture's background.

The layer's parameters:
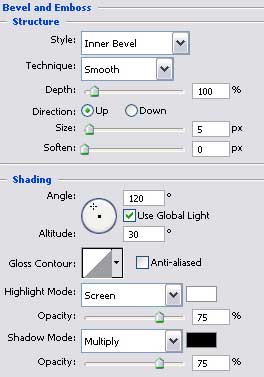
Blending Options>Bevel and Emboss
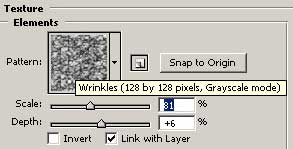
Blending Options>Bevel and Emboss>Texture
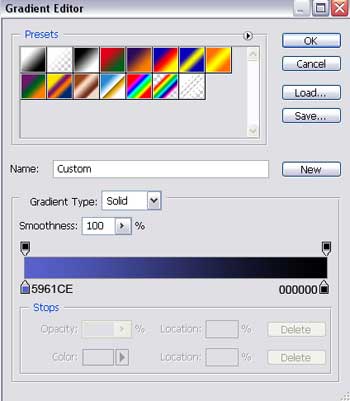
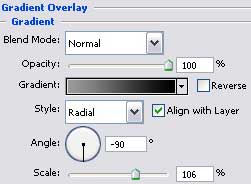
Blending Options>Gradient Overlay
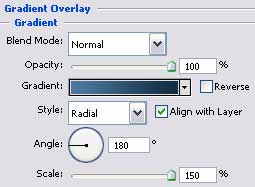
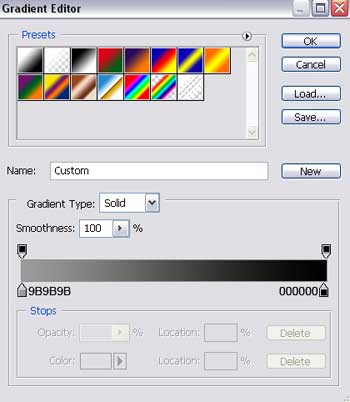
Gradient's parameters:


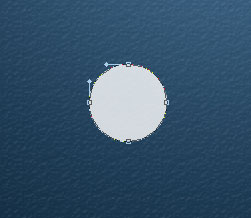
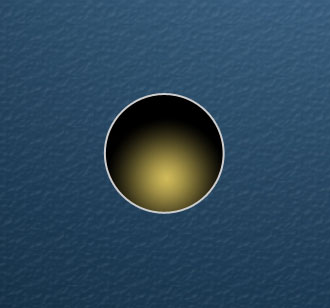
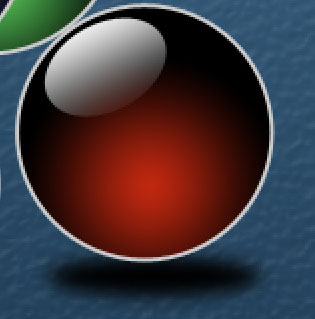
Pick up after that the Ellipse Tool (U) to create the primary layer of the sphere that we want to put in our picture.
The layer's parameters:
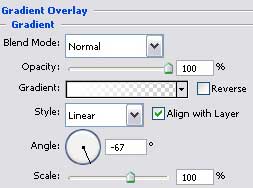
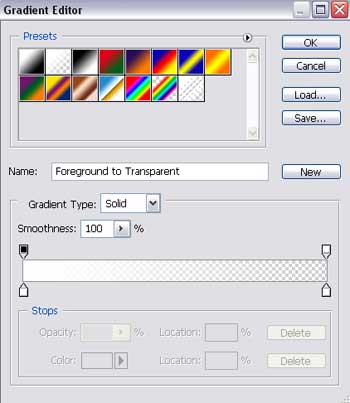
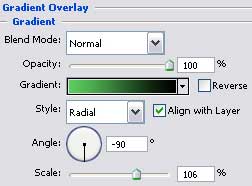
Blending Options>Gradient Overlay
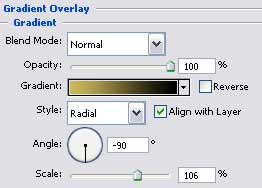
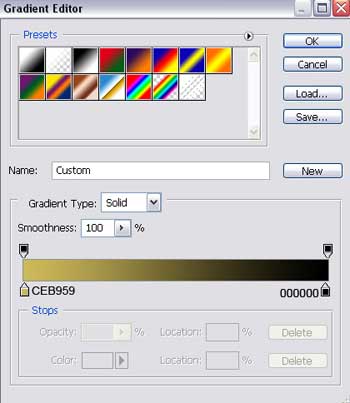
Gradient's parameters:
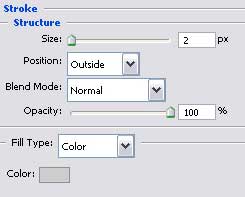
Blending Options>Stroke
Applying the last instrument, it's possible to picture a small flare on the sphere's surface.
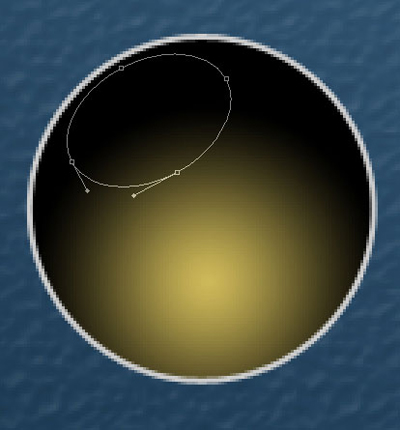
The layer's parameters:
Fill 0% on the layers.
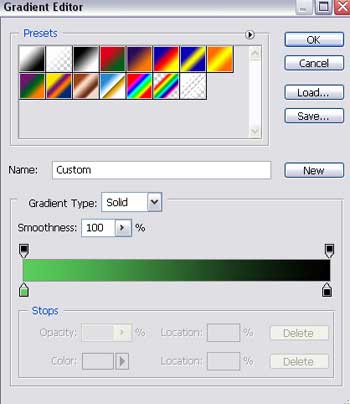
Blending Options>Gradient Overlay
Gradient's parameters:
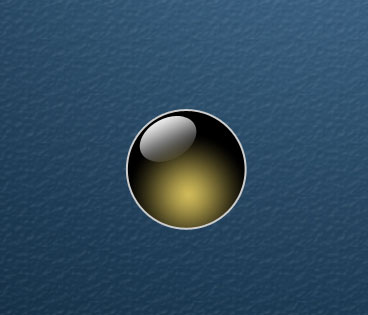
For a better result, we have to merge down in a group all the layers composing the sphere and its flare (press the Ctrl button and mark out the necessary layers and then click in the same time on the left mouse's button to stretch them down on Create a new group option).
Make 5 copies of the new made group and select the Free Transform option to change the sizes of the copies and their placement. Change also the colors' parameters. The flare's parameters and Stroke option should be left the way they are.
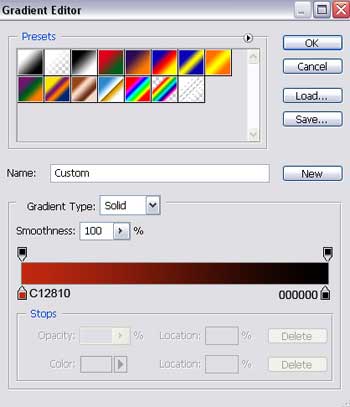
The parameters of the red sphere:
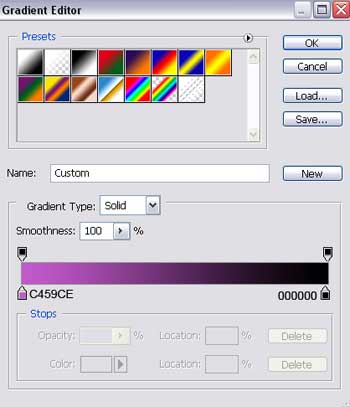
Blending Options>Gradient Overlay
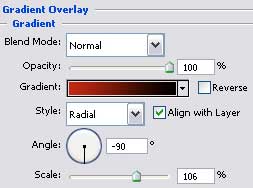
Gradient's parameters:
The parameters of the blue sphere:
Blending Options>Gradient Overlay
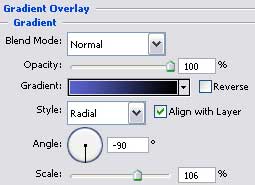
Gradient's parameters:
The parameters of the green sphere:
Blending Options>Gradient Overlay
Gradient's parameters:
The parameters of the violet sphere:
Blending Options>Gradient Overlay

Gradient's parameters:
The parameters of the grey sphere:
Blending Options>Gradient Overlay
Gradient's parameters:
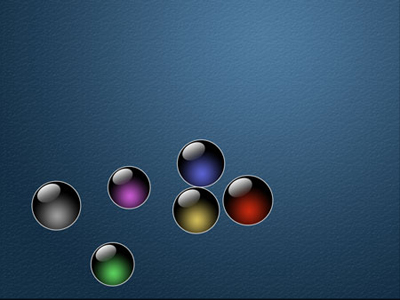
Now we shall copy each sphere. We need to make four copies of the blue sphere, three copies of the red one, nine copies of the green sphere, three copies of the violet one, two copies for the grey sphere and three copies of the orange one. The layers may be placed on your own wish.
Merge down in a group all the copies, the way we described earlier the merging down method. The group's Opacity should be situated on 80%.
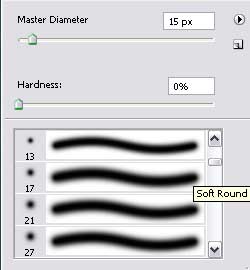
Create a new layer again situated under the sphere to represent on it the sphere's shadow. It's necessary to apply in this case the Brush Tool (B) of black color.
![]()
Make eleven copies of the shadow's layer and select the Free Transform to place the copies on that place they may be seen.

Combine in a group all the layers containing the shadow (press the Ctrl button and mark out the necessary layer and click on the left mouse's button to stretch them down on Create a new group option). Apply the next shown parameters for this group. The Opacity should be situated on 50%.

Make a copy of the earlier made group and select the Free Transform option again to enlarge the copy a little. Press the Shift button and set the Opacity for this group on 14%. Place the new group above the shadows' group and under the first group of colored spheres.
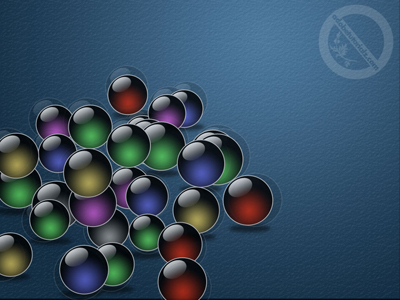
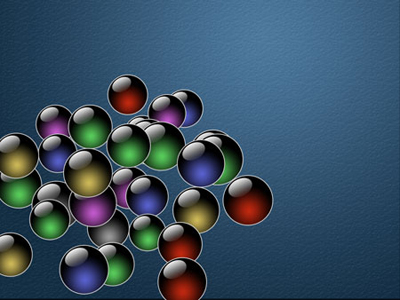
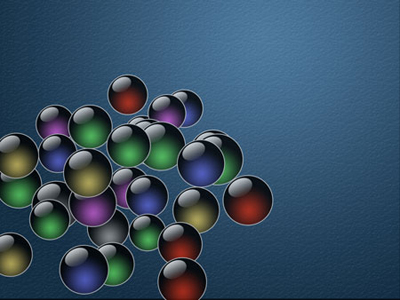
The illustration is finished!