


Step 1
Create a new document of any size, or open an existing document. This effect looks better on a lighter background, so I'll be using #FFFFFF.
Step 2
Place text on the document using a nice thick scripted font, here I'm using a font called Frankenstein which can be downloaded here for free. This font is also accompanied with the download pack for this tutorial.

Step 3
Double click this layer, and apply the following blending options:
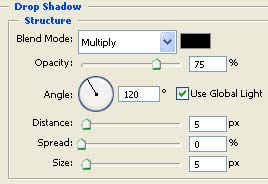
Drop Shadow:

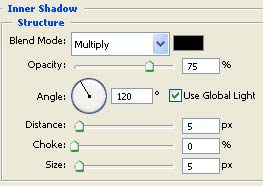
Inner Shadow:
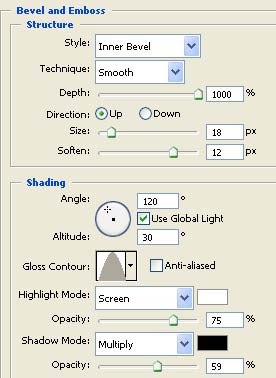
Bevel And Emboss
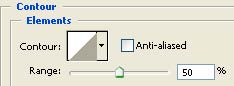
Contour:
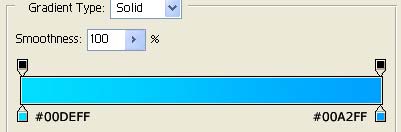
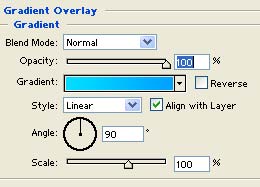
Gradient Overlay:
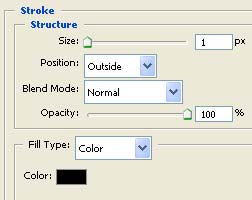
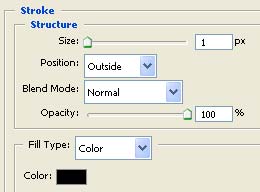
Stroke:
Result:

Step 4
Hold down the Ctrl key on your keyboard and click this layer, to make a selection of everything in this layer:

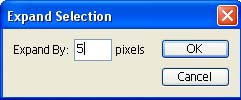
Go to Select->Modify->Expand with a setting of 5 pixels:
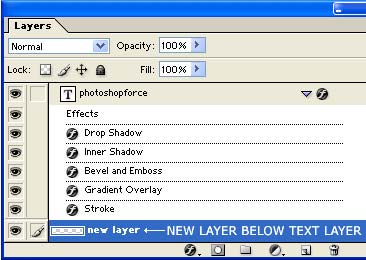
Press Ctrl + Shift + N On your keyboard to create a new layer.
Drag this layer below our text layer as I've done here:
Fill the selection with #BEFFFD, using the flood fill paint bucket tool.
Step 5
Set your foreground color to #BEFFFD, get out the flood fill bucket tool (
![]() ) and fill this selection:
) and fill this selection:

Double click this layer, and apply the following blending options:
Drop Shadow:
Inner Shadow:

Stroke:
Result:

As you can see, this is a very easy text effect to create however the end result really looks fantastic.