


We'll begin this tutorial, by creating a new canvas at a size of 294 x 169 then select the "Polygon Tool". Use the below settings then go to next step.
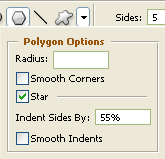
Now draw the star shape using ffbf01 as the color.

Now right click on the star shape layer and select, "Blending Options...". Now click on "Bevel and Emboss".
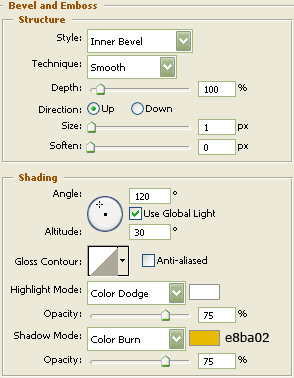
Do not click "OK" yet. Still more to do.
Now click on "Gradient Overlay".
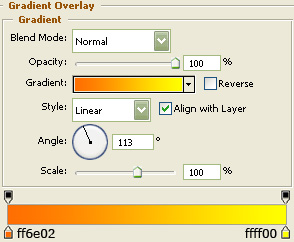
You may now click OK.
Now click on "Stroke".
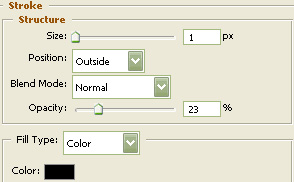
You may now click OK.
You should now have the below image.

Next, select the "Line Tool" and draw the below line (1.5 pixels) with cf6810 as the color.
Now we will create a couple additional anchor points to the line. Select the "Add Anchor Point Tool"
![]() and place a new anchor on the top and bottom, centered as illustrated below.
and place a new anchor on the top and bottom, centered as illustrated below.
Then we will need to move the newly made anchor points. To do this, select the "Direct Selection Tool"
![]() and select the anchor points that you just created. Now, using the arrow key on your keyboard, move the anchor points down as illustrated below.
and select the anchor points that you just created. Now, using the arrow key on your keyboard, move the anchor points down as illustrated below.
Then select the "Ellipse Tool" and draw two circles as illustrated using 40698a as the circle color.

Select the "Text Tool" and use the below settings:
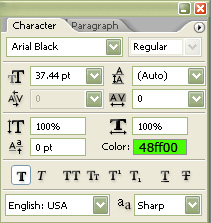
Now type in the "+" sign.

Now right click on the "+" sign layer and select, "Blending Options...". Now click on "Inner Shadow".
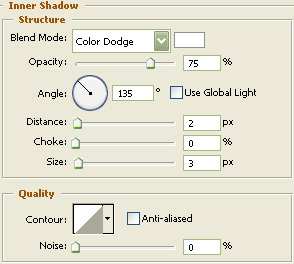
Do not click "OK" yet. Still more to do.
Now click on "Outer Glow".
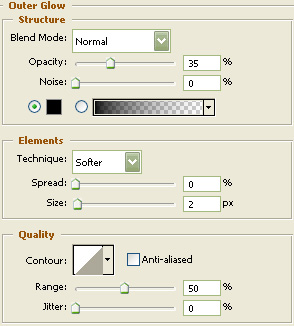
Do not click "OK" yet. Still more to do.
Now click on "Inner Glow".
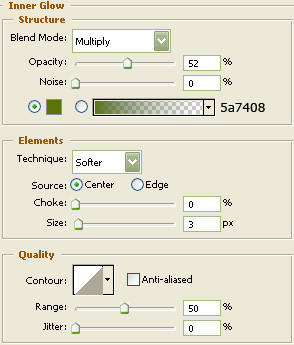
Do not click "OK" yet. Still more to do.
Now click on "Bevel and Emboss".
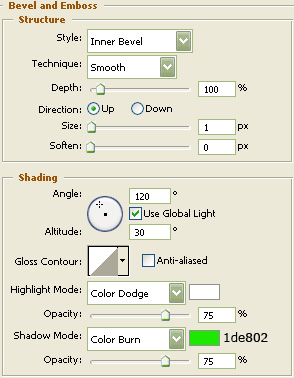
You may now click OK.
The Results!!!
As you can see, a bit of gloss was added to the "+" sign and a smaller icon to finish it off. I hope you enjoyed this tutorial.
