


Open a new file that would have 1600x1200 px and 72 dpi. Make use of the next instrument
![]() to create the background for the picture to be next.
to create the background for the picture to be next.

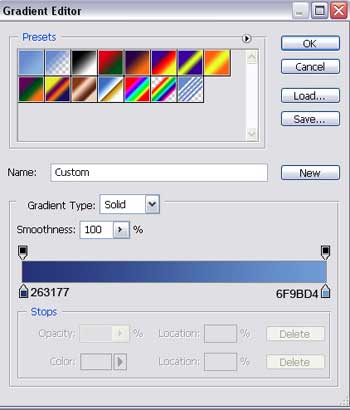
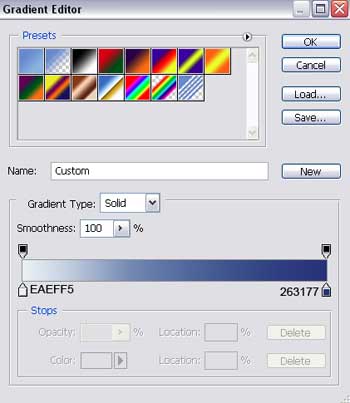
Blending Options-Gradient Overlay
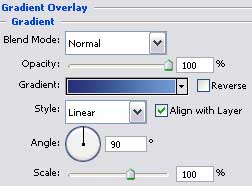
Gradient's parameters:
Apply the same instrument to represent the rays, penetrating the water. Make use also of this tool
![]() on the layers to clear out a little the figure with a transparent brush, the way it is demonstrated below.
on the layers to clear out a little the figure with a transparent brush, the way it is demonstrated below.

Fill 0% on the layers.
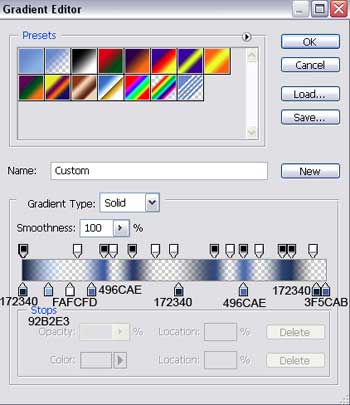
Blending Options-Gradient Overlay
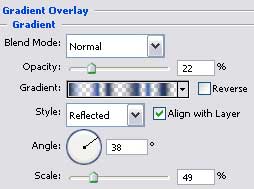
Gradient's parameters:
Select the next brush on a new layer
![]()
that would have the black color, just to represent on the picture's lowest part the water - plants.

Create a new layer and select a brush of medium size, having the opacity of 30% to dark out the lowest part of the picture. Choose the next color: 1D4571.

Set the Hard Light on the layers.
Take the next instrument
![]() to represent an air bubble.
to represent an air bubble.
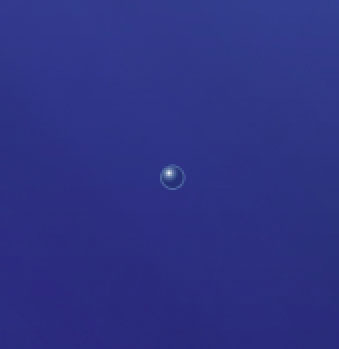

Blending Options-Gradient Overlay
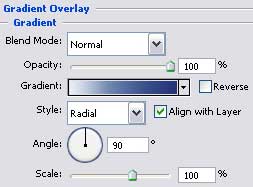
Gradient's parameters:
Blending Options-Stroke
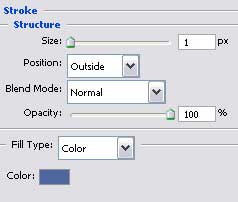
Make six copies of the new made layer and plec them out the way it is demonstrated on the picture. Applying the Free Transform selection, it's possible to make the bubbles smaller if that is necessary.
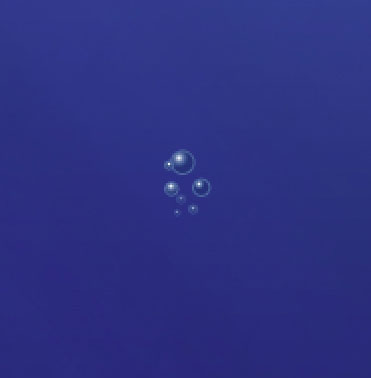
For your convenience, we should combine in a group all the layers composing the bubbles. Make three copies of the new made group and place them the same way it is indicated below.
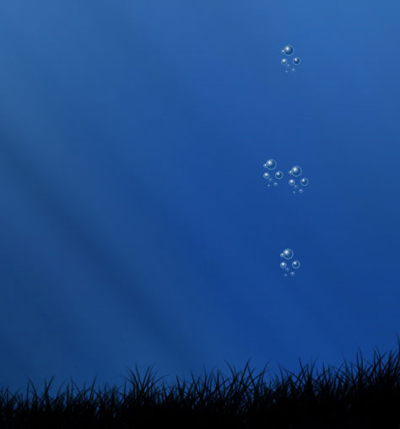
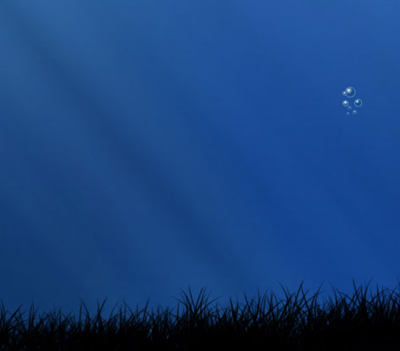
Copy out two bubbles of any group to place them like in the picture and apply also the Free Transform option to adjust the sizes.
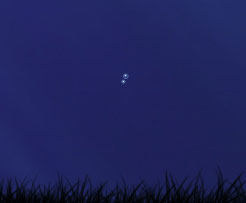

Combine those two bubbles in a group and make 11 copies of this group. Add if that is necessary by one bubble more.

Create a new layer and paint it in 6EA3D9. On the instruments' panel you may set the color's parameter also:

Apply on this layer FilterRenderFibers

The Free Transform selection will be helpful in turning the texture around and adjust it the way it is shown on the picture. Select the next instrument
 to erase everything that is not necessary. The upper part of the picture should be processed with a smooth brush of violet color.
Set Soft Light on the layers.
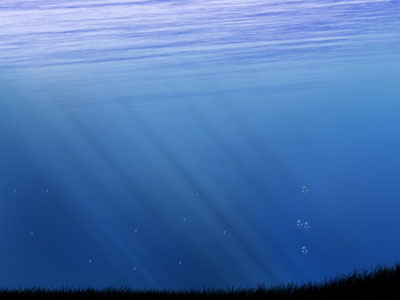
Finished!