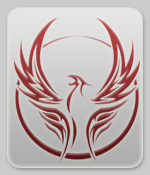
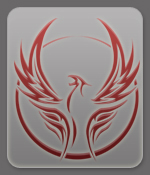
This tutorial will teach you how to make a glass button which you can put any logo or image onto. For this tutorial, I will use KillaNet's phoenix logo as the image.

1. First we'll make a new image; this one is 150 pixels wide by 175 pixels high with a white background.
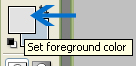
2. Click on the Foreground Colour Swatch and change the foreground color to #E2E2E2
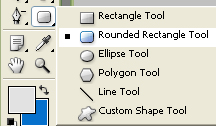
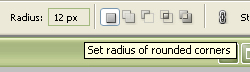
3. Now we're going to select the Rounded Rectangle Tool from the tool menu. In the options bar at the top of the screen change the radius of the rounded corners to 12.
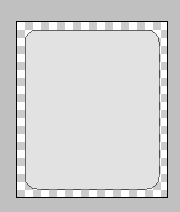
4. Placing the outer points of the cursor at the inner corner of your image, create a selection like I've done below. The first image shows the selection on a transparent background, the second is on a white one.

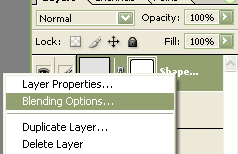
5. In your Layers Palette, left click on your new Shapes Layer to make sure it's selected, then right click and select blending options.
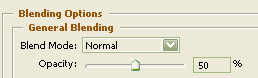
Now add the following blending options to the rounded rectangle:
First, in the General Blending Panel, select 50% for your opacity.
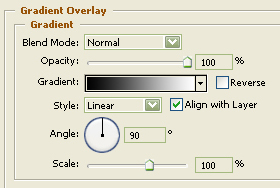
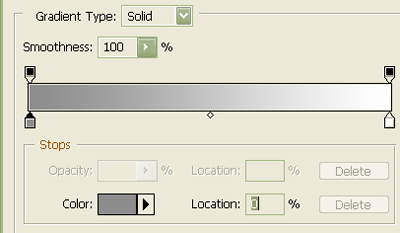
Second, click on Gradient Overlay in the left styles menu then click on the Gradient Editor.
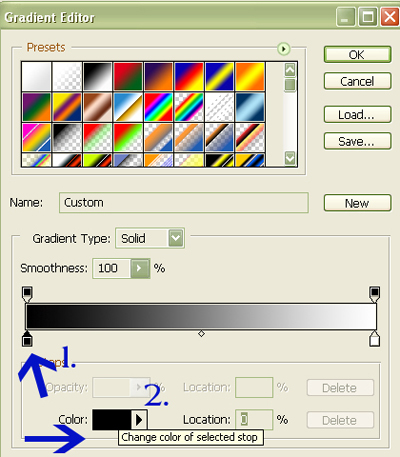
Click on the black colour stop then on the colour swatch. Change the colour to #8D8D8D as shown.
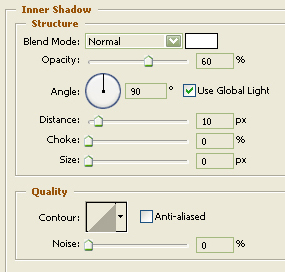
Third, click on Inner Shadow in the left styles menu and use the settings in the image below.
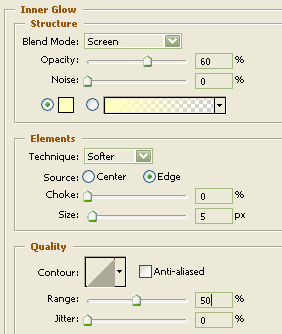
Fourth, click on Inner Glow in the left styles menu and use the settings in the image below.
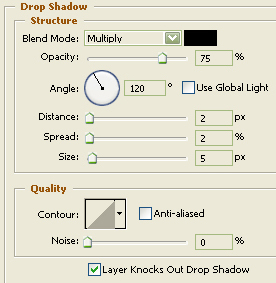
Fifth, click on Drop Shadow in the left styles menu and use the settings in the image below.
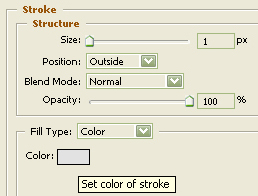
Finally, click on Stroke in the left styles menu, and set the stroke width to 1 pixel then click on the colour swatch and change the stroke colour to #E2E2E2.
6. Now we are going to add the image. If you have not already done so, open the image file containing the image you wish to put on your glass button. Copy the image onto your glass button. If you need to make the image smaller to fit on your button, select the Move Tool in your tool bar.
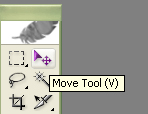
While holding down the shift key, click on a corner anchor box and move the image inwards to resize it. My button will not have text on it, but if you want to put text on yours, make sure you leave enough room for it to be legible to viewers.

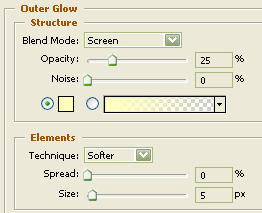
7. In these final two steps, I'm going to add an Inner Shadow and Outer Glow to the phoenix using the settings in the images below.

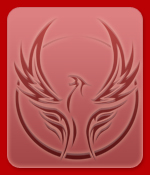
That's it, we're all finished. Here is my glass button with different coloured backgrounds to show you how the glass effect works.
Transparent Background:

Grey Backgrounds:

Red Background:
Blue Background: