This effect makes the object look like it's on a mirrored shelf.
Let's begin with a new image, I used 300 x 400 to start with, but yours will be large enough for the object you are putting on the shelf.
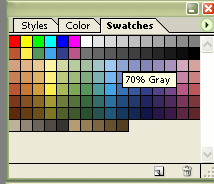
In your colour swatches, choose a dark grey and a somewhat lighter grey.
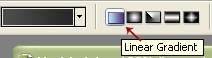
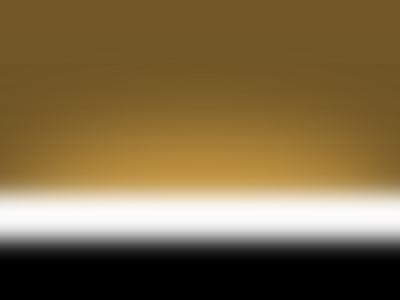
Using the gradient tool set at Linear Gradient, draw a line down the centre of your canvas.
![]()
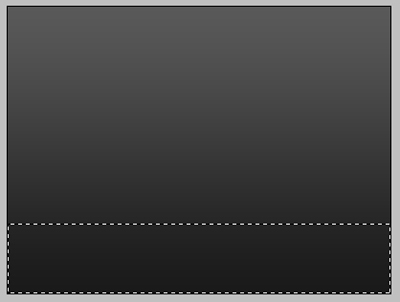
It will look like this:

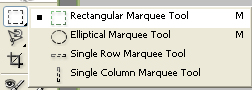
Next, using the Marquee Tool, make a selection across the bottom portion of your canvas
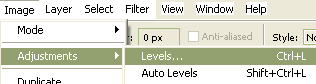
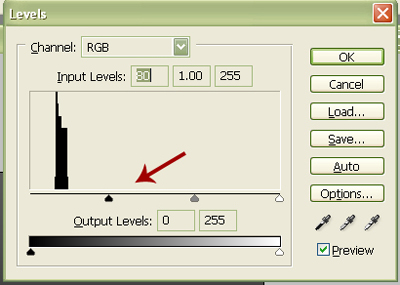
Now go to Images > Adjustments > Levels and move the black indicator arrow for the Shadow Input Levels closer to the middle of the scale. This will darken the lower portion somewhat.
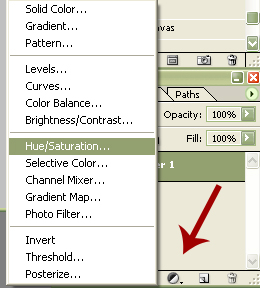
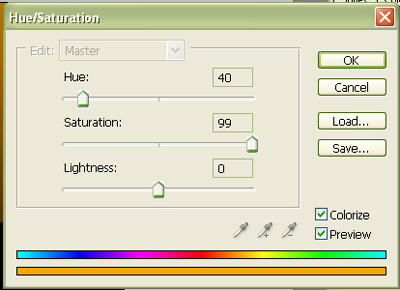
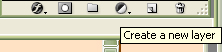
Next we are going to add a New Adjustment Layer. Click on the Create New Fill or Adjustment Layer icon at the bottom of your Layer Palette and select Hue/Saturation in the new menu.
In the popup dialogue, check the Colourize box in the lower right hand corner, then move the Hue and Saturation sliders until you find a colour which will compliment the main object of your picture.
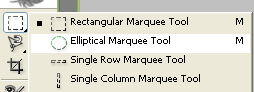
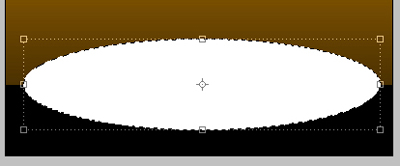
Now we need another layer, so click the Add New Layer icon at the bottom of your Layer Palette. With your new layer selected, use the Eliptical Marquee tool to create an ellipse, centering it over "dividing line" in your image. With white as your foreground colour, use the Fill Tool and fill the ellipse with white.
You can use the Move Tool to make sure your new ellipse is centered properly. To nudge it into place, hold down your Shift Key and use the Arrow Keys.
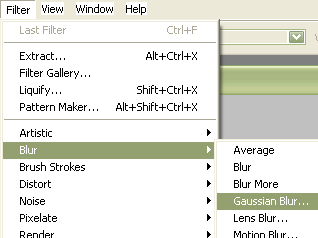
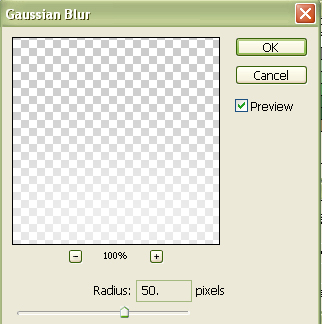
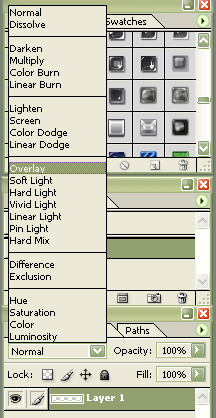
Next, we're going to add some blur so the ellipse resembles a lighting effect. Got to Filters > Blur > Gausian Blur and in the new dialogue, set your pixel blur between 45 and 55 and click Okay. In your Layer Palette, adjust the Layer Blend to Overlay, or try different options and see if there is a result you prefer.
Now to build our "mirror" shelf. Using the Rectangle Marquee tool, centre a selection over the "divide line" and go right across your image. Make sure it is wide enough for two of your focus objects. Once you make the selection, again fill it with white, and apply a Gausian Blur, but this time with a pixel blur setting between 8 and 12.
Time to add some texture to the "backdrop" of our image. First we are going to add another layer, then fill the whole layer with white. This will completely obscure what you've just done, but if you follow the next steps, your complete image will show.
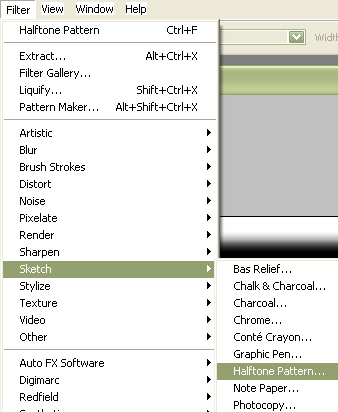
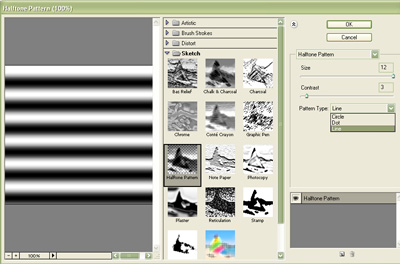
Go to Filter > Sketch > Halftone Pattern and select it. It may take a few seconds for the filter control dialogue to appear. You can move the slider bars on the right side of the dialogue to change the effect, and in the drop down menu you will want to select either Dots or Lines. You can see the settings I used in the illustration below.
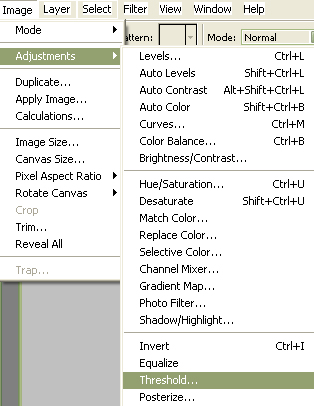
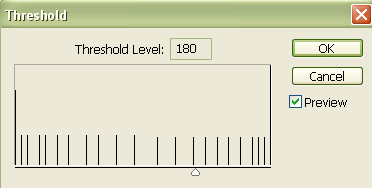
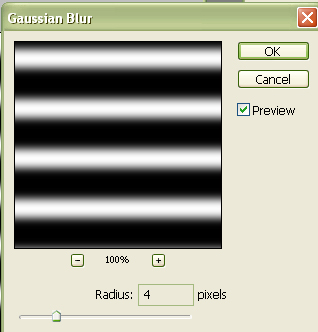
Next we will need to adjust the Threshold of this Layer. Go to Images > Adjustments > Threshold and select it. In the new dialogue, choose a threshold of between 175 and 185, whichever suits you best. Once you complete that step, go to Filter > Blur > Gausian blur again and choose a pixel blur between 2 and 5. Then in your Layer Palette, choose Screen as your Layer Blend Option and set the Opacity to between 30% and 40%.
Open the image you want to use as your main picture focus and select the image using the Marquee tool. Copy the image by using Ctrl + C then paste it into your main picture by using Ctrl + V. You can place the new image into place using the Move Tool.
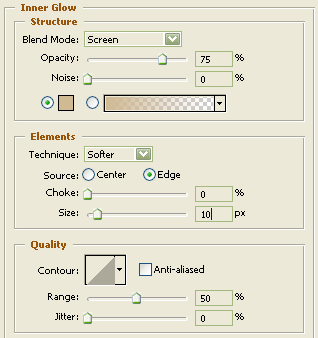
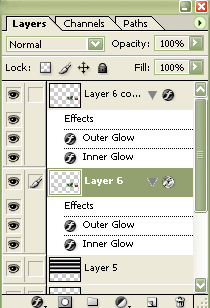
Now we're going to add some glow to the new image and give it a bit of depth. Click on the Add A Layer Style icon at the bottom of your Layers Palette and select Outer Glow. You can adjust the glow colour by clicking on the colour swatch in the popup dialogue. Choose glow colours which will compliment your background colour and your focus image. Leave the spread setting at 0 and choose a Size setting betwen 30 and 35. Following that, we will add a bit of Inner Glow by clicking on the Inner Glow in the column on the left in the Styles dialogue. Again choose a complimentary colour, then choose a size between 7 and 11, whichever looks best on your image.

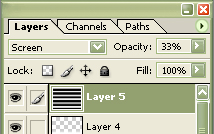
We're almost done, we just have to add the mirror effects now. First we will need to duplicate our focus image layer. This is done by clicking on the active image layer and dragging it onto the Add New Layer icon at the bottom of the Layer Palette. Your duplicate layer will be your active layer once you do this. Click on the original of the layer you just copied (it will be down one layer) to make it the active layer again.
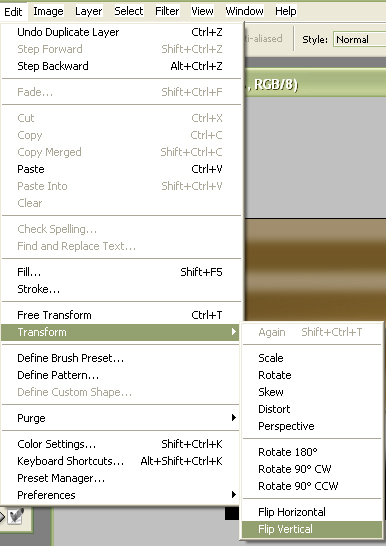
Now you will need to transform the original layer into the mirror image. Go to Edit > Transform > Flip Vertical and select it.
Using the Move Tool, adjust your transformed image so that it is just below the duplicate layer image, making them almost touch. Press your enter key to accept the transformation.
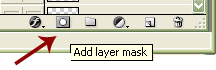
After making sure that the colour swatches in your Tool Menu are set for black and white, with black as the foreground colour, click on the Add Layer Mask icon in your Layers Palette. Using the Gradient Tool, draw a line from the bottom of your picture to just below the thin glow line between your reflected images. Adjust the layer's opacity level to between 70% and 80%, whichever suits your image best.
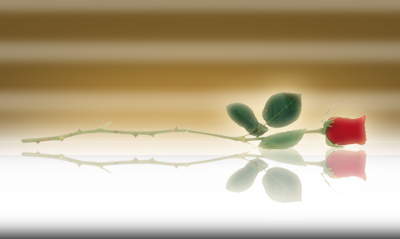
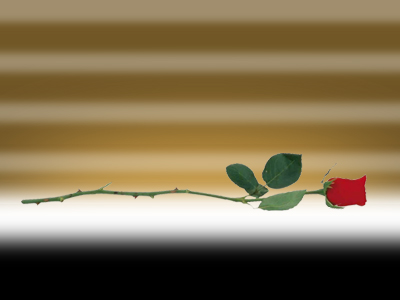
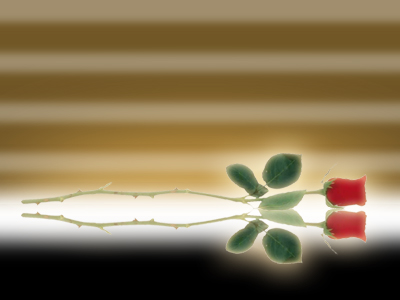
Here is my finished image. I'd love to see what you make by using this tutorial, so reply with your finished image if you wish.