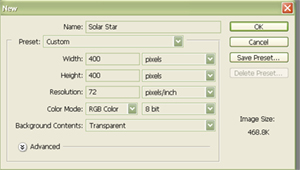
1. File>>New
Open a new image, choose a square size such as 300 x 300, etc. Settings are 72dpi and rgb, 8 bit
2. Fill the image with black.
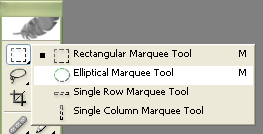
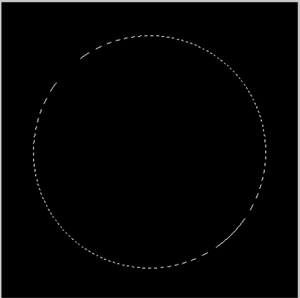
3. Using the Elliptical Marquee tool, make a circle-keep it centered on your image. Do not de-select the Marquee.
Hint: To make sure your marquee is a perfect circle, hold down the Shift key, left click your mouse, drag out the circle shape, release the mouse button then release the Shift key**
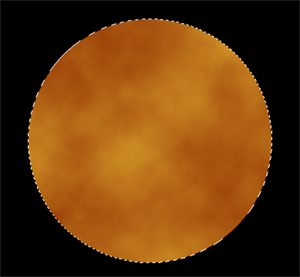
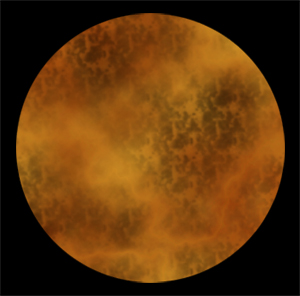
4. On your colour pallet choose to "sunny" colours-put the lighter colour in the foreground, darker in the background. I used F8CE3A and 913204 in this example.

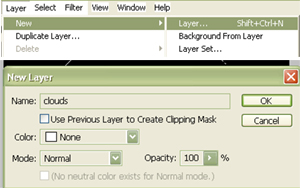
5. Make a new layer and name it clouds.
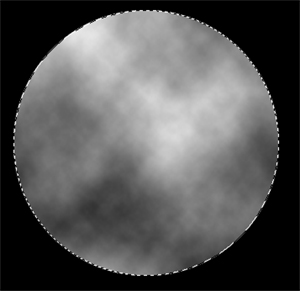
6. Go to Filter>>Render>>Clouds and click it once.
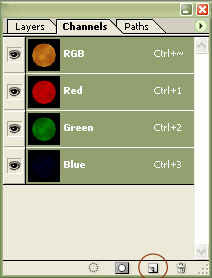
7. Click on the Channels Pallet, then click on the New Channel icon at the bottom of the palette. Don't panic, this will make it look like your pretty clouds layer has disappeared and resets your Colour Pallet to black and white. That's okay, you want this.
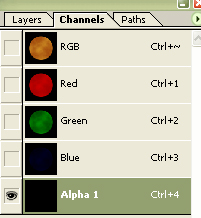
8. With the new Alpha 1 Channel layer selected, go to Filter>>Render>>Clouds. This will put gray clouds on your image. You need the layer to be somewhat bright/light tinted, so use ctrl + f a few times until you have more lighter coloured clouds than dark.
Note, don't make it too dark or PhotoShop won't read the next step, you will get a No Pixels Selected error. If you get this, go to Images>>Adjustments>>Contrast and brighten the image just enough to stop the error message.
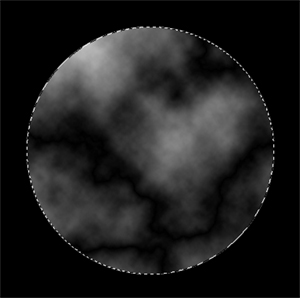
9. Now go to Filter>>Render>>Clouds Difference and click it once.
Note, if the image is too dark, PhotoShop won't read the next step. You will get a No Pixels Selected error. If you get this, go to Images>>Adjustments>>Contrast and brighten the image just enough to stop the error message.
10. With the Alpha 1 Channel still selected, hold down the Ctrl key and click on the Alpha 1 layer in the Channel Pallet. This will load the Channel's selection.
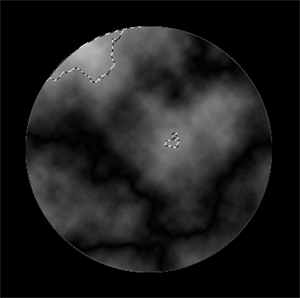
Click on your Layers Pallet and select your clouds layer.
11. Next, select your Wand Tool from the Tools Menu and while holding down the Alt key, click anywhere on the black part of your image. This will ensure that the next part will show only in the circle area as it subtracts the selection.

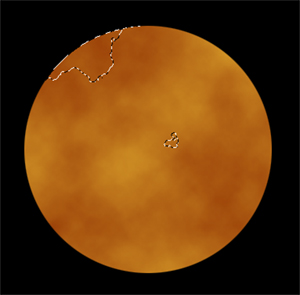
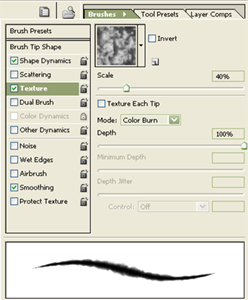
12. Select your Brush Tool from the Tools Menu; the settings I used for this tutorial are a soft round brush, 225 pixels at 35% opacity and 50% flow. Now click on the Brushes Tab on the right side of your work space and add the following settings to your brush: check Textures in the left hand menu, select the clouds texture. Set it to 40% scale. Colour burn should be set as default mode.
13. Make sure that your Colour Pallet is still set to black and white, then brush over the surface of your image. If any area appears too dark, use Edit>>Step Backward to return to an appearance you like. Go to Select>>Deselect.
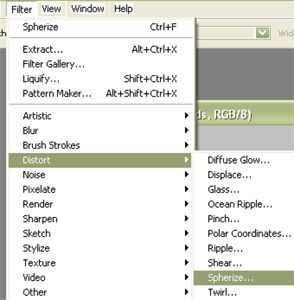
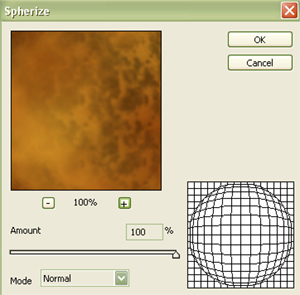
14. Load the selection for your clouds layer by holding down the Ctrl key and clicking on the clouds layer in your Layer Pallet. Next go to Filter>>Distort>>Spherize and set it to Normal 100%
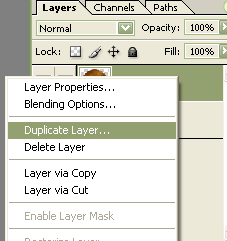
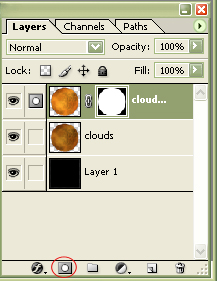
15. Right click on the clouds layer in your Layer Pallet and click on Duplicate Layer
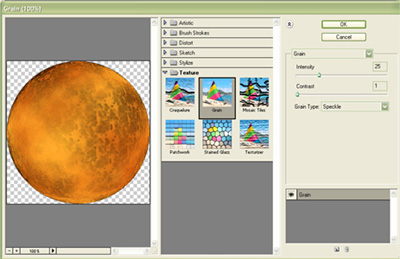
16. Go to Filter>>Texture>>Grain and choose the following settings: Intensity: 25 Contrast: 2 Type: Speckle then click okay.
17. To add a cleaner edge to the speckled layer, hold down the Ctrl key and click on the clouds copy layer to load the selection.
Click on the Add Layer Mask icon at the bottom of the Layer Pallet. Next go to Select>>Modify>>Contract set from 3-6, whichever you prefer.
Follow this with feathering the selection by going to Select>>Feather>>set anywhere from 8 to 12, again at your own preference.
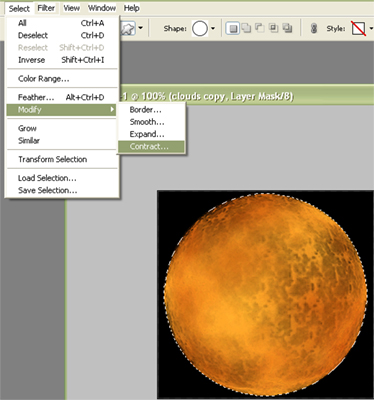
18. To complete the Layer Mask, go to Select>>Inverse then refill the black area with black. Make sure the clouds layer copy is highlighted, then hold down the Ctrl key and click e to merge the copy layer into the original clouds layer.

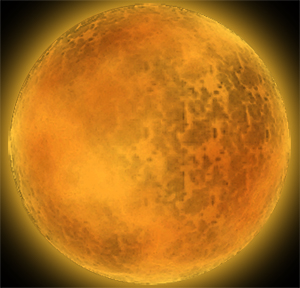
19. Now we're going to add the solar rays to your image. Right click on the clouds layer and select Blending Options. We are going to add some Outer Glow and some Inner Glow. I've only listed the settings which I changed; all others can stay at default.
Outer Glow Settings: Opacity: 80% Colour: Solid (I used FAB92E) Spread: 55 pixels
Inner Glow Settings: Opacity: 50%; Colour: Solid (FAB92E) Spread: 40 pixels
Note: You can change the Opacity, Colour and Spread to your own preferences for both glow settings.
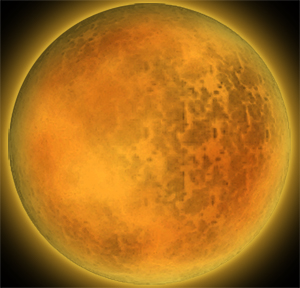
20. Make another copy of the clouds layer by right clicking on Clouds Layer and selecting Duplicate Layer. Now we're going to add a few final blending styles to our solar star: a General Blending and more Outer Glow. As above, I've only made note of the settings I altered.
General Blending Settings: Fill Opacity: 2%
Outer Glow: Opacity: 45%; Size: 8 pixels
Inner Shadow: Opacity: 70%; Angle: 135; Distance: 12 pixels; Size: 30 pixels
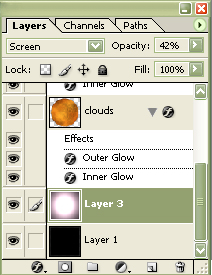
21. Add a new layer (Layer>>New) and set the Layer Mode to screen in the Layer Pallet. Go to Filter>>Render>>Clouds (make sure your Colour Pallet is set to black and white).

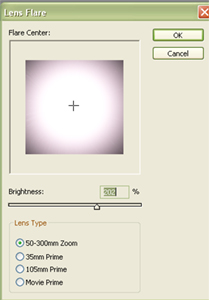
22. I added a solar flare to the image by doing the following: in the Layers Pallet, click on Layer 1, right click and duplicate the layer. Go to Filter>>Render>>Lens Flare with the following settings: Center the flare; brightness: 202%; select 50-300mm Zoom, click okay. Set your Layer Properties to the following: Mode: Screen; Opacity: 42%
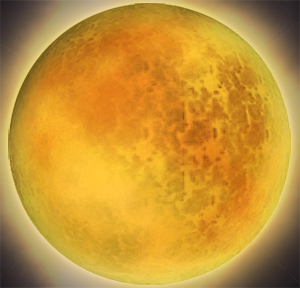
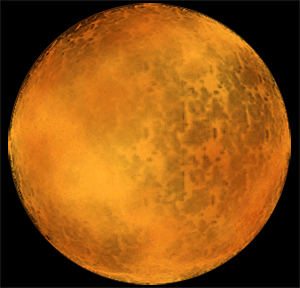
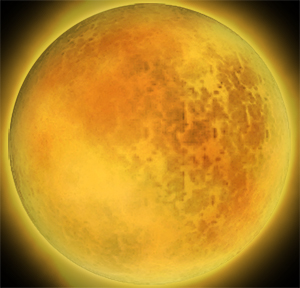
And that's it, all done.