Find a suitable image to work with and go to the next step. I'll use the below image.

Right click on the image layer and select "Blending Options." Next click on "Satin".
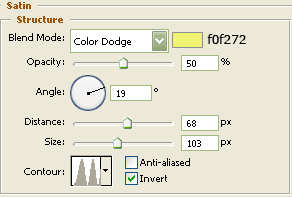
Do not click OK yet. Still more to do.
Now click on "Color Overlay".
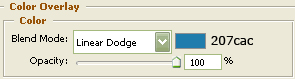
You may now click OK.
The Results!!!
This was a heck of an easy tutorial but the results are awesome.

For this particular effect, "Gradient Overlay" was used to replace the "Color Overlay" using the "Sprectrum" gradient--mode=multiply, opacity=64, and style=angle at 90.