We'll begin this tutorial, by creating a new canvas at a size of 375 x 194 then using the "Paint Bucket Tool" fill with 5b1039.

I then chose the "Custom Shape Tool" and drew some random shapes using 8e5a76 as the color. Name your shape layers "Random Shapes" (for lack of a better name) in the Layers Palette.

Now right click on the "Random Shapes" layers in the Layers Palette and select, "Blending Options...".
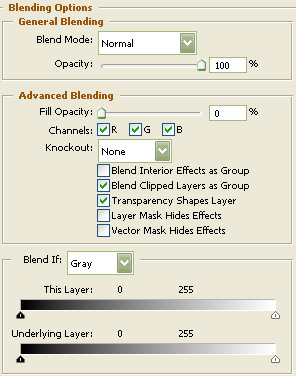
Do not click "OK" yet. Still more to do.
Now click on "Drop Shadow".
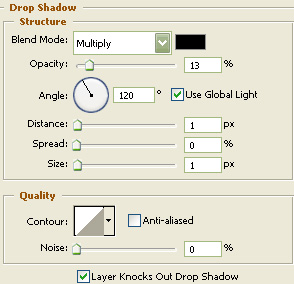
Do not click "OK" yet. Still more to do.
Now click on "Outer Glow".
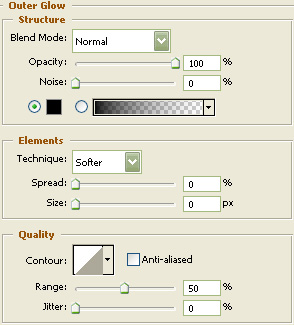
Do not click "OK" yet. Still more to do.
Now click on "Inner Glow".
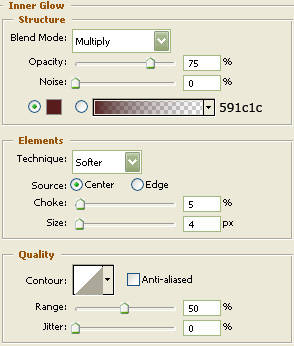
Do not click "OK" yet. Still more to do.
Now click on "Bevel and Emboss".
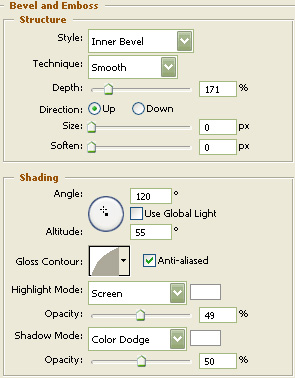
Do not click "OK" yet. Still more to do.
Now click on "Contour".
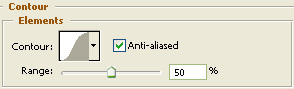
Do not click "OK" yet. Still more to do.
Now click on "Color Overlay".

You may now click OK.
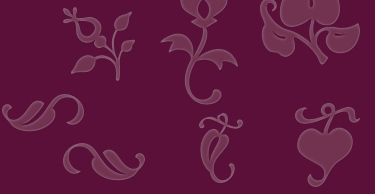
You should now have the below image.
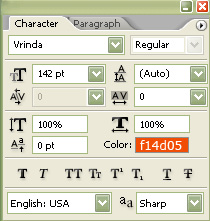
Select the "Text Tool" and use the below settings. Download the Vrinda typeface here.
Now type the text you would like to use.

Now right click on the text layer in the Layers Palette and select, "Blending Options...". Now click on "Stroke".
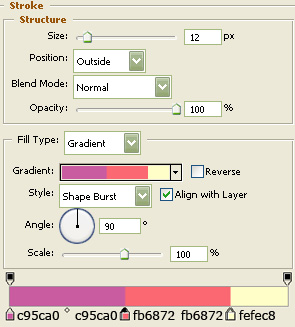
You may now click OK.
You should now have the below image.

Now duplicate the text layer in the Layers Palette and clear it's layer style. To do this, just right click on the layer in the Layers Palette and select "Clear Layer Style".

Now right click on the duplicated text layer in the Layers Palette and select, "Blending Options...". Now click on "Gradient Overlay".
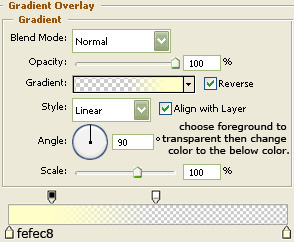
Do not click "OK" yet. Still more to do.
Now click on "Stroke".
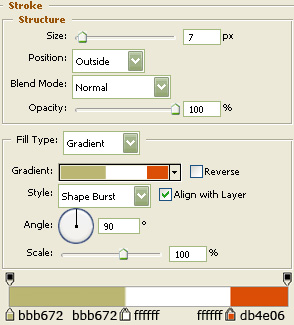
You may now click OK.
You should now have the below image.

Using the "Pen Tool" draw the below shape with White as your color.

The Results!!!
Turn the layer fill down to 22% and you're done. I hope you enjoyed this tutorial.