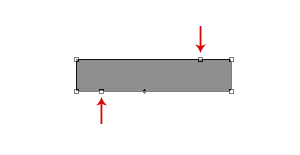
We'll begin this tutorial, by creating a new canvas at a size of 300 x 155 using White as the color. Now select the "Rectangle Tool" and draw the below shape with 8f8f8f as the color. Name this layer "Button" in the Layers Palette.

Now we will create a couple anchor points to the shape as illustrated below. Select the "Add Anchor Point Tool"
![]() and place new anchor points in approximately the same place as I have done indicated by the red arrows.
and place new anchor points in approximately the same place as I have done indicated by the red arrows.
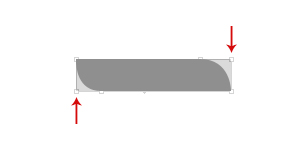
Now select the "Delete Anchor Point Tool"
![]() and click the anchor points again illustrated by the below image as done below.
and click the anchor points again illustrated by the below image as done below.
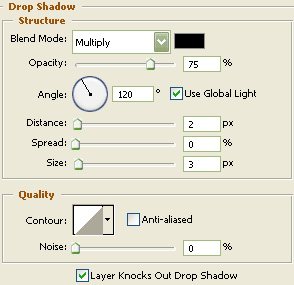
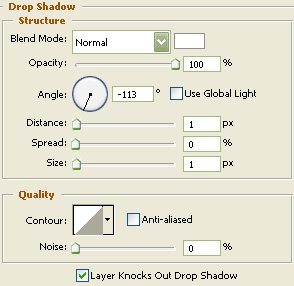
Now right click on the "Button" layer in the Layers Palette and select, "Blending Options...". Now click on "Drop Shadow".
Do not click "OK" yet. Still more to do.
Now click on "Inner Shadow".
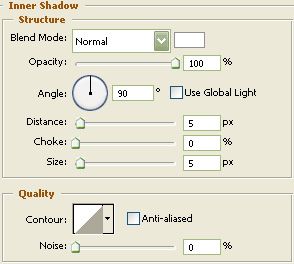
Do not click "OK" yet. Still more to do.
Now click on "Color Overlay".
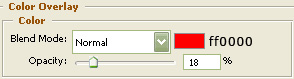
Do not click "OK" yet. Still more to do.
Now click on "Gradient Overlay".
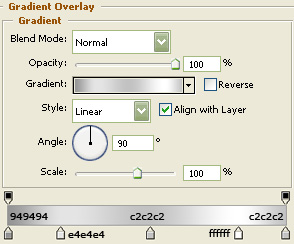
Do not click "OK" yet. Still more to do.
Now click on "Stroke".

You may now click OK.
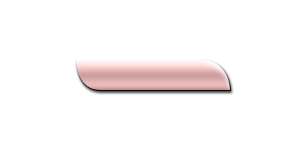
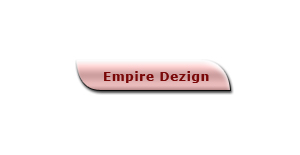
You should now have the below image.
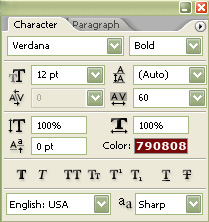
Select the "Text Tool" and use the below settings:
Now type in the button name that you would like to use.
Now right click on the text layer in the Layers Palette and select, "Blending Options...". Now click on "Drop Shadow".
Do not click "OK" yet. Still more to do.
Now click on "Outer Glow".
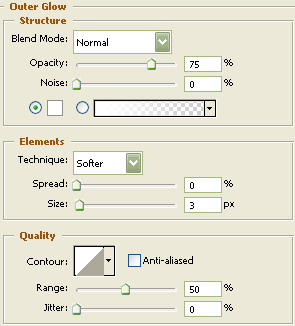
You may now click OK.
You should now have the below image.

Now "Ctrl" click the "Button" layer in the Layers Palette to create a selection around it. Then, go to the main menu and click on "Select" then "Modify" and then "Contract". Contract by 2 and click "OK". Then create a new layer and go to the main menu once again and click on "Edit" and lastly "Stroke". Width is 1, color is Black and Location is inside. You may then deselect the selection. Name this layer "Stroke" in the Layers Palette.
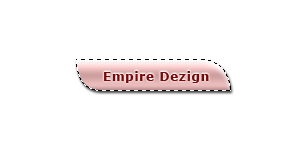
Turn the Fill of the down to 13% on the "Stroke" layer and your done.

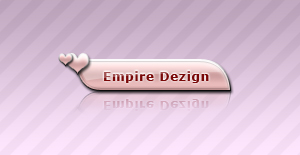
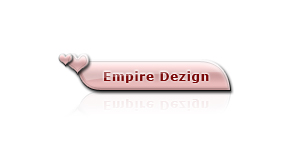
The Results!!!
I've added a minor gloss to the button as well as some hearts and a reflection. The heart style is the same as what was used on the "Button" layer. The smaller heart, the style was decreased (Layer, Layer Style then Scale Effects down to 30%). I hope you enjoyed this tutorial.
using a background (download background here)