We'll begin this tutorial, by creating a new canvas at a size of 535 x 123 with 154a77 as the canvas color. Double click the background layer in the Layers Palette and click OK. Doing this will unlock the layer for the next step.

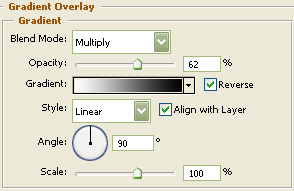
Now right click on the background layer in the Layers Palette and select, "Blending Options...". Now click on "Gradient Overlay".
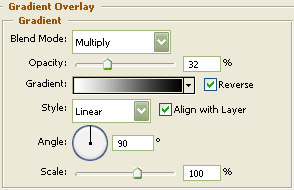
You may now click OK.
You should now have the below image.

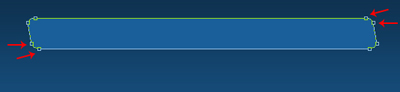
Next, grab the "Rounded Rectangle Tool" and draw a rectangle with a radius of 10 pixels with 1a5f99 as the color.
Then choose the "Direct Selection Tool" and move the bottom left and top right anchor points in 5 pixels as I have done below. Name this layer "Menu Frame" in the Layers Palette.
Now download this pattern and click "Open".
Now right click on the "Menu Frame" layer in the Layers Palette and select, "Blending Options...". Now click on "Drop Shadow".

Do not click "OK" yet. Still more to do.
Now click on "Gradient Overlay".
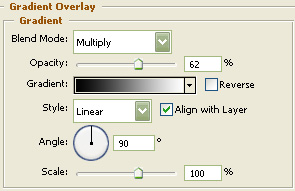
Do not click "OK" yet. Still more to do.
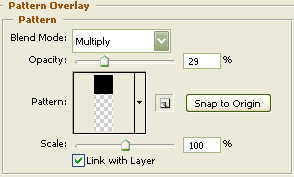
Now click on "Pattern Overlay".

You may now click OK.
You should now have the below image.

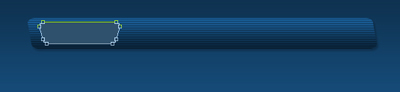
Again, using the "Rounded Rectangle Tool", draw a rectangle with a radius of 5 pixels this time with 30516d as the color.
Then choose the "Direct Selection Tool" again and move the bottom left and right anchor points in as I have done below. Name this layer "Menu Back" in the Layers Palette.
Next, duplicate the "Menu Back" layer in the Layers Palette and change the color to 093f6c. Then go to "Edit" then "Free Transform" and decrease the width by about 5% and the height by about 10%. Name this layer "Button" in the Layers Palette.

Now right click on the "Button" layer in the Layers Palette and select, "Blending Options...". Now click on "Drop Shadow".

Do not click "OK" yet. Still more to do.
Now click on "Gradient Overlay".
Do not click "OK" yet. Still more to do.
Now click on "Pattern Overlay".
Do not click "OK" yet. Still more to do.
Now click on "Stroke".

You may now click OK.
You should now have the below image.

Select the "Text Tool" and use the below settings.
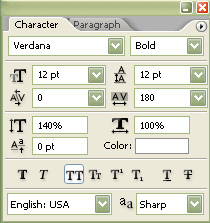
Now type your preferred menu item and turn the fill of the text layer down to 58%.

Then select the text layer and two other button layers and put them in their own group. Now duplicate the group a few times and change the button text. Be sure to flip every other button vertically as illustrated below by going to "Edit" then "Transform" and "Flip Vertically".

Now "Ctrl" click the "Menu Frame" layer to create a selection. Create a new layer and place just above the "Menu Frame" layer in the Layers Palette. Now go to the main menu and choose "Select" then "Modify" and lastly "Contract". Contract by 2 and hit OK. Now fill with White and deselect the selection. Name this layer "Gloss" in the Layers Palette.

Now choose the "Elliptical Marquee Tool" and make the following selection. Make certain that you are on the "Gloss" layer in the Layers Palette and go to "Edit" then "Cut". Then change the fill of the "Gloss" layer to about 14%.
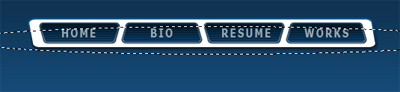
The Results!!!
To finish it off, I duplicated the whole menu and merged. Then turned the fill of the duplicated layer down and blurred. I hope you enjoyed this tutorial.