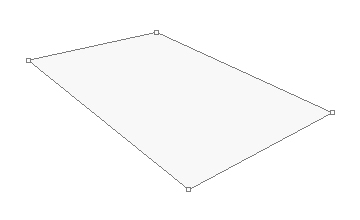
We'll begin this tutorial, by creating a new canvas at a size of 360 x 220 then select the "Pen Tool". Draw the below shape as illustrated using f8f8f8 as the color. Name this layer "Icon Frame" in the Layers Palette.
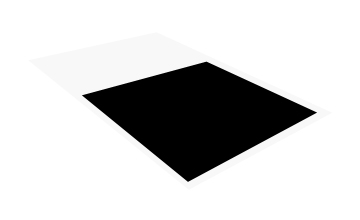
Using the "Pen Tool" once again, draw the below shape with Black as the color this time.
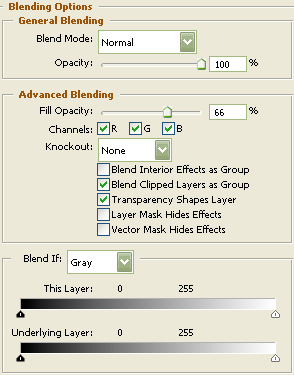
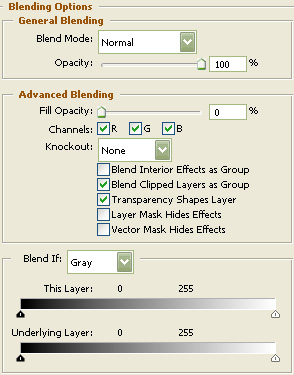
Now right click on the black layer in the Layers Palette and select, "Blending Options...".
Do not click "OK" yet. Still more to do.
Now click on "Gradient Overlay".
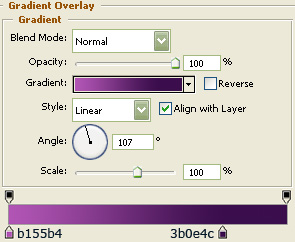
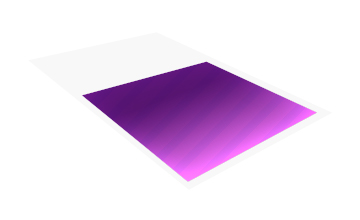
You may now click OK.
You should now have the below image.

Next, duplicate the black layer, then clear the layer style by right clicking on the layer in the layers palette and selecting "Clear Layer Style". Then download this pattern before going any further.

Now right click on the duplicated black layer in the Layers Palette and select, "Blending Options...".
Do not click "OK" yet. Still more to do.
Now click on "Inner Shadow".
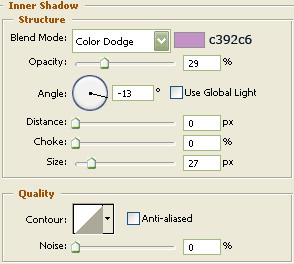
Do not click "OK" yet. Still more to do.
Now click on "Pattern Overlay".
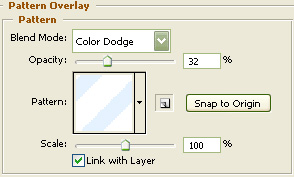
You may now click OK.
You should now have the below image.
Using the "Pen Tool" once again, draw the below shape with Black as the color this time. Then follow steps 3 and 4 to get the following.

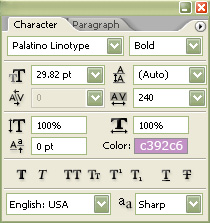
Select the "Text Tool" and use the below settings:
Now type your preferred text. For this example, I will type "music".

Next, go to the main menu and select "Edit" then "Free Transform". Transform the text layer as I have done below.

Now right click on the text layer in the Layers Palette and select, "Blending Options...". Now click on "Bevel and Emboss".
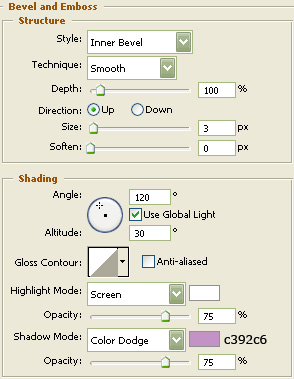
You may now click OK.
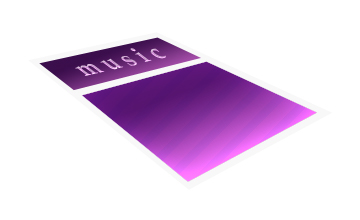
You should now have the below image.
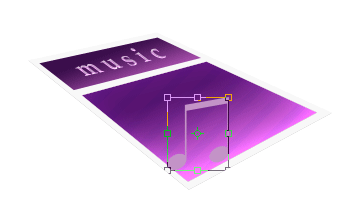
Then choose the "Custom Shape Tool" and find the "Eigth Notes" shape or the shape you would like to use and draw it using c392c6 as the color.

Next, go to the main menu and select "Edit" then "Free Transform". Transform the shape layer as I have done below and place in the appropriate spot.
Now right click on the shape layer in the Layers Palette and select, "Blending Options...". Now click on "Bevel and Emboss".

You may now click OK.
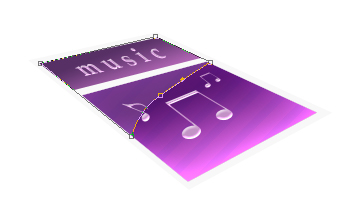
I've added a couple more shapes and applied the same styles as was used in step 19 above.

Now let's create some gloss. First select the "Pen Tool" and draw the below shape using White as the color. Then turn the Fill down to 14%. Name this layer "Gloss".
Then, duplicate the "Icon Frame" layer in the Layers Palette and drag the duplicated layer so it is beneath the "Icon Frame" layer in the Layers Palette. Name the duplicated layer "Icon Frame 2" in the Layers Palette. Then change the color of the "Icon Frame 2" layer to a1a1a1. Now hold in the "Alt" key on your keyboard and press the down arrow key 8 times to get the below effect.
Then merge all of the layers beneath the "Icon Frame" layer together except for the background layer. To do this simply select the layers in the Layers Palette then go to the main menu and select "Layer" then "Merge Layers". To select multiple layers in the Layers Palette hold in the "Shift" key on your keyboard.

Now right click on the "Icon Frame 2" layer in the Layers Palette and select, "Blending Options...". Now click on "Drop Shadow".
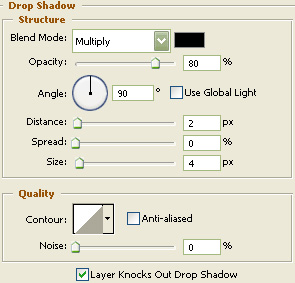
You may now click OK.
You should now have the below image.

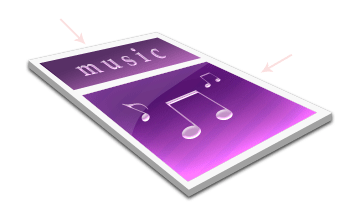
The Results!!!
Using the "Eraser Tool" you can rid the black from the blur that we did in the previous step where the arrows point to below. I hope you enjoyed this tutorial.