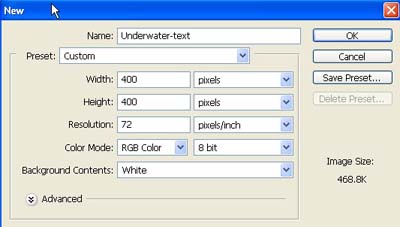
1. First of all I have taken a new file of height = 400 pixels, width = 400 pixels and resolution of 72 dpi in the RGB mode.
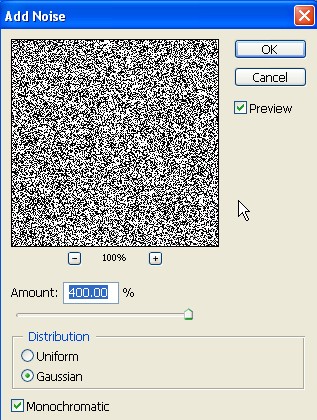
2. Now go to Filter>Noise>Add Noise and use the setting which I have used below.
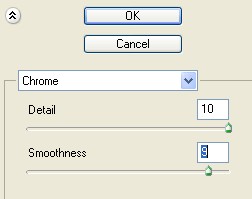
3. Again go to Filter>Sketch>Chrome and use the setting which I have used below.
4. Your image will look like this.

5. Select the text tool from the tool palette in the file as shown below in fig.

6. Use the Blending Options>Stroke Structure and give the properties as in given fig.

7. Your image must be shown like this.

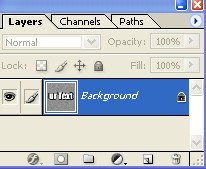
8. Merge the layers as in the fig.
9. Now go to Filter>Stylize>Extrude and use the setting which I have used below.
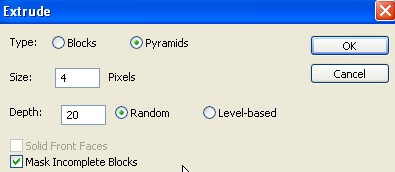
10. Your image must be shown like this.

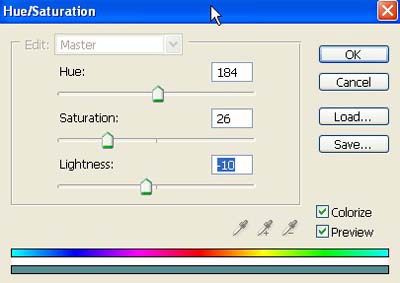
11. Now go to Image>Adjustments>Hue/Saturation and use the setting which I have used below.
12. There's your under water text effect.