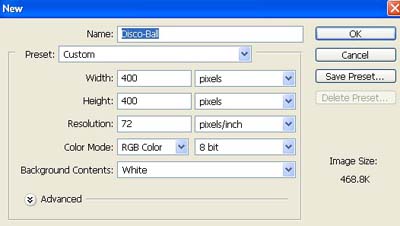
1. Take a new file of 400 pixels, 400 pixels, of resolution 72 dpi in the RGB mode.
2. Fill the new document with color black.

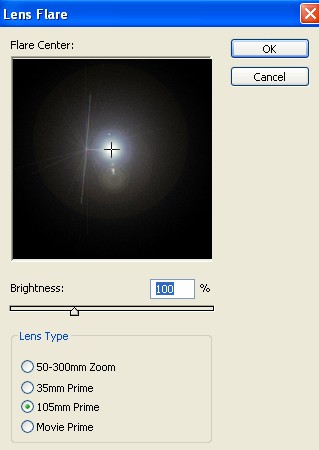
3. Now go to Filter>Render>Lens Flare and use these settings.
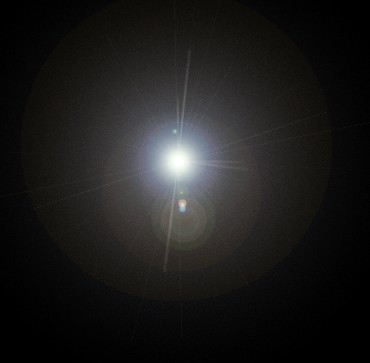
4. Your image should be look like this.
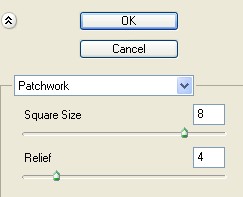
5. Go to Filter>Texture>Patchwork use these settings.
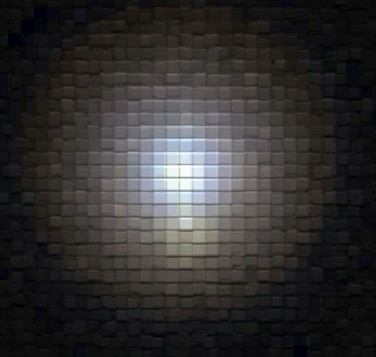
6. Your image look like this.
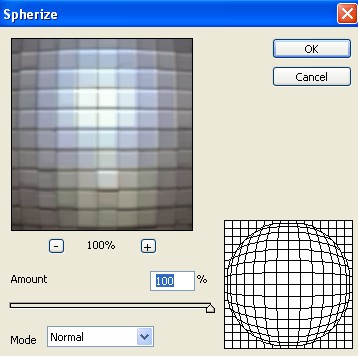
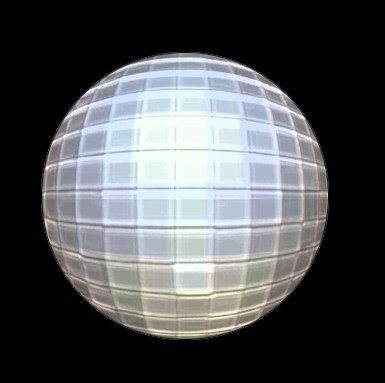
7. Then go to Filter>Distort>Spherize apply these settings.
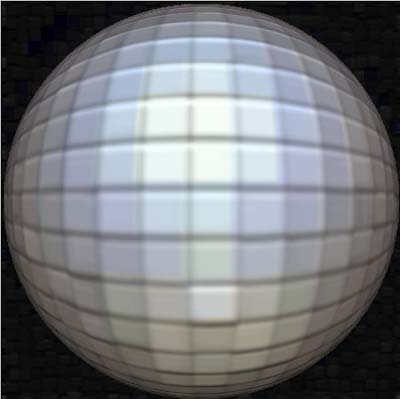
8. Press Ctrl+F to use the same filter again and then your image should be look like this.
9. Now select the Elliptical Marquee tool
![]() and make a selection while holding down shift, like the image below.
and make a selection while holding down shift, like the image below.
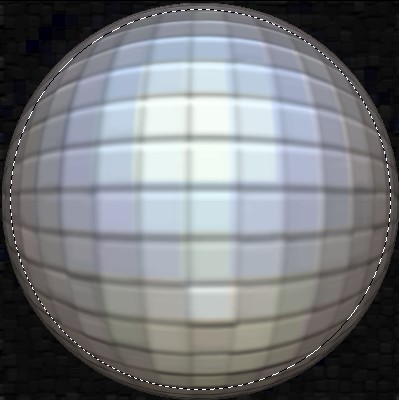
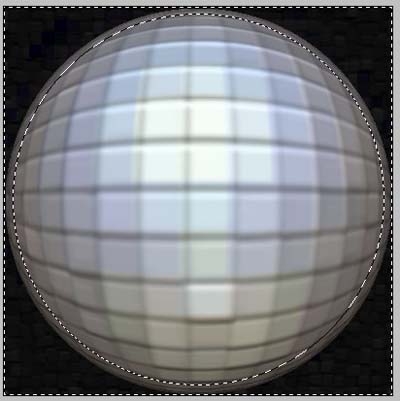
10. Then go to Select>Inverse.
11. Your image look like this.
12. Press Delete to inverse selection. Then deselect Ctrl+D.
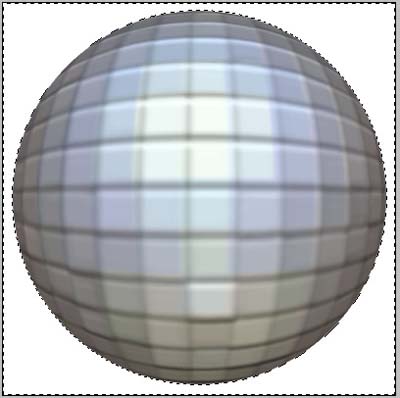
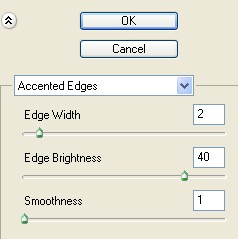
13. Go to Filter>Brush Stroke>Accented Edges apply the following settings.
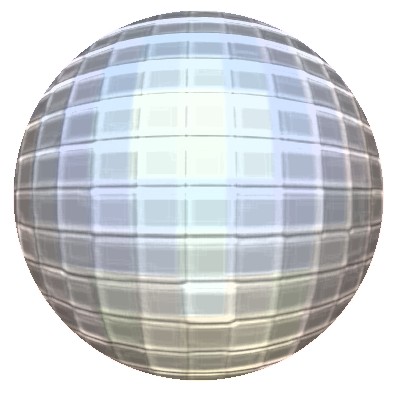
14. Your image should be look like this.
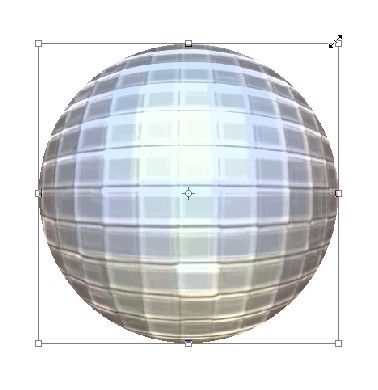
15. Make the disco ball a bit smaller by transforming (Ctrl+T) see in the image.
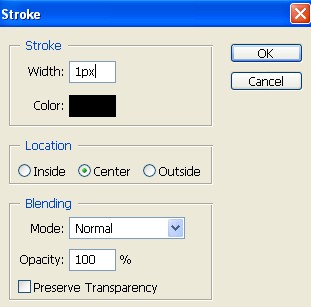
16. And add a stroke.
17. Select the background layer and fill it with black.
18. Your image should be look like this.
19. Finally select the brush from the tool palette use these sittings.
![]()
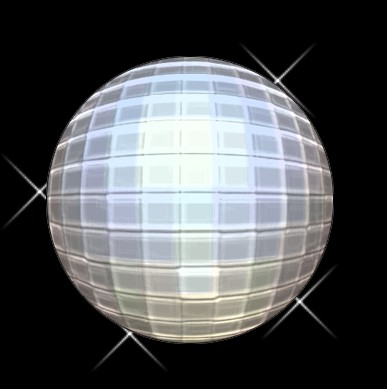
20. Your final image should be look like this.