


I was working on a magazine this weekend and after scanning and cropping about 50 pictures I stumbled across something I never noticed before, if I doubled clicked inside an image with the crop tool selected it would apply the crop. So out of that revelation this weeks article was birthed. We all use the crop tool, but do you know its hidden power?
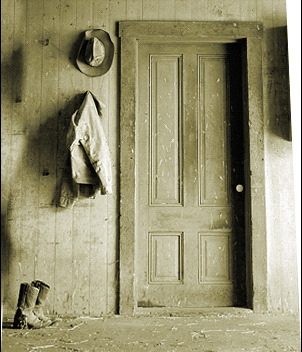
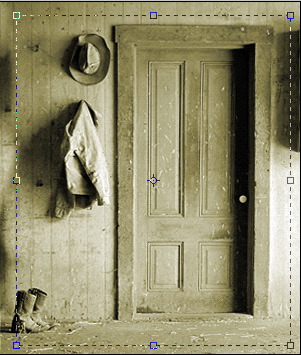
Start with a scanned image, Notice the perspective of the photo? This is very common, when the picture is taken below the object, it gets smaller at the top. This is especially common with pictures of tall buildings.
Choose the crop tool

Notice the option on the option bar? Make sure that the shield is turned on.

Now drag out the tool like you would with the rectangular marquee tool. See how the area outside the box is grayed out? This is the effect the shield gives you, it previews the area to be cropped.
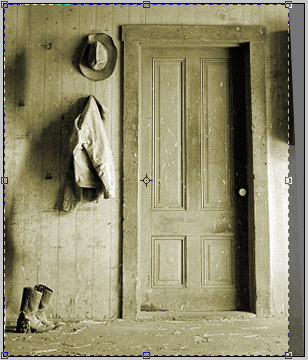
Now check the perspective option in the top toolbar.
![]()
Drag the top corners to compensate for the perspective.
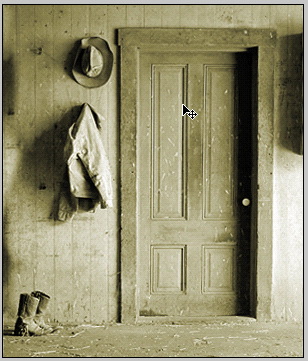
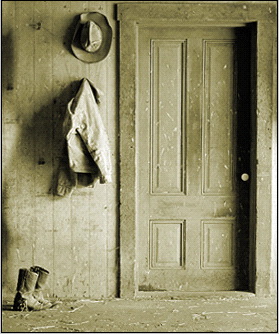
Double click anywhere in the cropping area to apply the crop. Notice how the picture has been straightened up.
Another option is the cropped area. You can choose either delete (which discards the image data outside the cropped area.) or you can choose hide. (This changed the image canvas size, but leaves the image data intact so you can reposition it or enlarge the canvas to reveal the entire image if you change your mind)
Note that you have to convert the background to a regular layer for the "hide" option.

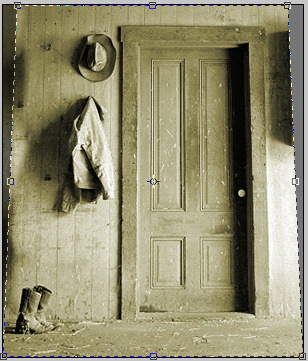
Here is a crop set with the shield turned off and set to hide, double click to apply.
Here is the crop applied and the image nudged over to the right. If the image was deleted and not hidden, we would have blank pixels to the left when we tried to nudge it.
Lastly, lets look at a fun trick. This is also really useful for fixing crooked images.
Draw with the crop tool. Position the cursor outside the rectangle and on a corner until is turns into a double-sided curved arrow. Drag the crop area around until it is slanted.
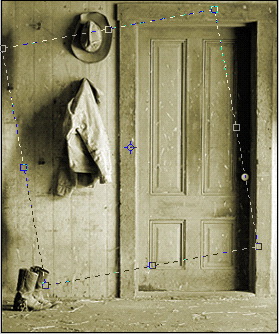
Apply the crop and see how it creates a slanted crop.
Well, that's all we have time for this week. I hope this has helped show you some new things you can do with the "not so" plain old crop tool. One last tip: With the tool presets in PS 7 you can save your crop sizes and use them over again to save time.
