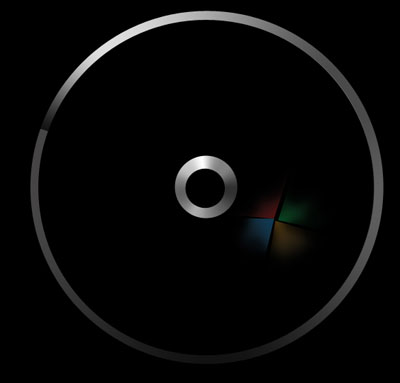
Create a new file that would have 1280x1024 px and 100 dpi. It must be painted in black color.

Then select this instrument
![]() to represent a circle in the middle of the picture to be.
to represent a circle in the middle of the picture to be.
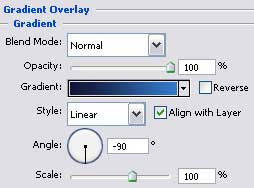
Blending Options-Gradient Overlay
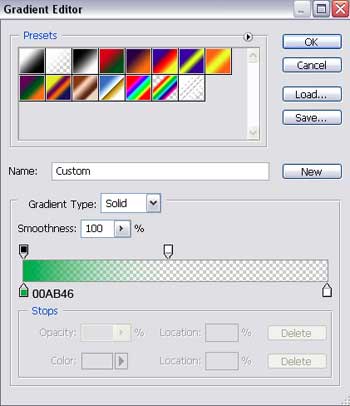
Gradient's parameters:
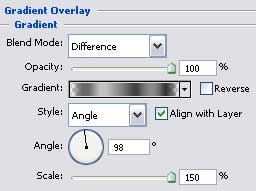
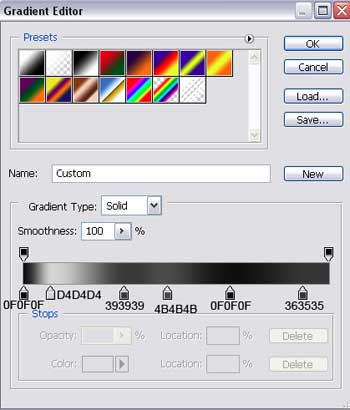
Blending Options-Stroke
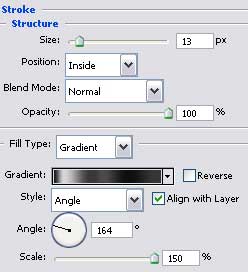
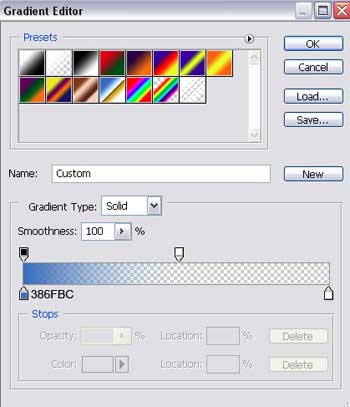
Gradient's parameters:
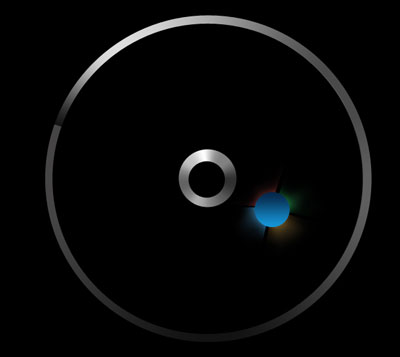
The previous applied instrument will be helpful in drawing a smaller circle situated inside of the first one.
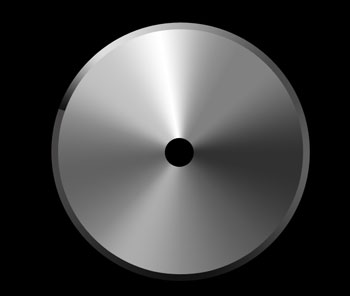
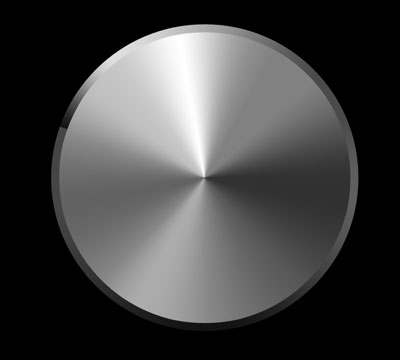
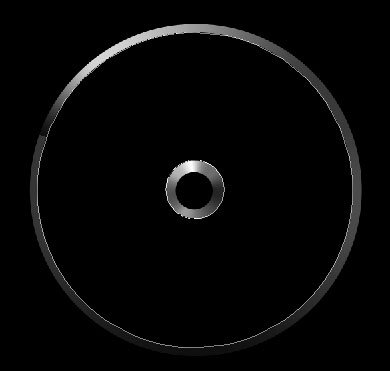
Choose the same instrument and try to represent a kind of varnish surface of black color on the disk's surface. First we have to process the outside edges and then press Alt button to cut out an orifice on the disk.

Start representing the logotype, using this tool
![]() . Click on this option
. Click on this option
![]() on the layers and the unnecessary elements must be erased with the appropriate instrument.
on the layers and the unnecessary elements must be erased with the appropriate instrument.
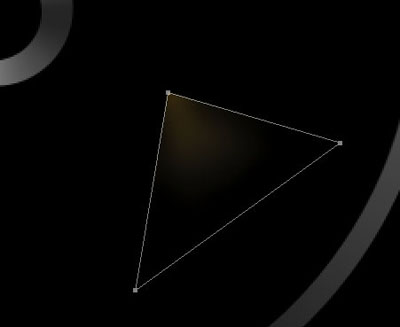
Fill 0% on the layers.
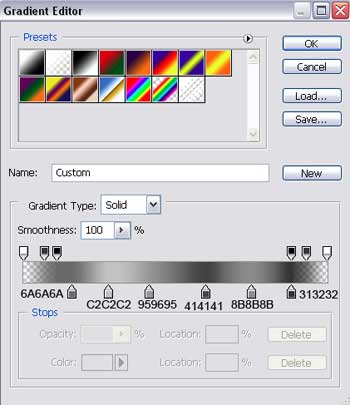
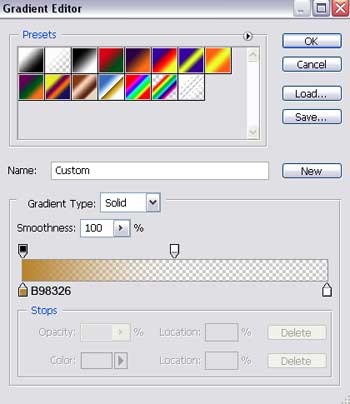
Blending Options-Gradient Overlay
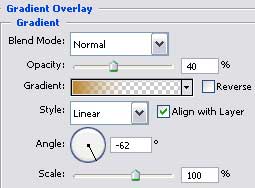
Gradient's parameters:
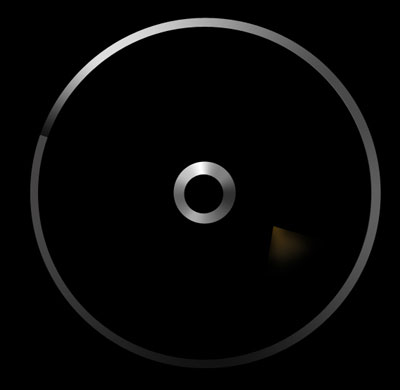
Make three copies of the new made layer and make use of the Free Transform option to turn the drawing around the way it is shown on the picture (change the parameters of the gradient according to color). Apply again the eraser if that is necessary.
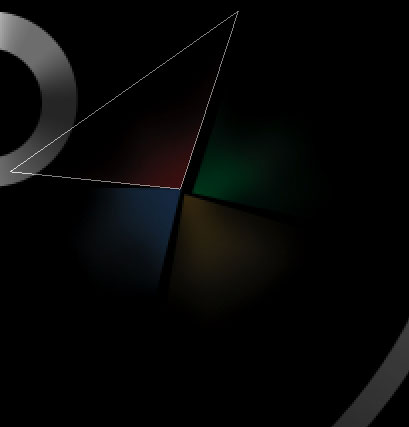
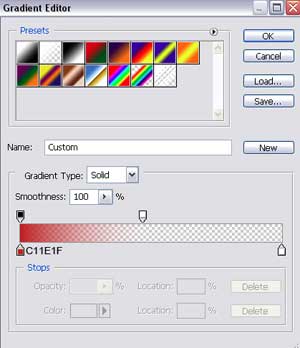
The red element:
Blending Options-Gradient Overlay
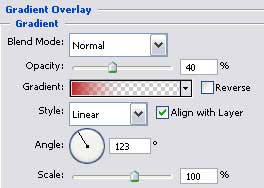
Gradient's parameters:
The green element:
Blending Options-Gradient Overlay

Gradient's parameters:
The blue one:
Blending Options-Gradient Overlay

Gradient's parameters:
Select the next tool
 and try to draw the next logotype's layer:

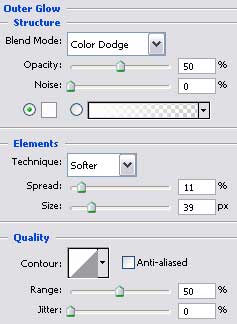
Blending Options-Outer Glow
Blending Options-Gradient Overlay