


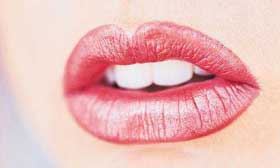
1. Open your image in Photoshop. Double click on the background layer. Rename it Dots 1.
2. Make new layer, press D (change foreground and background colors to default) and go to Layer > New > Background From Layer. This should result in background layer filled with white color.
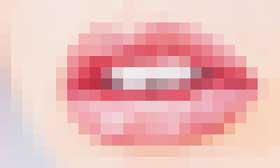
3. Select Dots 1 and go to Filter > Pixelate > Mosaic... In filter dialog box choose cell size big enough to produce a grid of approximately 20-30 squares in a row.
My image is 500 px by 300 px and I chose cell size of 20 px for it. You can figure out the optimal cell size for your image by dividing width of your image in pixels by 20, 25 or 30, depending on how detailed your image is and on the density of dots you like. Try to get number without fractions. In my example it's 500 px / 25 = 20 px cell size. Write down this number, I will refer to it later as “cell size”. Click OK.
4. Now we'll make a dot pattern. Create a new document (Ctrl + N) with width and height equal to your cell size (20 px in my case). Select all (Ctrl +A) and fill background layer with black color. Deselect (Ctrl + D).
5. Select Elliptical Marquee Tool. In Options bar choose Style: Fixed size. In Width and Height boxes type in the same amount - it should be a slightly less then your cell size, so the circles won't touch. In my example I typed 18 px. Leave Feather option to 0px and Anti-aliased checked. Click on background layer. This will result in circle selection in the size that you specified in Options bar. Use arrow keys to align your circle selection in the center of the document.
6. In layers palette click on New Layer button. Fill selection with white color. Select all (Ctrl + A) and go to Edit > Define pattern.
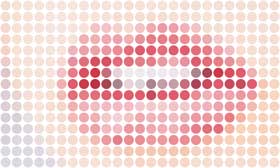
7. Return to your mosaic image document. Add mask to Dots 1 layer. Make sure mask is selected. Select all and fill selection with our new dot pattern. Ctrl + D to deselect.
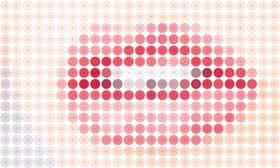
We can stop right here because we already got a nice dotted mosaic image. But we can add more details to push it even farther.
8. Duplicate Dots 1 layer and rename it Dots 2. Delete layer mask. Adjust this layer slightly using Brightness/Contrast, Hue/Saturation, Levels or anything else you like. I adjusted Brightness +10 and Contrast +20.
9. Repeat steps 4 through 7 but use smaller circles size.
10. You can add a couple of more layers with different circle sizes.
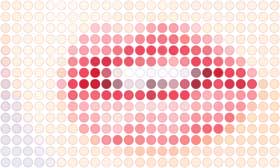
In my example
Dots 1 - original colors, circle size is 18 px;
Dots 2 - duplicate Dots 1; Layer > Adjustments > Brightness/Contrast (Brightness +10, Contrast +20); circle size is 14 px;
Dots 3 - duplicate Dots 1; Layer > Adjustments > Hue/Saturation (Saturation +25); circle size is 10 px;
Dots 4 - duplicate Dots 1; Layer > Adjustments > Hue/Saturation (Saturation +35 and Lightness -5); circle size is 4 px.
Take a look how to achieve the same effect in Illustrator.