I have already written a tutorial on how to make a mosaic effect. But somebody has just asked me if I knew how to make the same effect but with different size dots. Apparently I did. So here is the tutorial, for all of you dot-effect junkies…
1. Open your image in Photoshop. High-contrast pictures work the best for this effect.
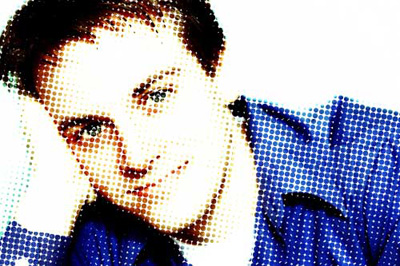
2. Go to Filter > Pixelate > Color Halftone. In the filter dialog box enter the maximum radius of the dots. I used 5 pixels for the image sized 500 x 300 px. The larger the images, or the less details you want to show, the higher the radius.

3. Then enter screen angle. Now here you can start experimenting. You can use default setting, which is different angle for each color channel, or you can set all channels to the same angle, like in my example. If you choose to use the same angle you will get the effect of distinctive dots on the grid. If you choose to use different angles, you'll get the famous Andy Warhol effect, where the colored dots are mixed together in uniform matter. For the sake of this tutorial please use the same angle for each channel.
4. For some reason Photoshop produces a visible moir' effect on spaces with large areas of dark color (you may not experience this, it varies with images). This unwanted effect is the most noticeable when angle is set to 90 degrees. So I recommend playing with angles to see which one makes the least noticeable moir'. Even 91 degrees is much better. For my image I chose 100 degrees for all channels.
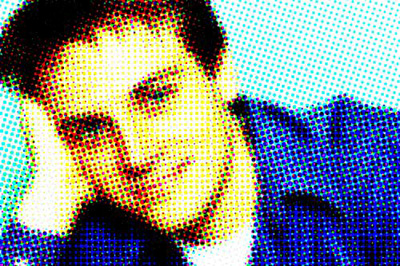
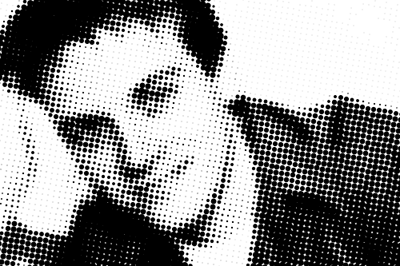
So now you have your image made up of different size colored dots. But this effect looks best in one color, black.
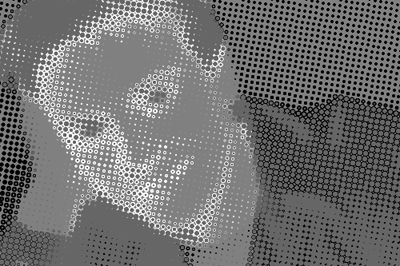
5. There are several ways to make a black-and-white version, but we'll use the easiest one in my opinion. Go to Image > Adjustments > Channel Mixer. At the bottom of the dialog box check the Monochrome. Now, if you happy with the default settings, which is 100% Red channel, you can click OK and save your image. We're done. If you like to play more drag the sliders and experiments with different combinations of channel information. You can get pretty weird results.
The image on the left was produced with following settings: Red: +100%, Green: -90%, Blue 0%, and Constant +40%.
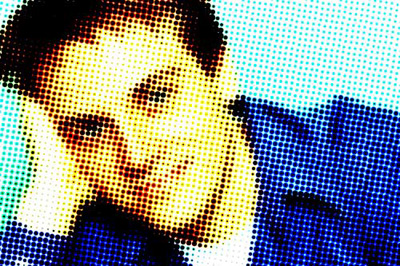
For a classic clean result use 100% of one channel, set all others to 0. A 200% of one channel produces dots that are a bit rough around the edges, not as smooth as 100%.
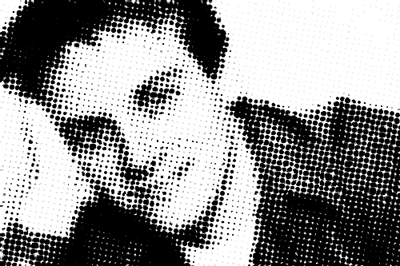
6. Now if you want to make a grungier effect continue on. There probably at least a dozen ways to distress this image, and Filter > Distort > Glass works as good as any of them. Play with the settings on the left. I chose Distortion: 3, Smoothness: 7, and kept Texture settings at default.
You can also try:
Filter > Artistic > Palette Knife (set Stroke size 3-5) Filter > Artistic > Smudge Stick (transforms dots into short uniform strokes) Filter > Brush Strokes > Spatter (Spray Radius: 3, Smoothness: 12) Filter > Distort > Ocean Ripple (Size: 1; Magnitude: 2)
7. I thought of one more thing you can do with this image. Open the original image. On the layer above it put the image produced in the step 5 (smooth black dots). In the Layers palette set Blend mode to Screen. Now the layer with dots became a mask for the original picture.