


Star by making the leaf in a new file, I'm going to use the one that comes with the Photoshop Presets Shapes and #40b309 as color

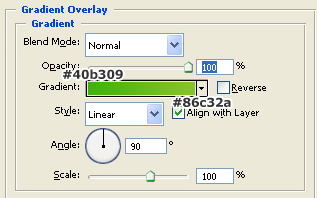
Apply a Gradient in the layer styles to this layer using the values below
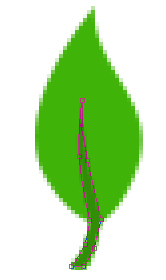
Using the Pen Tool make a selection that comes from the leaf stem to somewhere in the middle with the same curves as the leaf, and color it, I used #389e08

Here's a close-up of the Pen path
Now to make it look more "2.0ish" we're going to add some glow using gradients. Create a new layer and Ctrl+Click over the first shape thumb, this selects the leaf. Then using a White to Transparent gradient, make a gradient in a 120° direction from top to bottom like in the following image

Change the blending options of this layer to Overlay and you should get something like this

Create a new layer and using the Elliptical Marquee Tool make a selection covering the top part of the leaf

Make a gradient from top to bottom in a 90° direction using the White to Transparent gradient

Deselect(Ctrl+D), change blending option to Soft Light and you should have something like this now

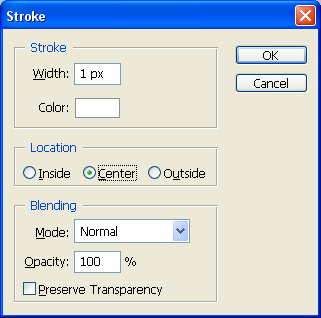
In a new layer, Ctrl+Click over the leaf layer thumb to select it, go to Select -> Modify -> Contract and contract it by 1px, then go to Edit -> Stroke, use the following values
Change the layer blending option to Soft Light and you should get something like this

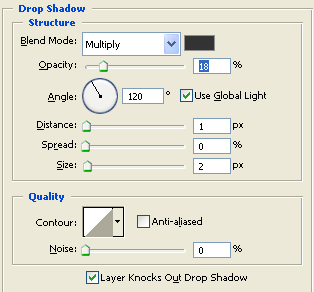
Now going back to the first layer, where the leaf shape is, add a Drop Shadow with the following values
And to finish the logo, we're going to add some text to it. Orange color is #FE6601 and grey is #333333
