

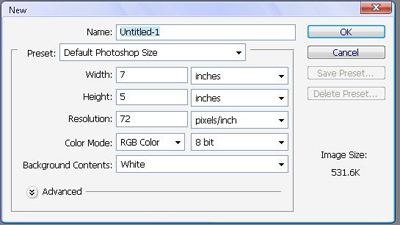
First off, were going to start by making a new document,
Now, that we have our new document, we will change our colors to:
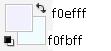
No, they are not white, but pretty close to it, hehe.
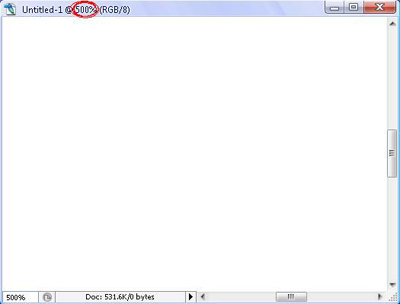
So now, zoom in 500%, using Ctrl++ (Ctrl and the plus sign at the same time)
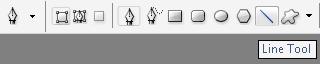
You will now use the Pen Tool,
![]() in your menu.
in your menu.
First off, choose the line in the Pen Tool Menu.
Now you will draw thin lines in your paper, preferably pretty close together, and in slightly diagonal/vertical directions, like below:
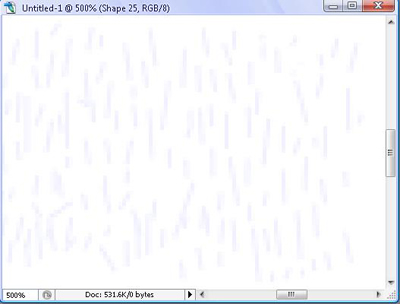
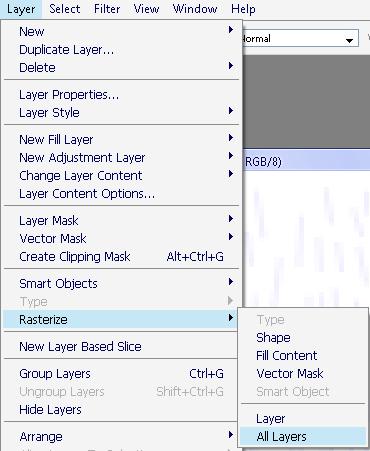
I know its hard to see due to the really light colors, but fill up the zoomed in area (not the whole document). Now we will rasterize all layers, so go Layer> Rasterize > All Layers
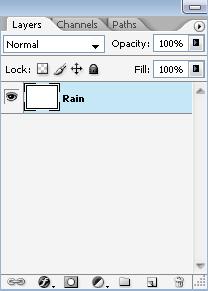
Now, we will Merge all the layers, so go Layer > Merge Visible.
![]()
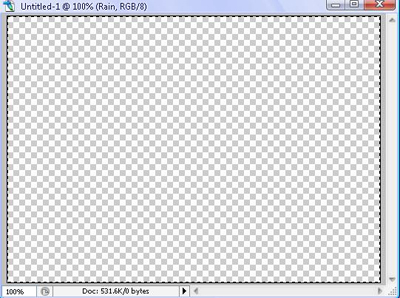
Now, you should only have one Layer, to your right, I renamed mine Rain.
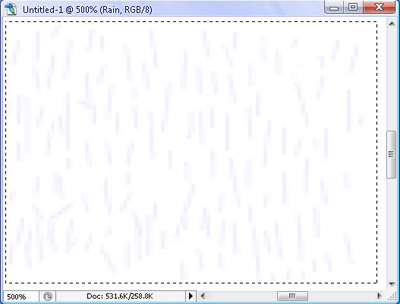
Now, you will select the area (you are still zoomed in, so select only the rain you have drawn.
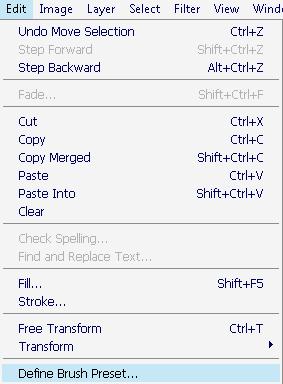
After this, you will go to Edit > Define Brush Preset
Now, a 'Name Brush' will pop up, Name your Brush "Rain" As I did below:

Now, zoom back out to 100%. You will press Ctrl+A (select all) and then press delete the white background, making it transparent.
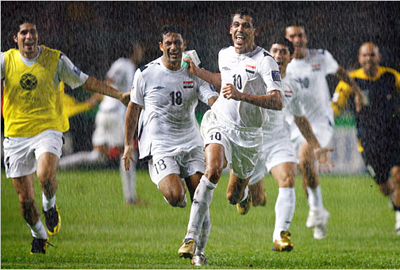
Now find a picture where you want to put rain on. Make sure you don't make it 1. An abstract image or 2. An indoor image, as these two will obviously give it away that it was not raining. I googled field, and got the first one I found acceptable.
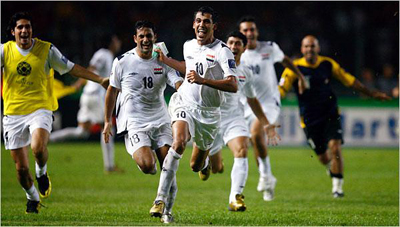
It was actually a very joyful day for the Iraqui people in their triumph in the Asian Cup Final against Saudi Arabia (1-0), Congratulations!
Well, it seemed like a fit picture to make it rain.
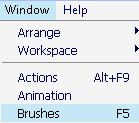
So before we add the image to our Photoshop, lets edit its features a bit. Now you will go to Window > Brushes (F5)
Making sure you have selected the brush you recently made (It should be the last brush), we will edit its Properties:
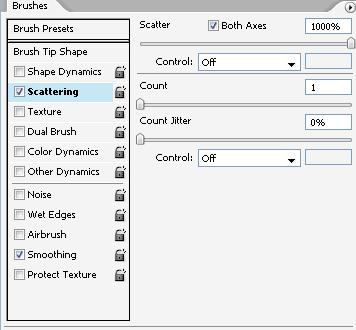
Make sure you check Scattering, and choose those properties, while also checking on Smoothing (which is just an effect, so it has no properties).
Now, lets save the brush.
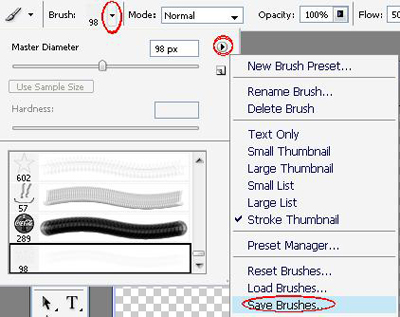
Follow the red circles from top to bottom, and you should be fine. Save your "brushes" any name you wish.
Any time you can't find your brush, simply "Replace Brushes" and choose the brush file you previously saved.
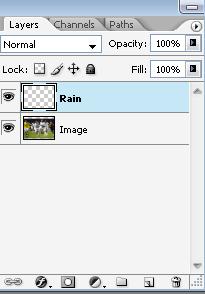
Now, make a New Layer (Ctrl+Shift+N), name it Image, and paste the image in it. Now you will put the Rain Layer on top of the Image Layer, as seen below:
Finally, get your brush, make sure the properties (Scattering/Smoothing) are set correctly, brush around! Do not exagerate the rain making it look fake, try not to cover a spot too many times, and let it rain!
Here is my final result:
It sure looks to me like it was raining!
