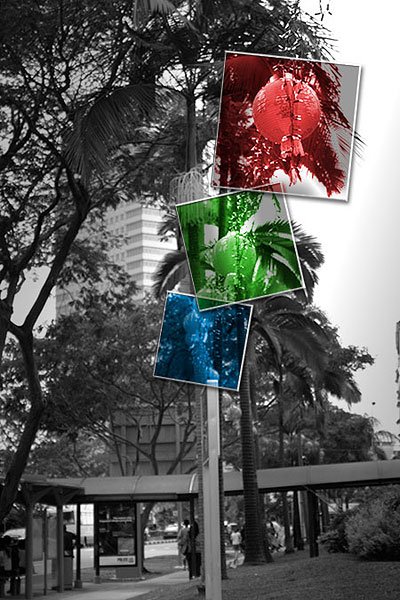
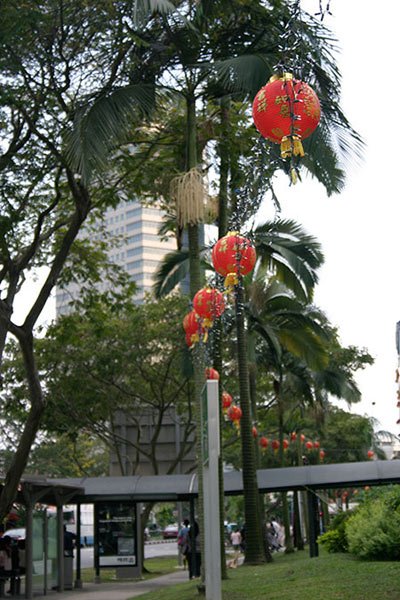
Everyone knows the importance of the Adjustment layers to edit the whole picture from the first to the last pixel, but probably not all have tried to add Styles to masked Adjustment layers. This is what we are going to do in this tutorial. When I took the original photo, I was planning for another result in my mind. Unfortunately, the sky was too uniform and bright to make the picture interesting. So I would eed something to "save" the shot and make it interesting.
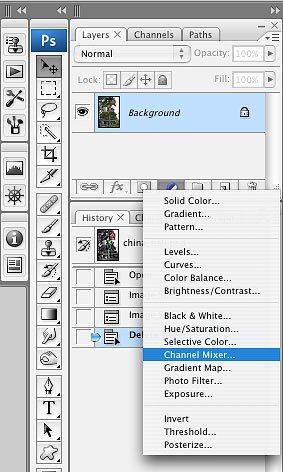
1. First of all I transformed the image in black and white. Even if I was working already with Photoshop CS3, in this case I've decided to use the Channel mixer adjustment as Adjustment layer, instead of the specific Black&White adjustment.
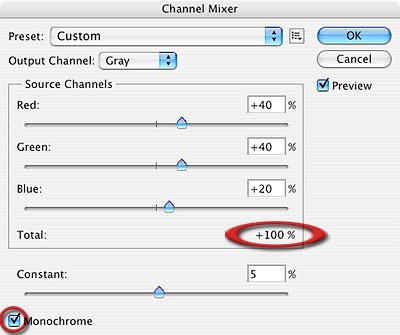
2. To create a black and white with Channel mixer adjustment, it's pretty easy. Just check the Monochromatic box at the bottom, and take note that the sum of the single value is 100%. At the end it would be alright to add 5% Constant. Clicking Ok, you will see that the original layer was not touched, cause the Adjustment layer is editing color on itself, not on the original pixels. So, if for any reason you want to go back to the colored version, just hide (or trash) the Channel mixer Adjustment layer.
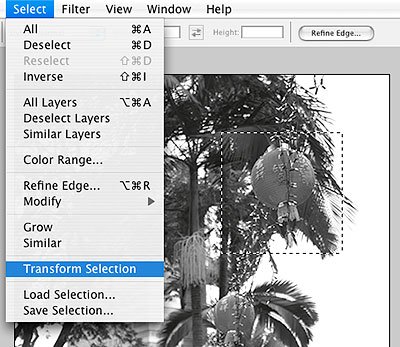
3. Now drag a selection on the picture using the Rectangular selection tool. In this example I dragged it on the lantern. Because I would not make a "still" effect, I did rotate the selection using Selection>Transform selection, then pressed Enter on the keyboard to confirm the transformation.
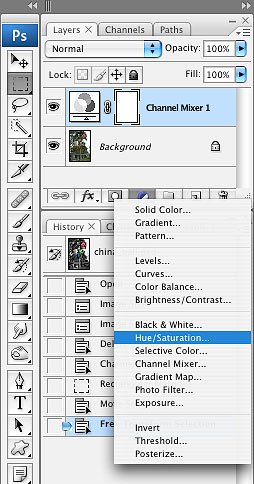
4. Then I added a Hue/Saturation Adjustment layer. The fastest way to do it is by clicking on the half-black-half-white-circle at the bottom of the layers palette. You can also add an Adjustment layer by the Layer menu.
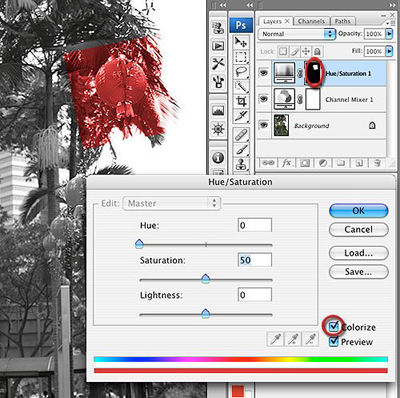
5. As you will see, once you add an Adjustment layer while a selection is active, the effect will be applied only to the selected area, because the layer mask is automatically created on the selection's shape. Check the Colorize box in order to spread the same color on all the selected pixels.
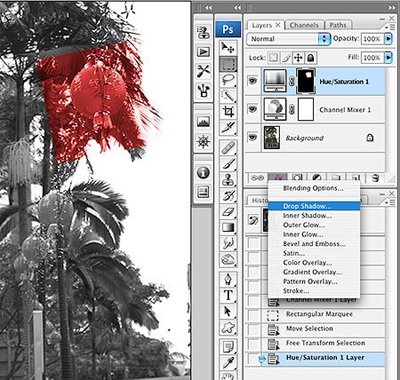
6. Now it's time to give depth to the box. You can add one or more Layer style , as drop shadow, bevel and emboss, inner shadow, satin, stroke. It's up to you. When you are satisfied with the result of the effects, press Enter on the keyboard, then you can use the same technique to add more boxes. Remember that you can copy and paste the Layer styles just right-click on the styled layer, choosing Copy layer style, clicking on the non-styled layer, right-click and choose Paste style layer.
7. You can create as many boxes as you prefer. Try this technique on different selection shapes, like Elliptical or Lasso made.