


So, lets get started. Picture layers as thick sheets of paper. If you put 5 sheets (each on top of the other), you will only see the top sheet. Yet what if you would modify some of these sheets to make them partially or fully transparent? With Photoshop, anything is possible!
Therefore, lets start off, Create a new document:
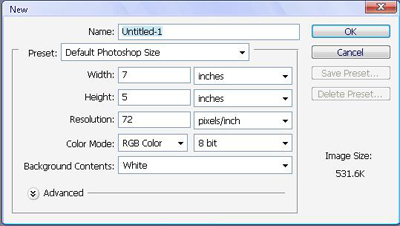
Again, I'm using the Default Photoshop Size as it is sufficient for what we will do.
To the bottom right corner, you should see your layers menu. If you don't, go Windows > Layers
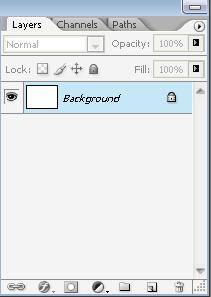
As we can see, this is the only layer we can see right now. First, we are going to unlock the layer, as it is not always good to work with. Double click on the Layer, and you will get the "New Layer"
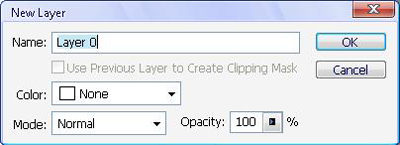
Select your settings, I left them like that for this tutorial, and Press Ok. Now, we will make the layer completely transparent. The layer right now make seem transparent, but that is actually white. So press Ctrl+A to select the whole layer. and press Delete. Your layer should now look like this:
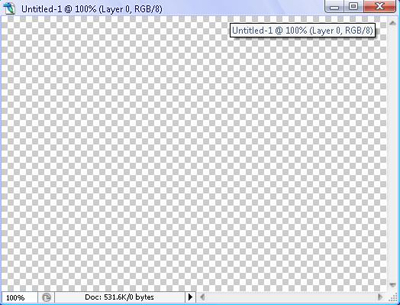
This grey-white checkers board simply symbolizes the layer is transparent.
Now, we will do some clouds.
Filter > Render > Clouds
Since your colors are set to black and white, you should see some clouds in your screen, Mine came out like this:

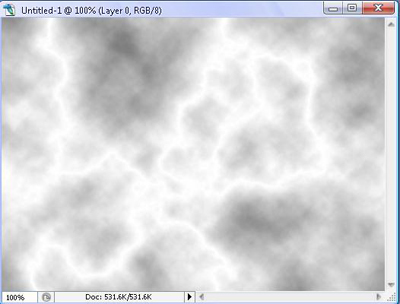
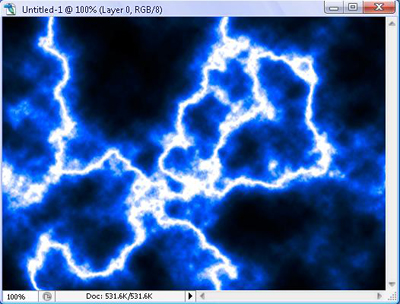
Now we will go Filter > Render > Difference Clouds
You should see some thunder-like clouds, but they will be black, so press Ctrl+I to invert them. It should look like this after inverting:
Now, you will press Ctrl+L to modify the levels of white grey and black.
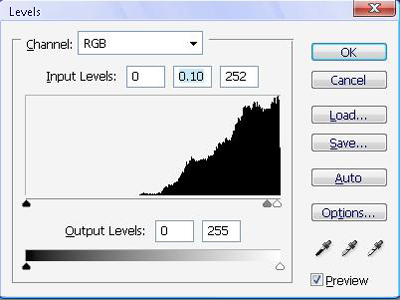
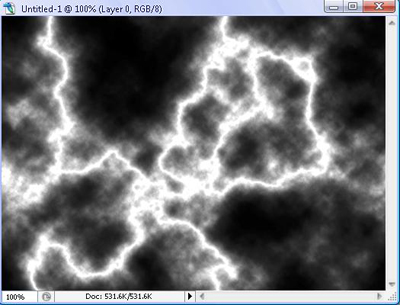
Move the grey closer to the white tab (which is closer to the black mountain-thing). If you don't understand, just copy the input levels, and you should see a satisfactory result. Now you will have some decent looking thunder.
Now, we will add color to the thunder, so press Ctrl+U to open the Hue/Saturation box.
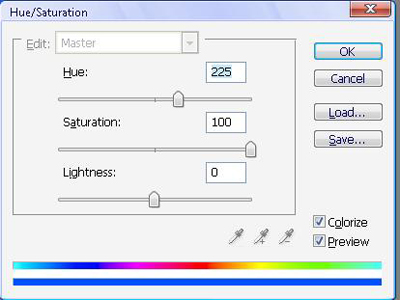
Please remember to check the Colorize box in the bottom right so that your image will receive "color". Play with the Hue/Saturation/Lightness to obtain the color you wish. Mine are as shown above to make a nice blue.
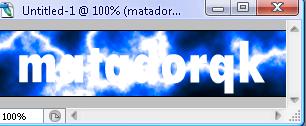
Now, we will insert some text, so click on the Text tool,
![]() in your menu. You can edit the font and size above.
in your menu. You can edit the font and size above.
I used TW Cen MT Condensed Extra Bold. Size 60pt, color: White. Use white even though it may not be legible as we will use some effects that will make it perfectly readable. After you are done writing it, move it around with your
![]() moving tool.
moving tool.
Make sure you choose a good location as we will crop the image to a good size. So use the crop tool,
![]() , and select around your text. Once your satisfied with the crop, press enter. The image should be much smaller now.
, and select around your text. Once your satisfied with the crop, press enter. The image should be much smaller now.
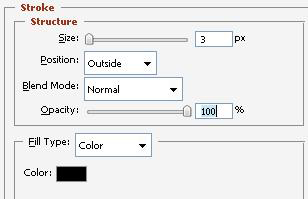
Now, you will go to your layers, and right click on the text layer, select Blending Options.
Click on the last blending option, Stroke. Use these settings:
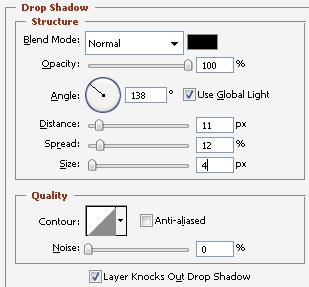
Then, click on Drop Shadow. And use these settings:
There, were done. It's not a complicated or fancy image, but hopefully you learned about layers, blending options, and making thunder!

Until next time
